Builds
Build is a zip package that contains all the components required to run your game server, including game server executable files, dependent packages, and installation scripts. The build package will be downloaded to the host machine during initialization and then extracted as the game user, and the extracted game files will be owned by the game user and the game group. The build package is extracted/installed to the following location:
- For Linux OS:
/local/game - For Windows OS:
C:/local/game
1. Add a Build Install Script (optional)
If you want to do some custom installation work after the Build is unpacked, you can add an installation script to the Build package. This is an optional operation; you can skip it if you don't need it. Create an install script for the operating system of your game build:
- Windows: create a PowerShell script file named "
install.ps1". - Linux: Create a bash script file named "
install.sh".
When creating an install script, keep in mind the following:
The install script must be located at the root of the build package.
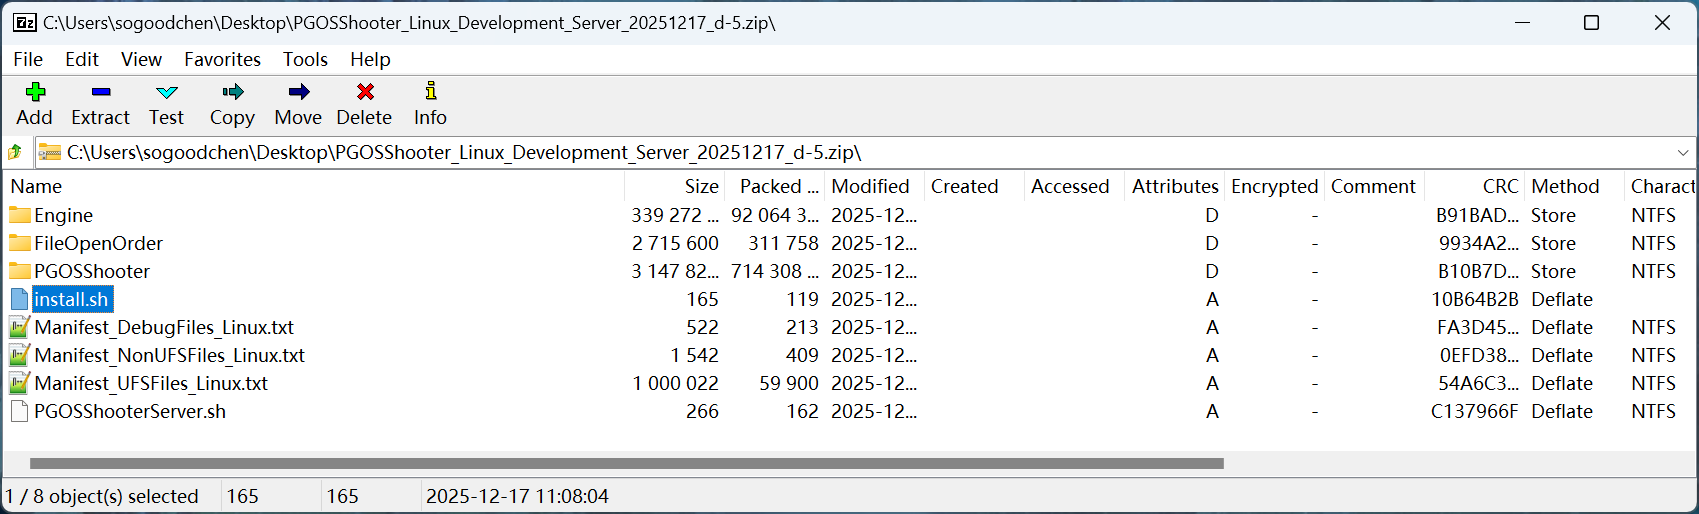
The install script will be executed after the build archive is extracted.
The install script will be executed as the
rootuser.
1.1 Example scripts
The following examples show some common scripts for Windows and Linux.
Windows
This example install.ps1 file installs Visual C++ runtime components required for the game server. The component file is included in the build package.
C:\\local\\game\\vc_redist.x64.exe /install /quiet
Linux
This example install.sh file illustrates how to use bash in your install script and write the results to a log file.
#!/bin/bash
echo 'Hello World' > install.log
2. Add Builds
When your DS program is ready, you need to compress it into a ZIP file, and then you can upload the build package to the PGOS platform according to the following steps:
Step1: Log in to the web portal, enter console and then select a title region to which you want to upload the build.

Step2: Choose DS Hosting > Builds , Click Add Build button:
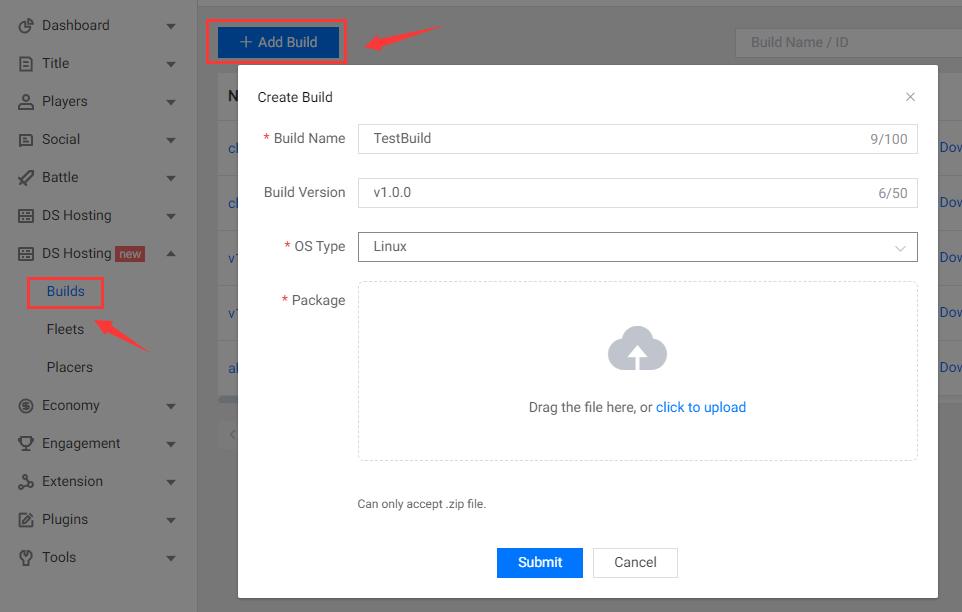
Fill in the fields below:
- Build Name: A descriptive name for the build, which should be unique and cannot be modified after submission.
- Build Version: A string which can be used to distinguish between different versions of the build.
- OS Type: The operating system where the DS instance runs on. It can't be changed after creation.
- Package: Select the build package locally and upload it to cloud. Currently only zip package is supported.
Setp3: Click the Submit button then a new build is created.
You can also add Builds using the PGOS CLI tool, which can be integrated into automated dev & ops processes.
3. Modify Builds
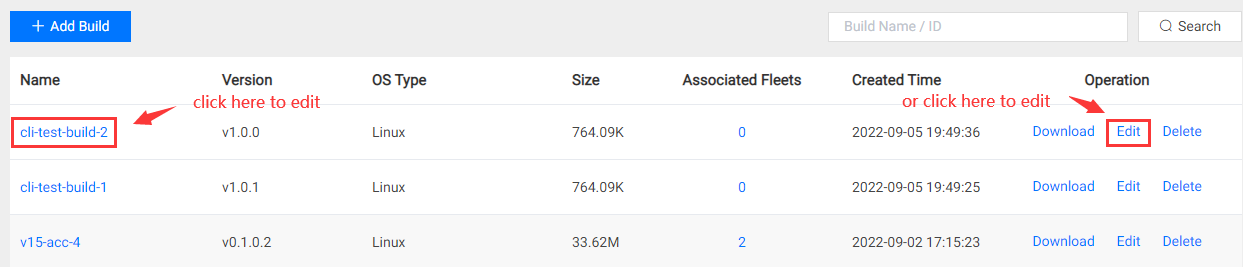
Step1: Choose the build you want to edit and click its id or edit icon.
Step2: You will see the Edit Build dialog as shown below:
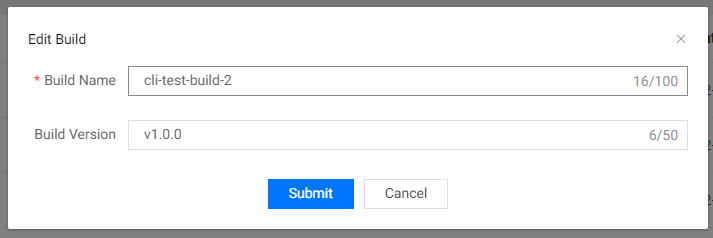
Step3: Make your changes and click the submit button to save your modification.
4. Delete Build
Step1: Choose the build you want to edit and click its delete icon.
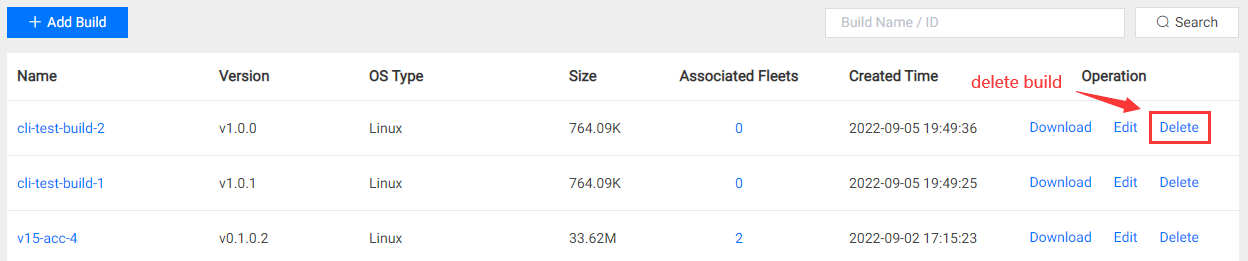
Step2: Double-check and confirm the operation before deleting.
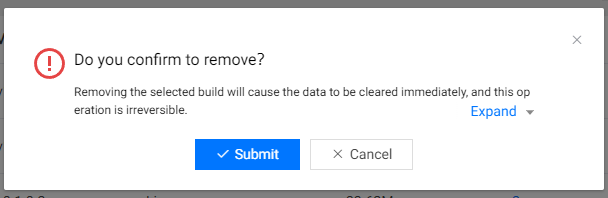
❗ Note:
- The maximum build capacity available for upload game builds is 100G for each titile region.
- We suggest that you can regularly delete unused builds as needed to make room for additional or larger builds.
Delete Buildmay not succeed when the build is associated with a fleet.- Please confirm the delete operation because it cannot be recovered.