User Permission Management
1. Overview
The PGOS permission system is used to manage user permissions to access data to prevent unauthorized users from accessing unauthorized game data. The title administrator is responsible for managing title members, creating a PGOS account for new members, and assigning roles and permissions to them. If the user no longer uses the account or requests to delete the account, the title administrator will delete the account.
2. Basic Concept
PGOS divides users into the following types:
- Title administrator: has the highest authority of the title, and is responsible for managing the user permission assignment of the title.
- Title user: a user with permission to access the title. The specific permissions are assigned by the title administrator.
- Permission: including but not limited to accessing the title region, using a certain function, and accessing data.
- Role: created by title administrator. Users in the same role have the same permissions.
3. Permission Rules
- Title administrators can create a PGOS account for title members, and assign roles and permissions to them. If the user no longer uses the account or requests to delete the account, the title administrator can delete the account.
- Title members apply for an account from the administrator. The title member can be set to a certain role in the title region and has the corresponding permission.
- Users can be set to different Roles in different titles or title regions.
- PGOS provides some commonly used role templates, which can be used directly, but the permissions contained in these Roles cannot be modified. Title administrator can create new roles to assign different permissions.
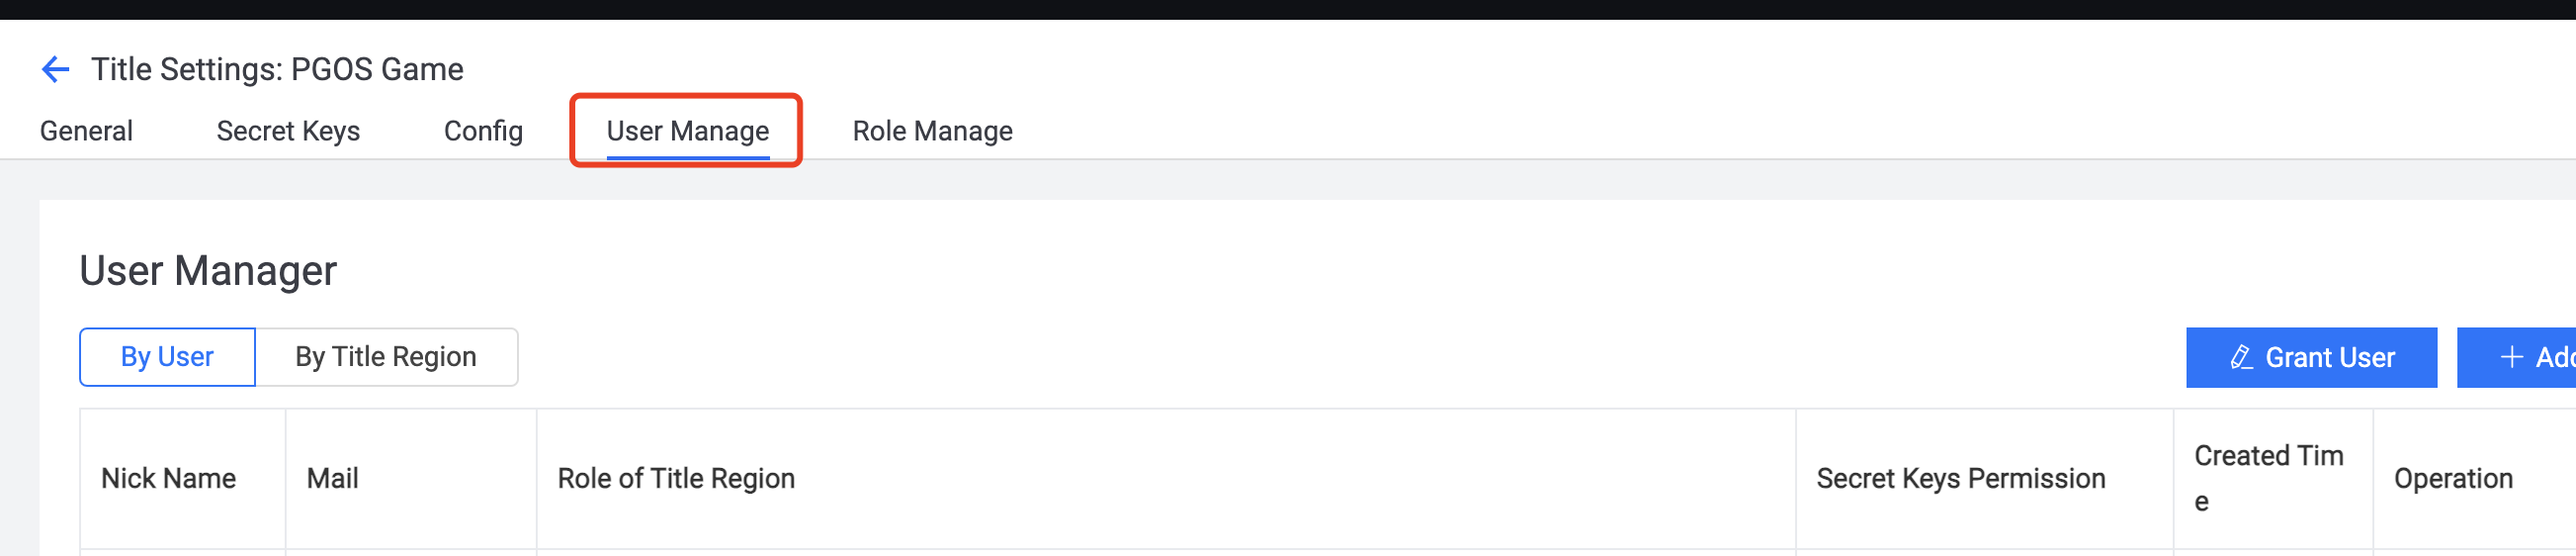
4. Operation on the Portal
4.1 Add a New Account
- Click the Setting button on the home page of the title

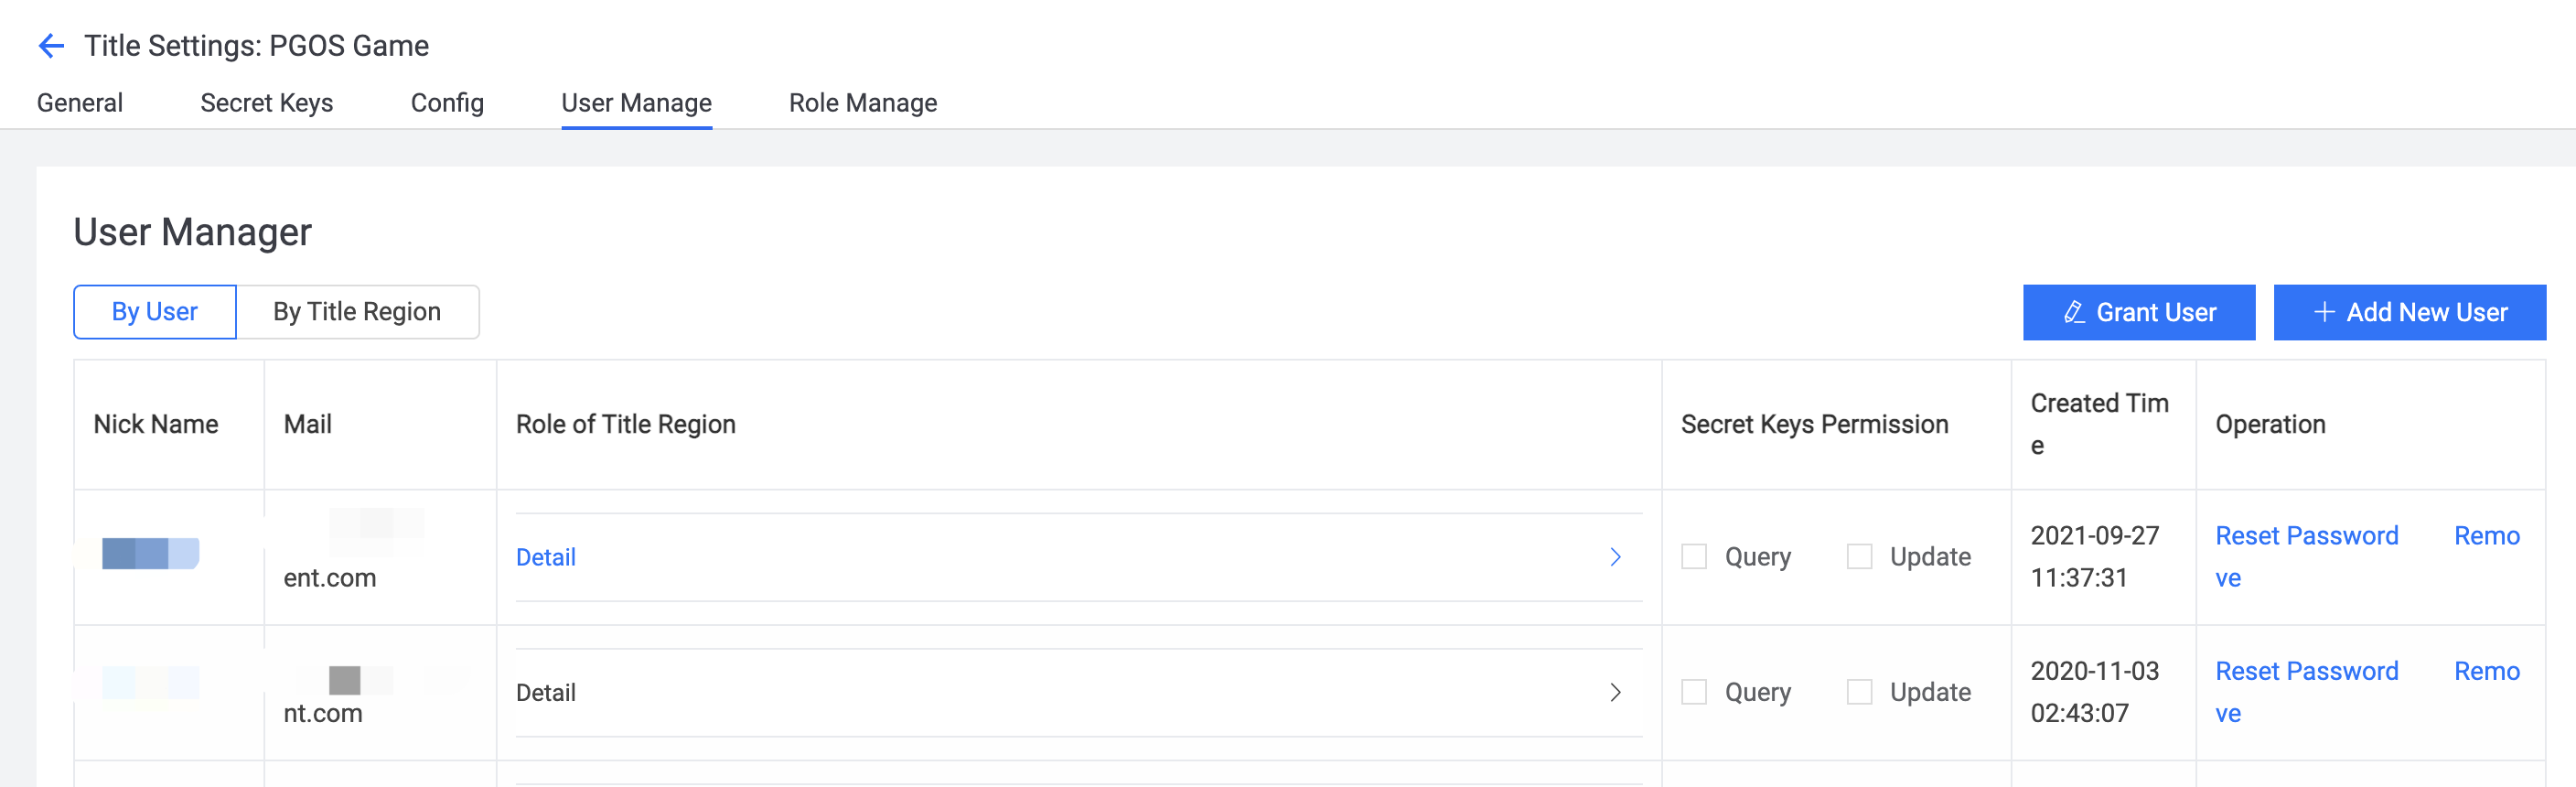
- Click User Manage Tab
- Click Add New User, open the new user pop-up window
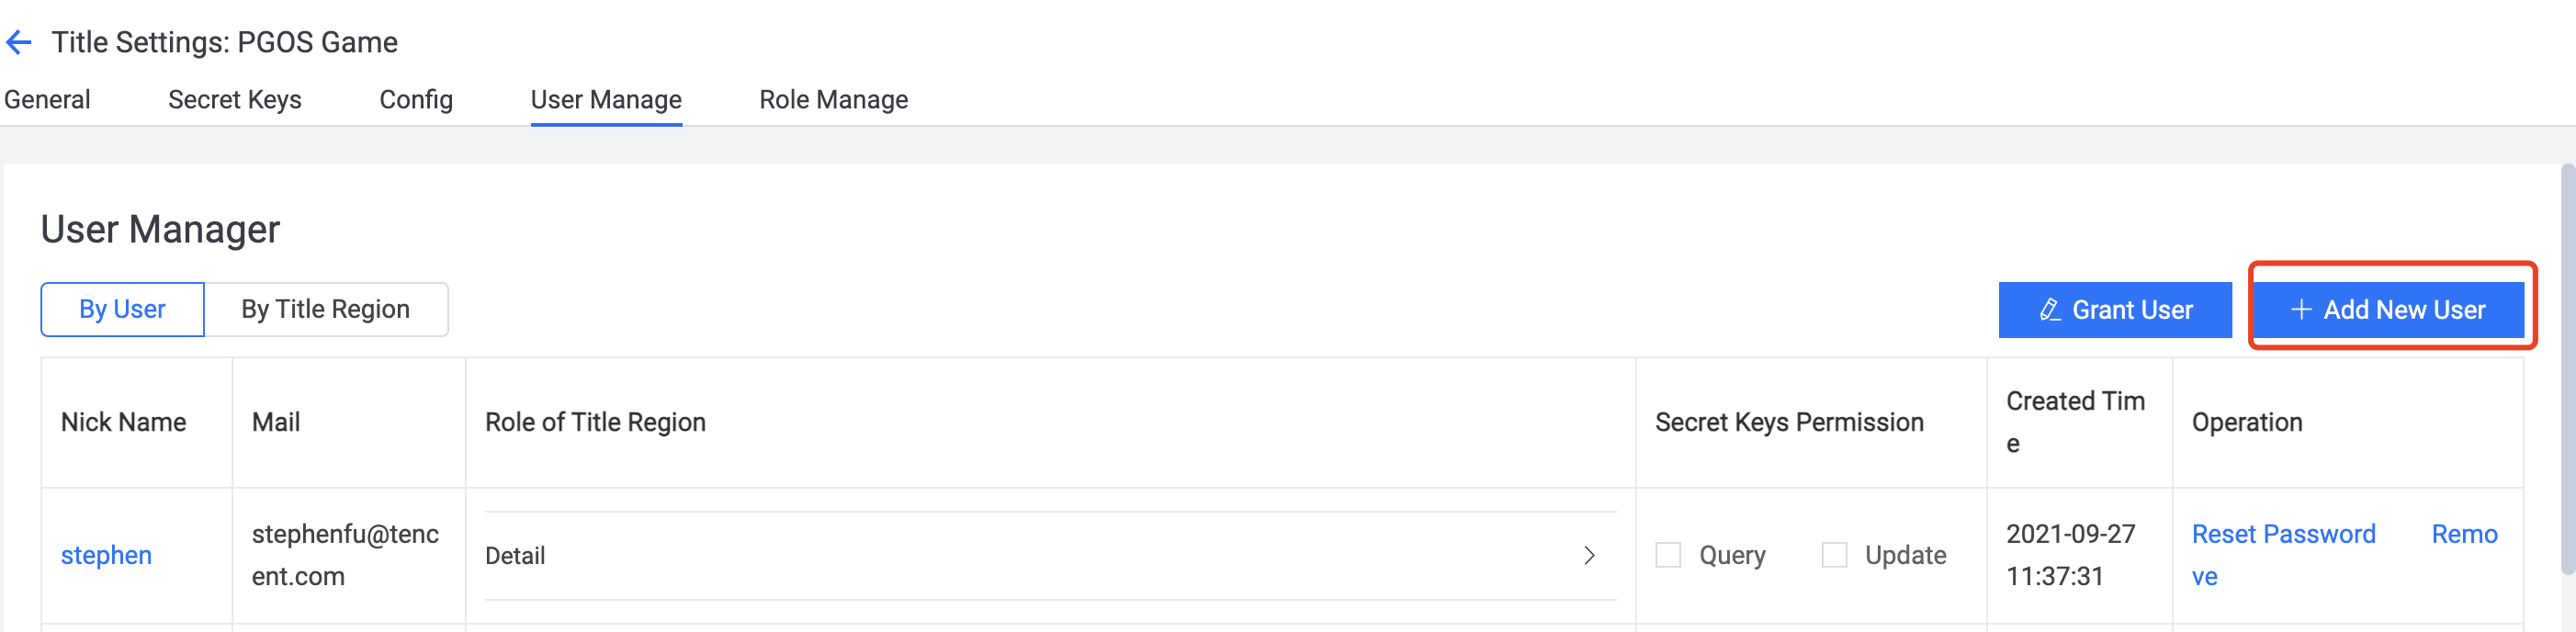
User ID: is the PGOS account, used for login PGOS, cannot start with a number. Once a user account is generated, it cannot be modified.
NickName: is used to display on the portal and can be the same as the User ID. The user can also modify it after logging in.
Mail: please fill in the correct e-mail address to receive password notifications and change log updates.
Role: you can choose the initial role for the new user. If not, you can also set it for the user later.
Title Region: you can select the title region that the user is allowed to access, or you can set all title regions to be allowed to operate.
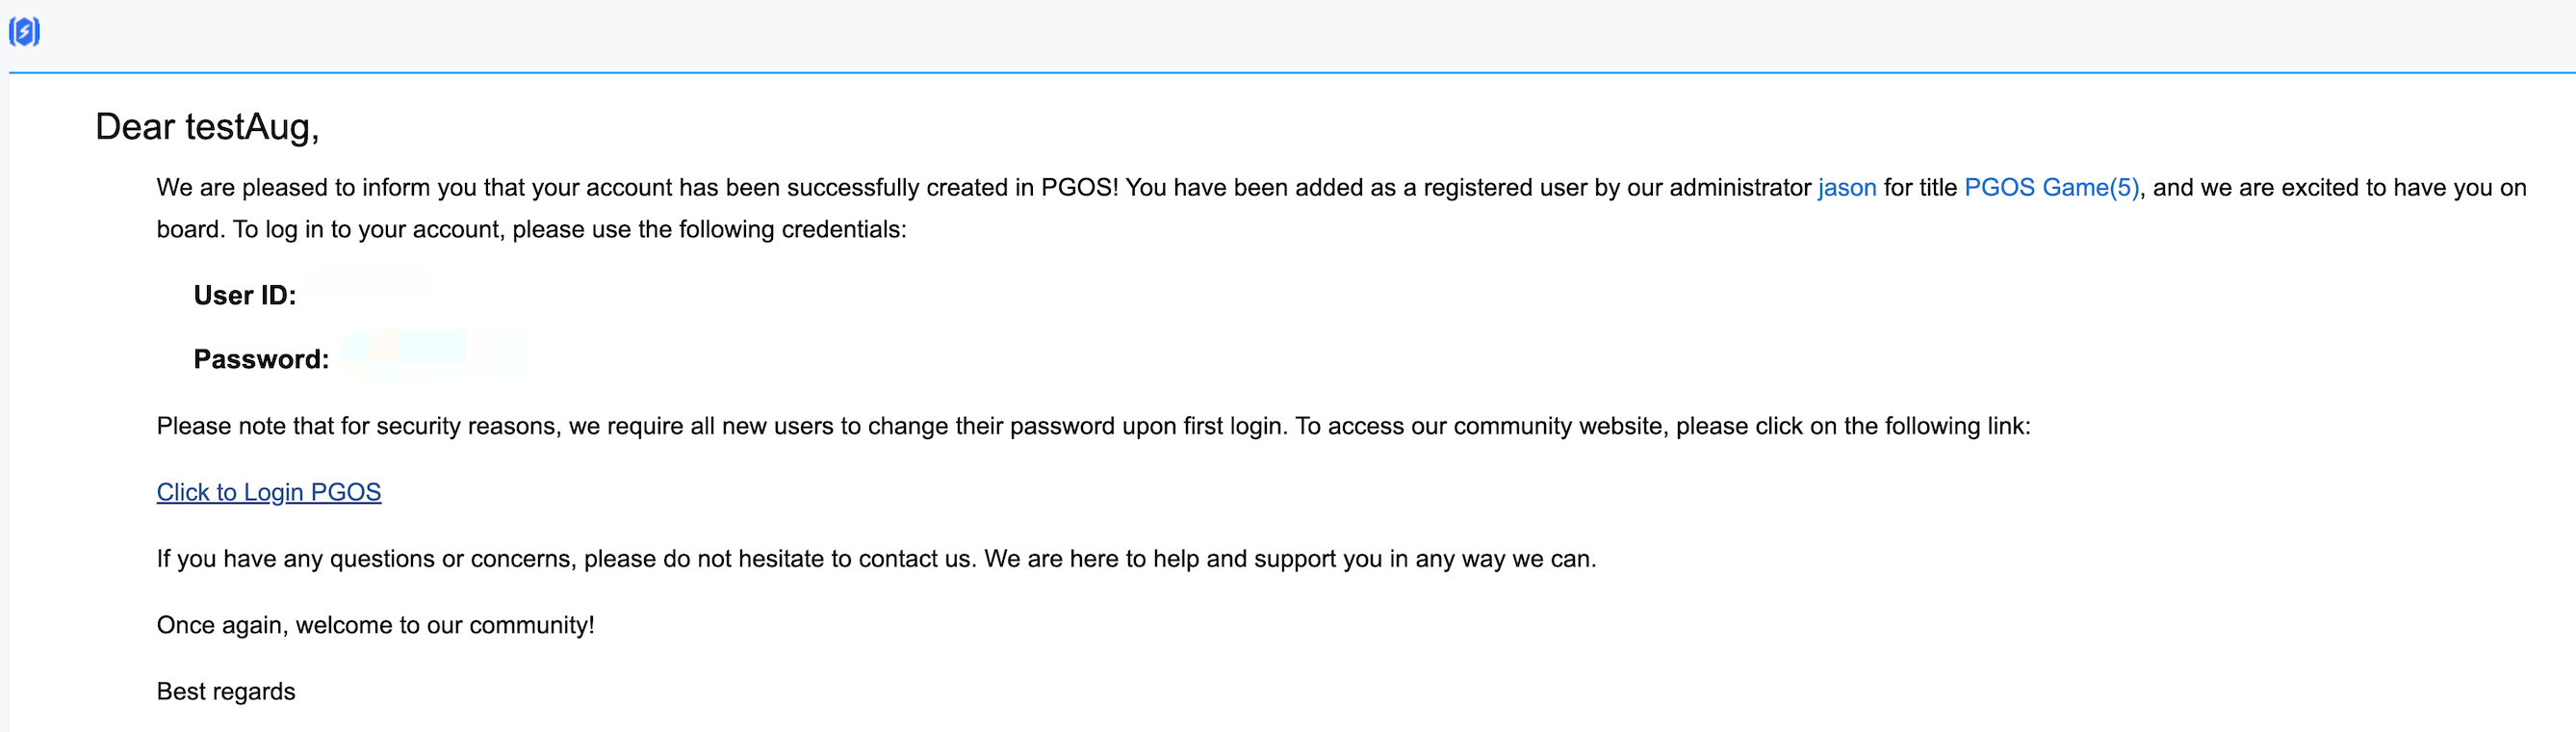
After submission, the user will receive an e-mail containing the user's initial password. When a new user logs in for the first time, he or she needs to change the login password.
4.2. Create a Role
- Click the Setting button on the home page of the title
- Click Role Manage Tab
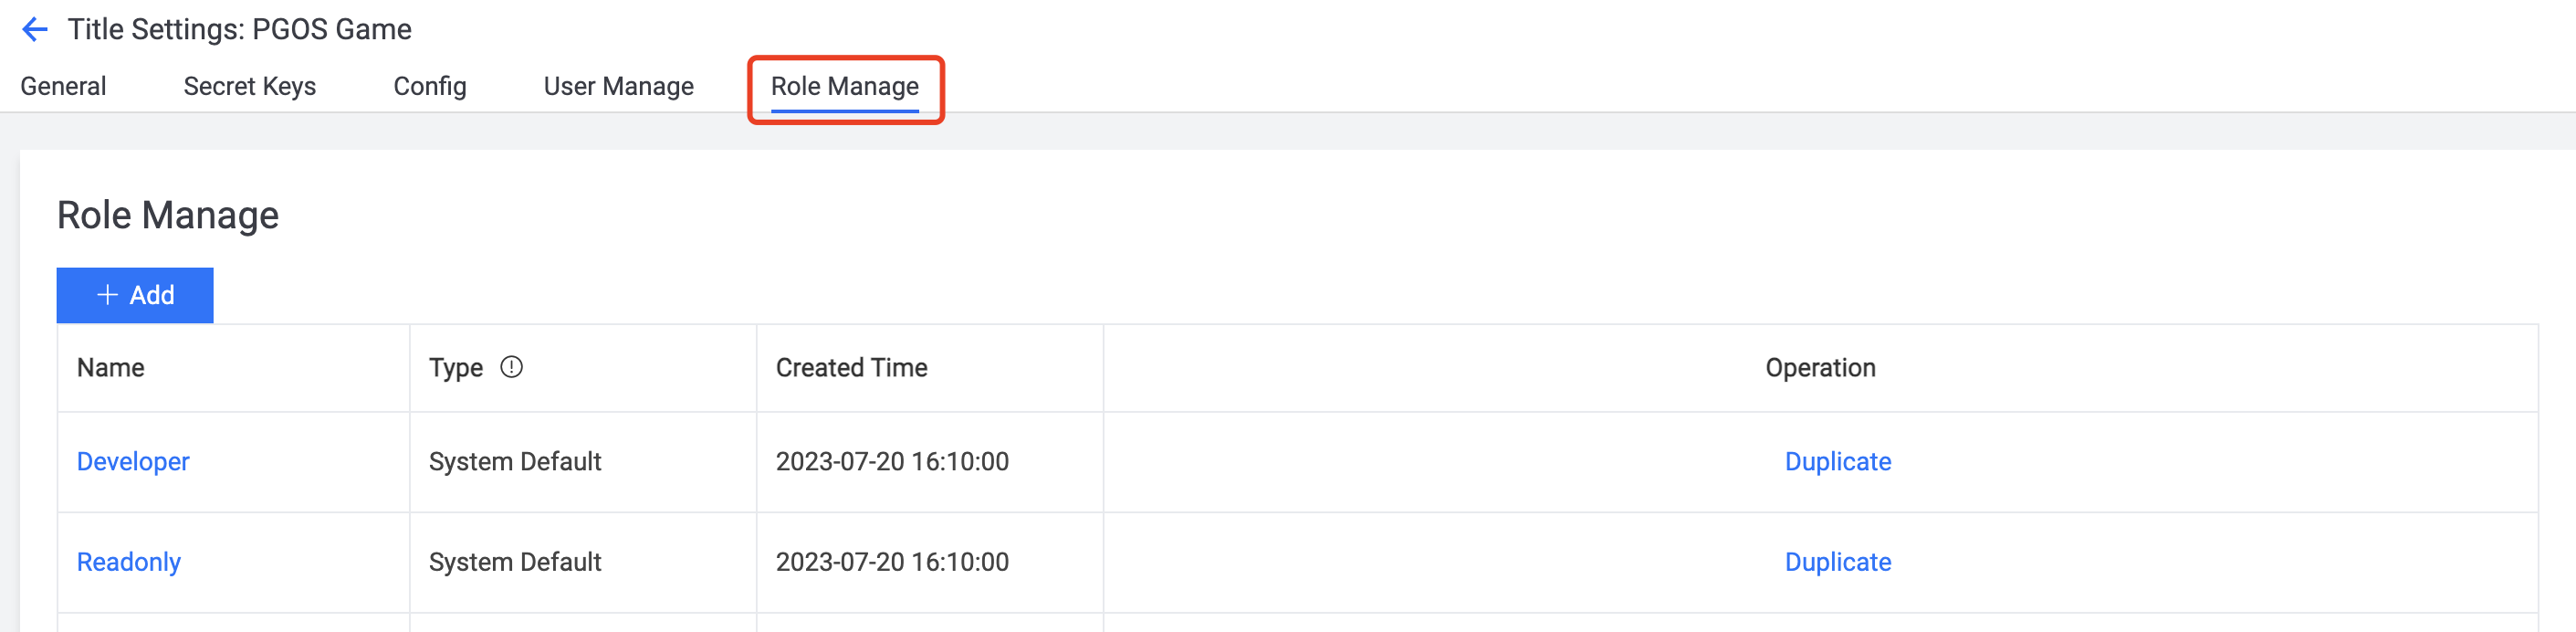
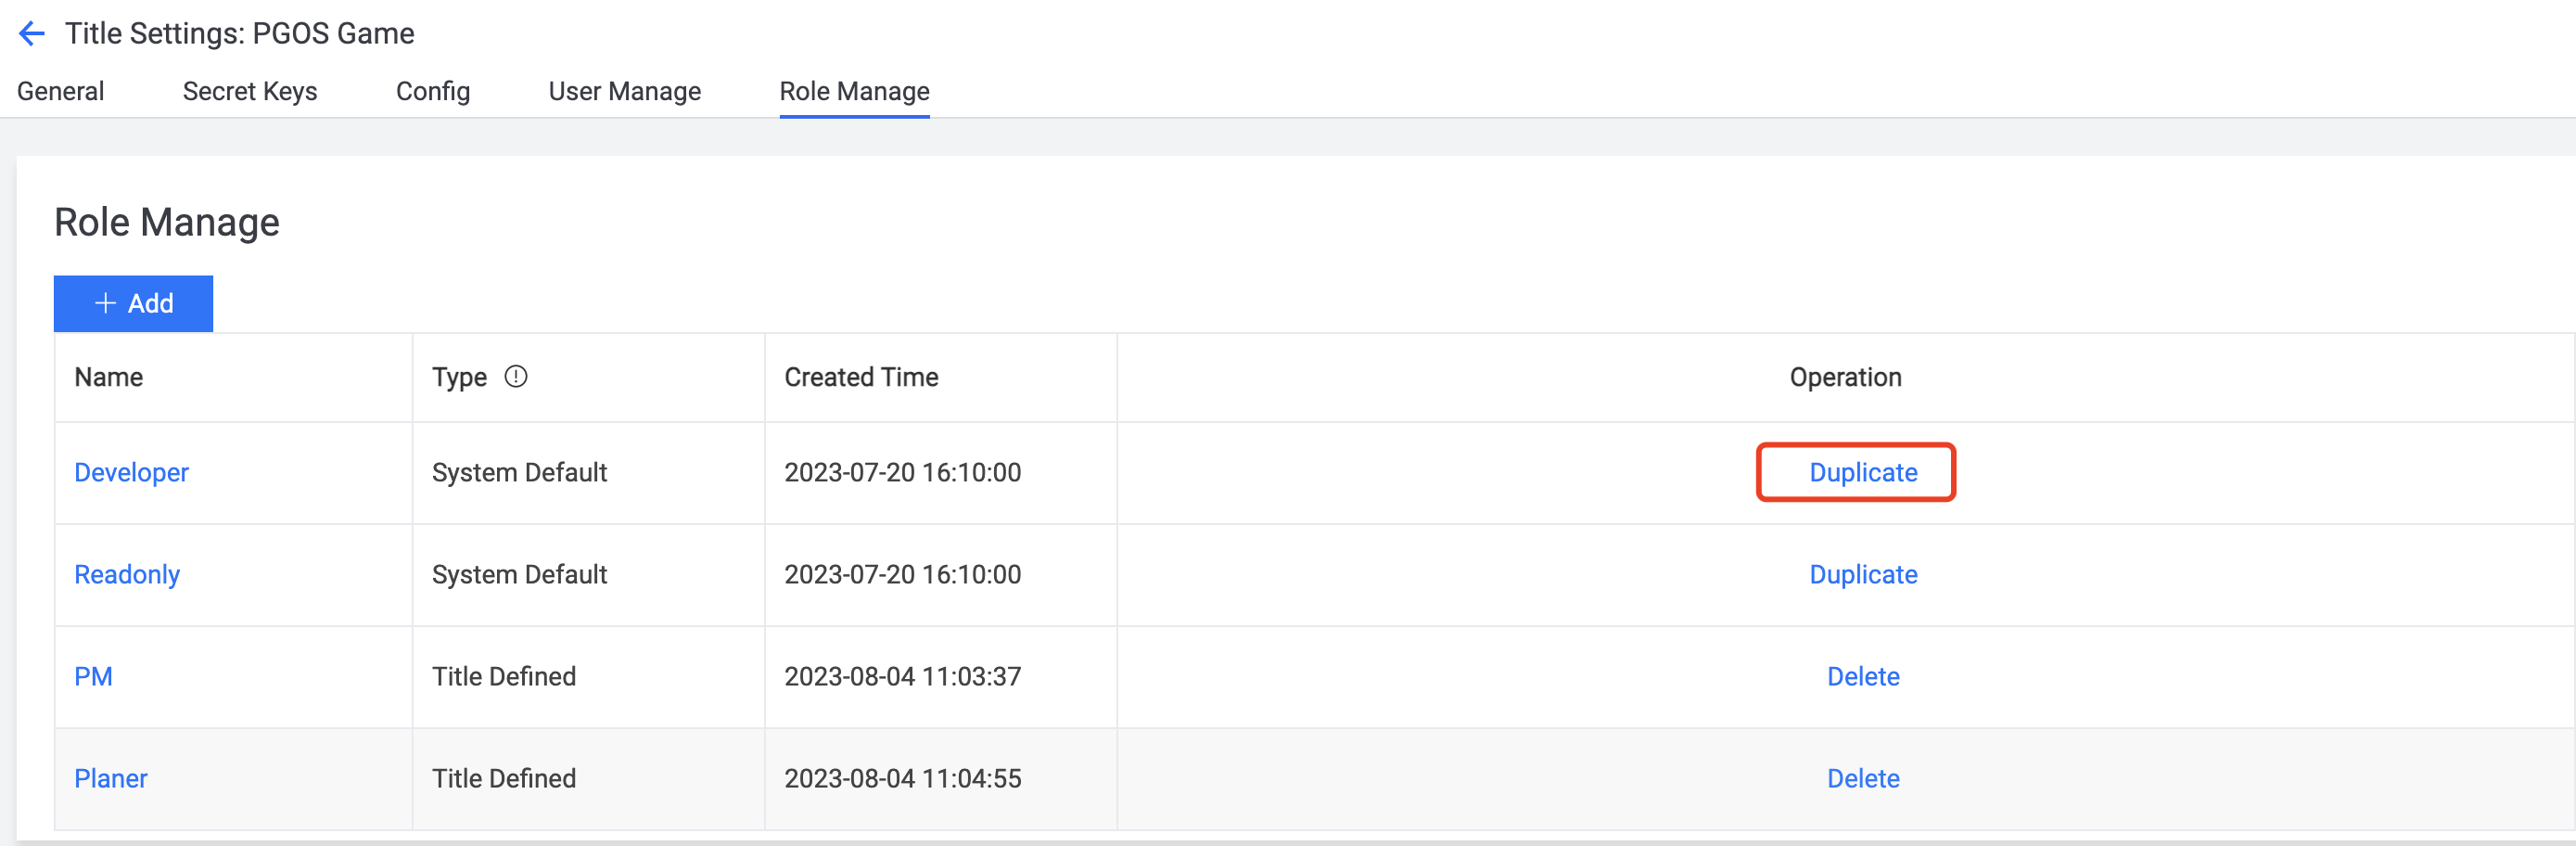
You can see the current role list of the title. The system default type is the role provided by PGOS by default, and the defined type is the role customized by the title administrator.
- Click the role to view the permission details contained in the Role.
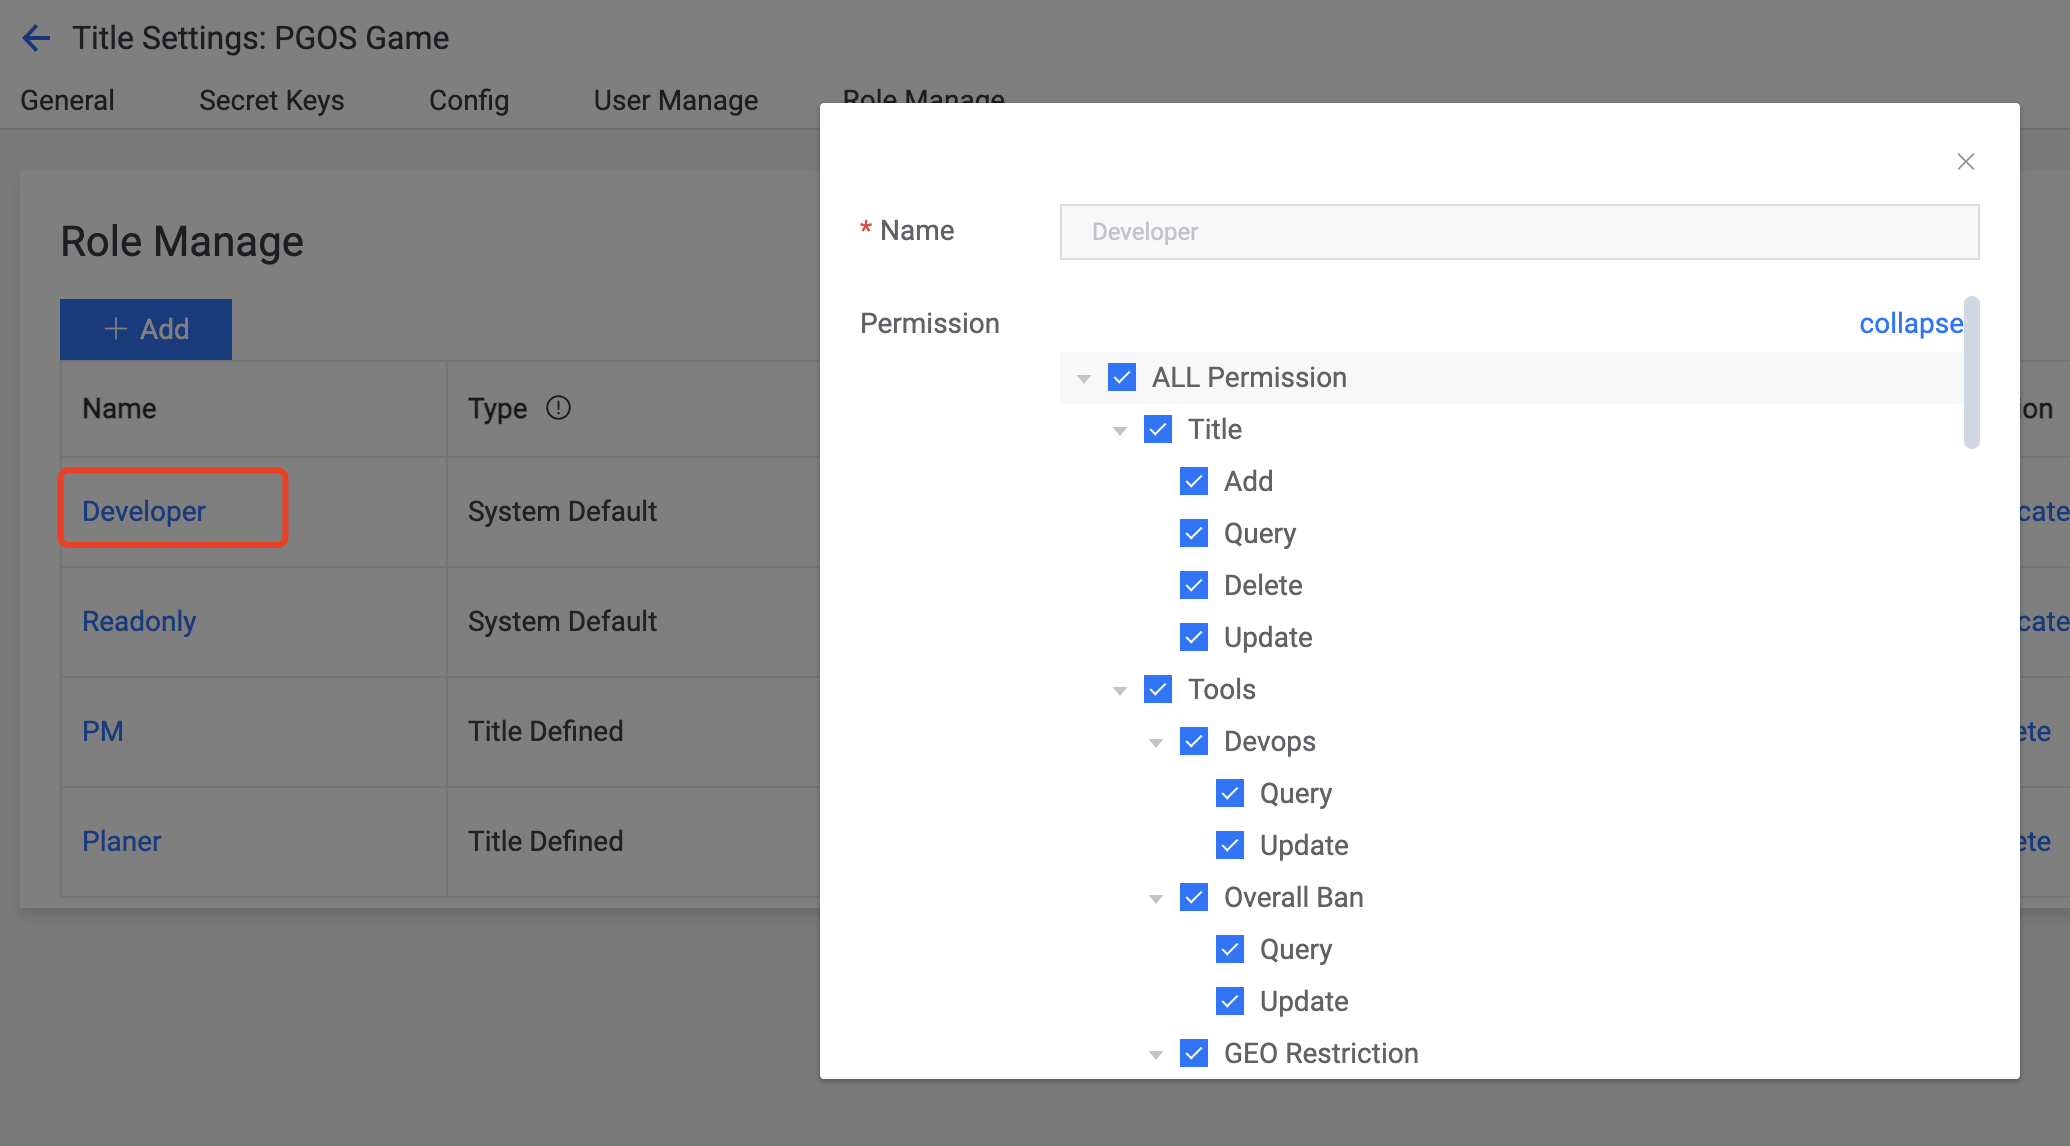
4.3 Duplicate a Role
Roles of the System Default type can be copied by clicking the Duplicate button in the Operation column, then you can change the role name and edit the permissions.
4.4 Grant The Permission
If the user already has a PGOS account but does not have title operation permissions, please follow this process to grant permissions.
- Find the Settings from the title home page.
- Click User Manage Tab
- Click Grant User, and open up the pop-up window.
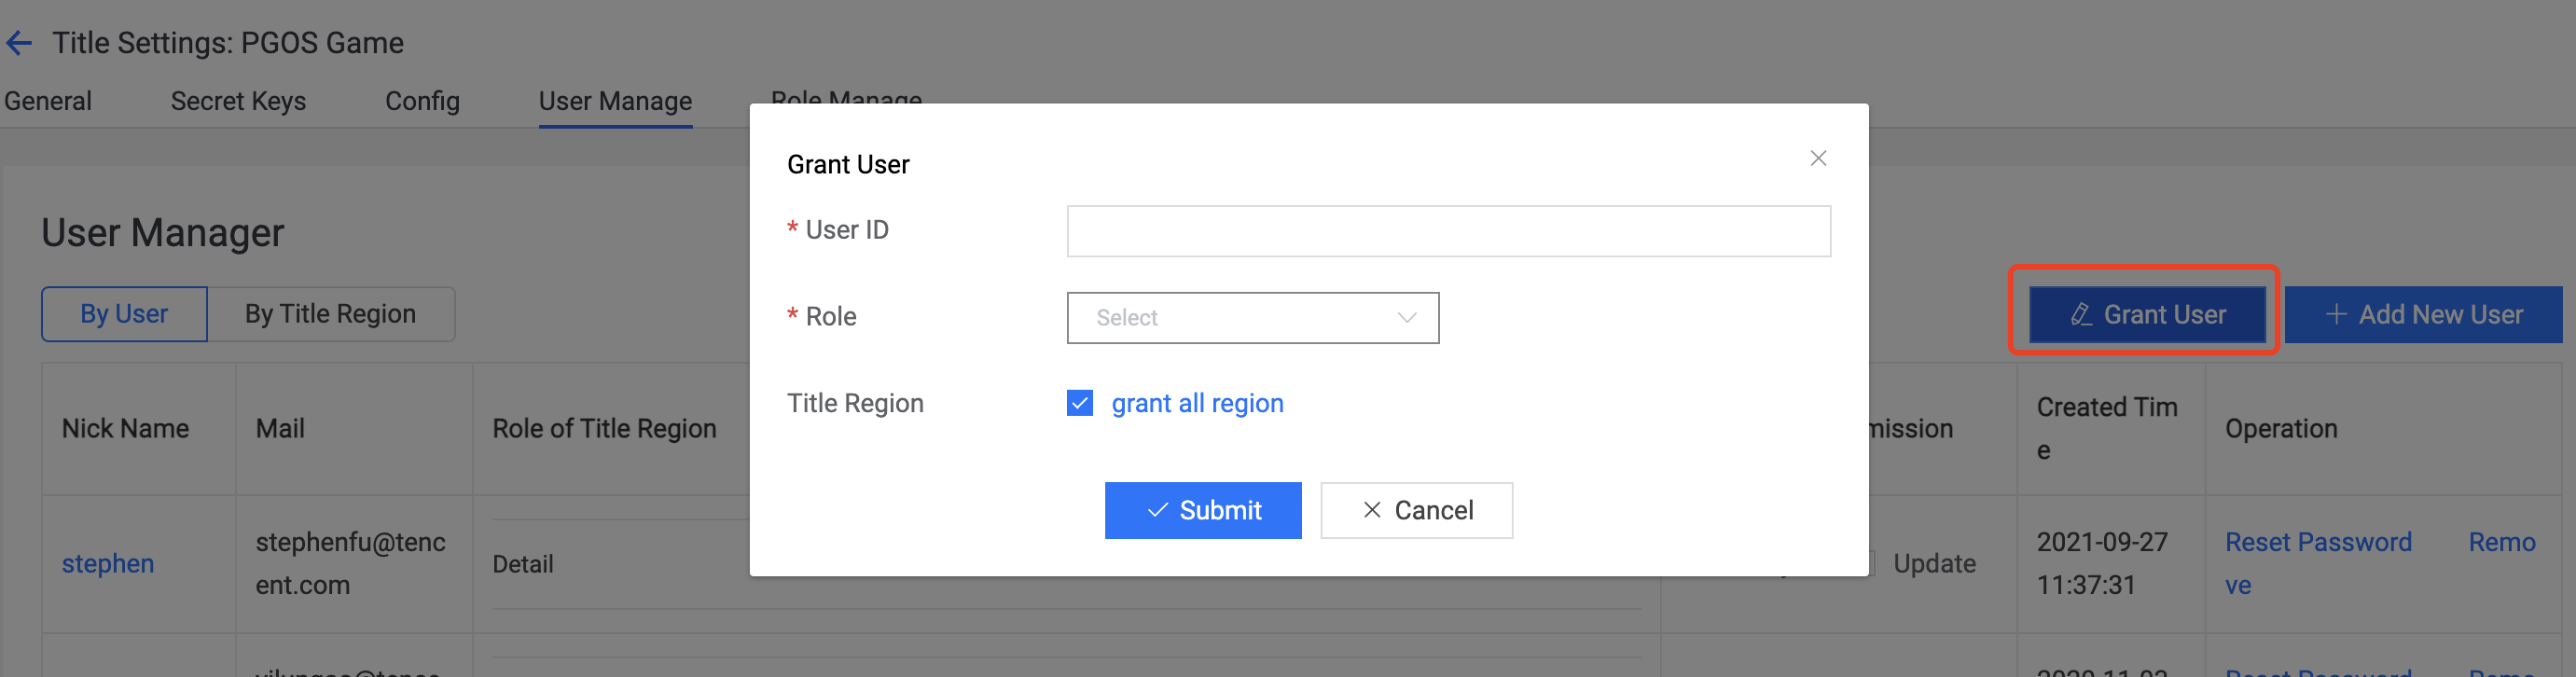
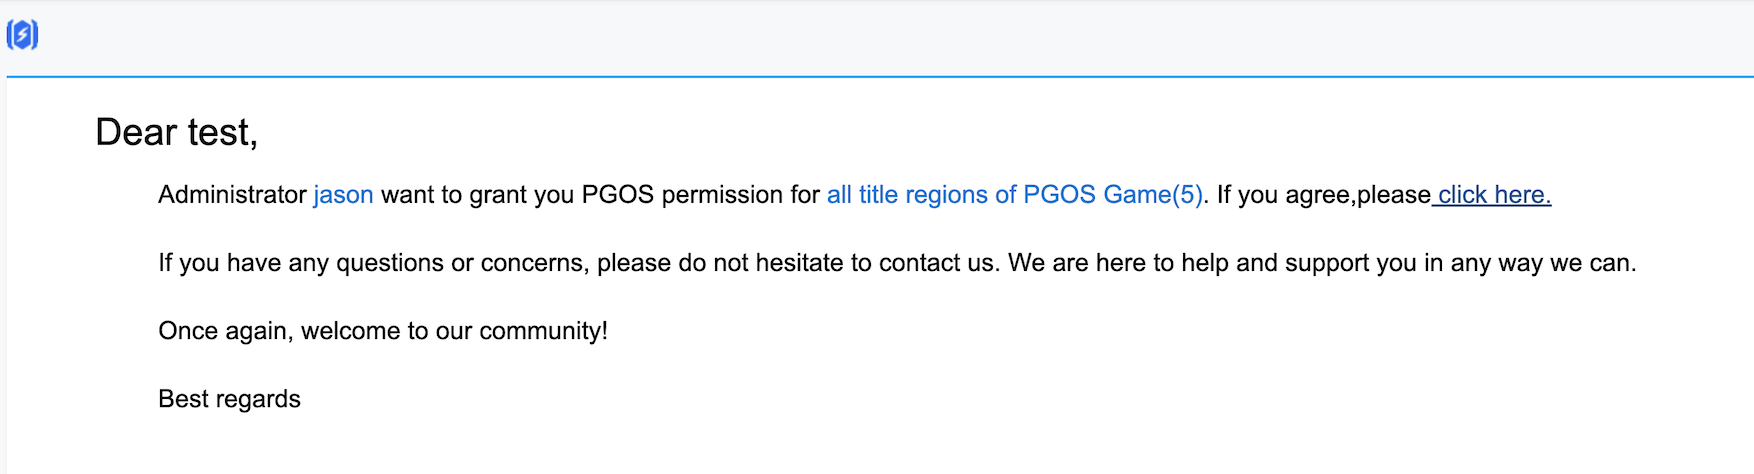
Enter the User ID and select a role for the user, then choose the region that is allowed to access.
After submission, authorized users will receive an e-mail. The user needs to click on the link in the e-mail to agree to the authorization, and then the user can access the title region.
4.5 Modify User's Role
- Enter the User Manager Tab, and find the user.
- Click the Detail, view detailed permissions of the user

- Click the name of the role to modify the user's role under the corresponding title region. Please notice that If the role changes, the corresponding permissions will also change.
4.6 Reset The User Password
Enter the User Manager Tab, find the user, and click Reset Password
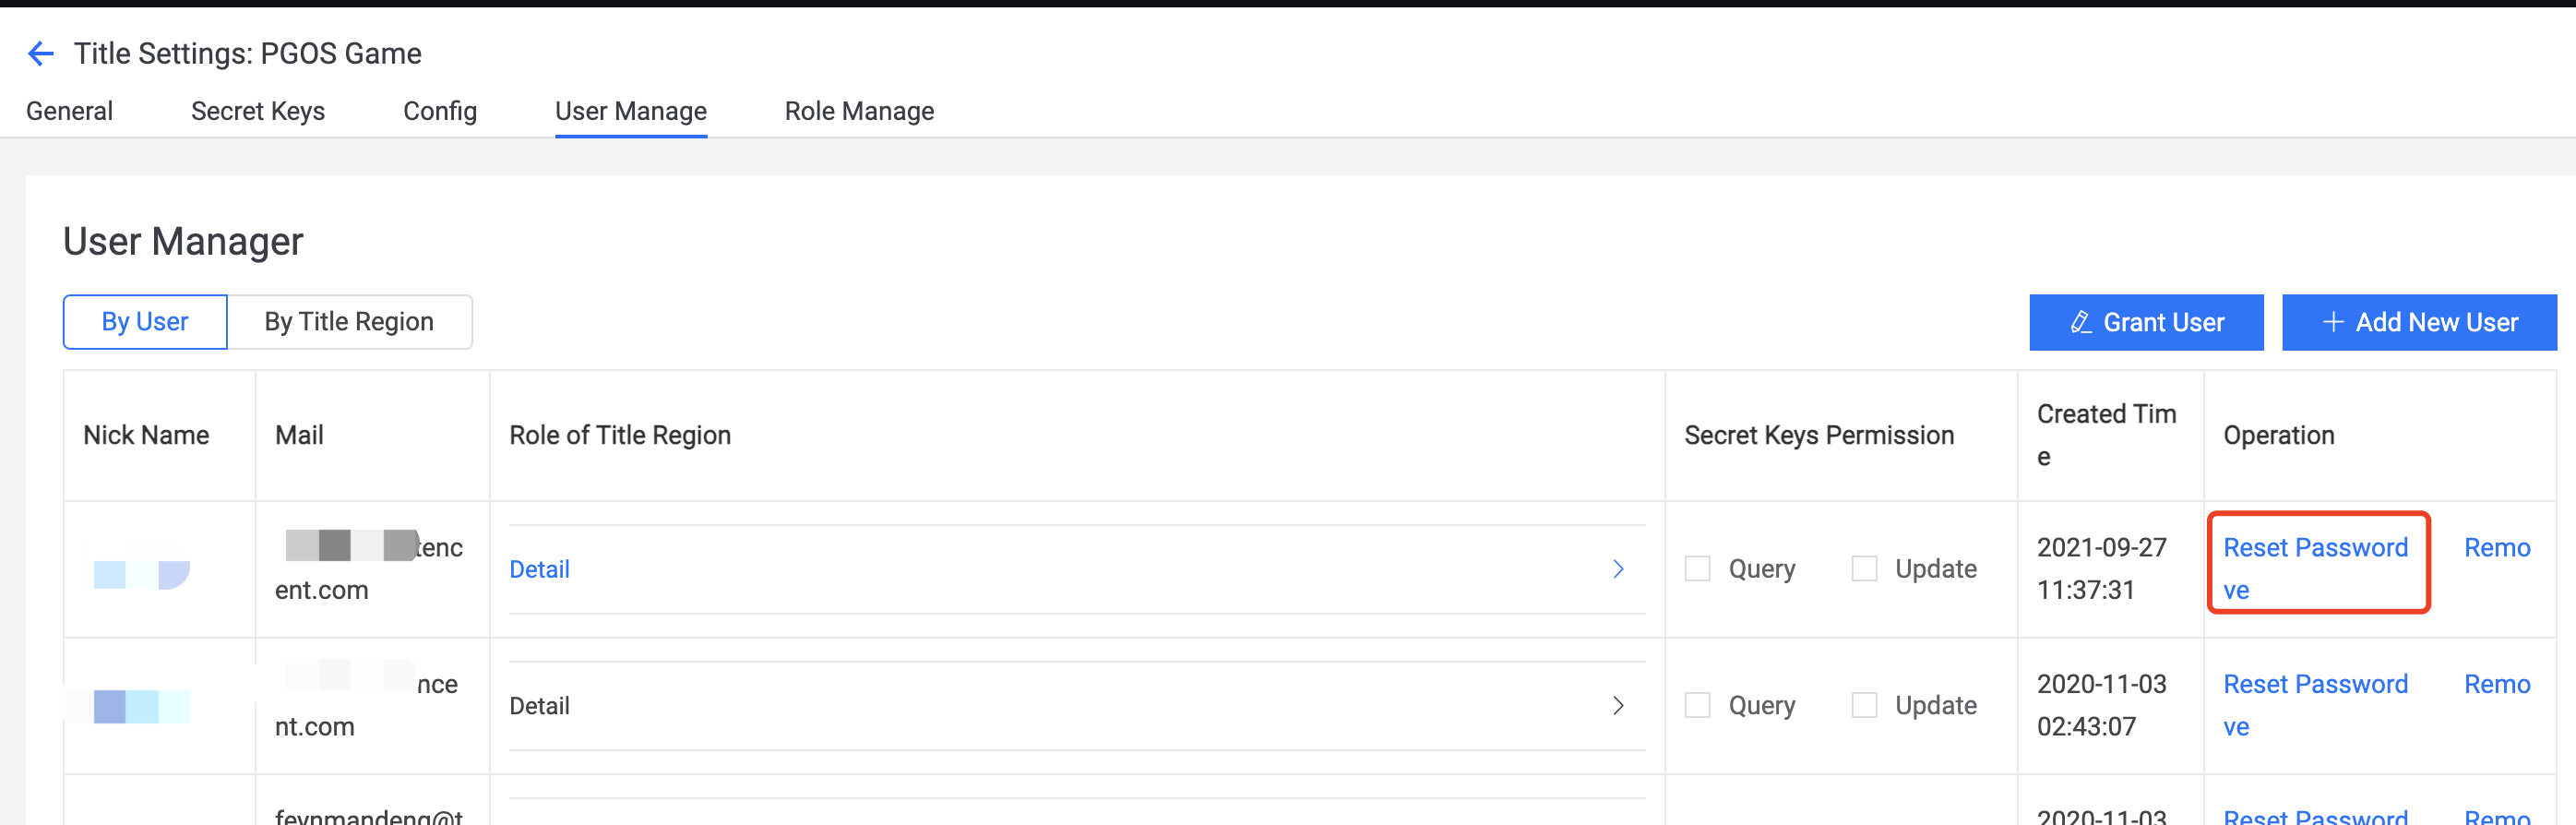
After submission, the user will receive an e-mail with a new password. Please remember the first time you log in with a new password, you need to reset your password again.
4.7. Permission of Secret Keys
Enter the User Manager Tab, and find the user, you can set the user's permission to access the Secret Key in the Secret Keys Permission column,