Design
1. Levels
Pingpong Shooter contains two client levels and one server level.
// Client levels
World'/Game/PGOS/Maps/LoginMap.LoginMap'
World'/Game/PGOS/Maps/HallMap.HallMap'

// Battle level
World'/Game/PGOS/Maps/BattleMap.BattleMap'
1.1 Login Level (game client level)
Function: This level is the start level of the sample game client and is used to complete preparations before entering the game hall.
1.2 Hall Level (game client level)
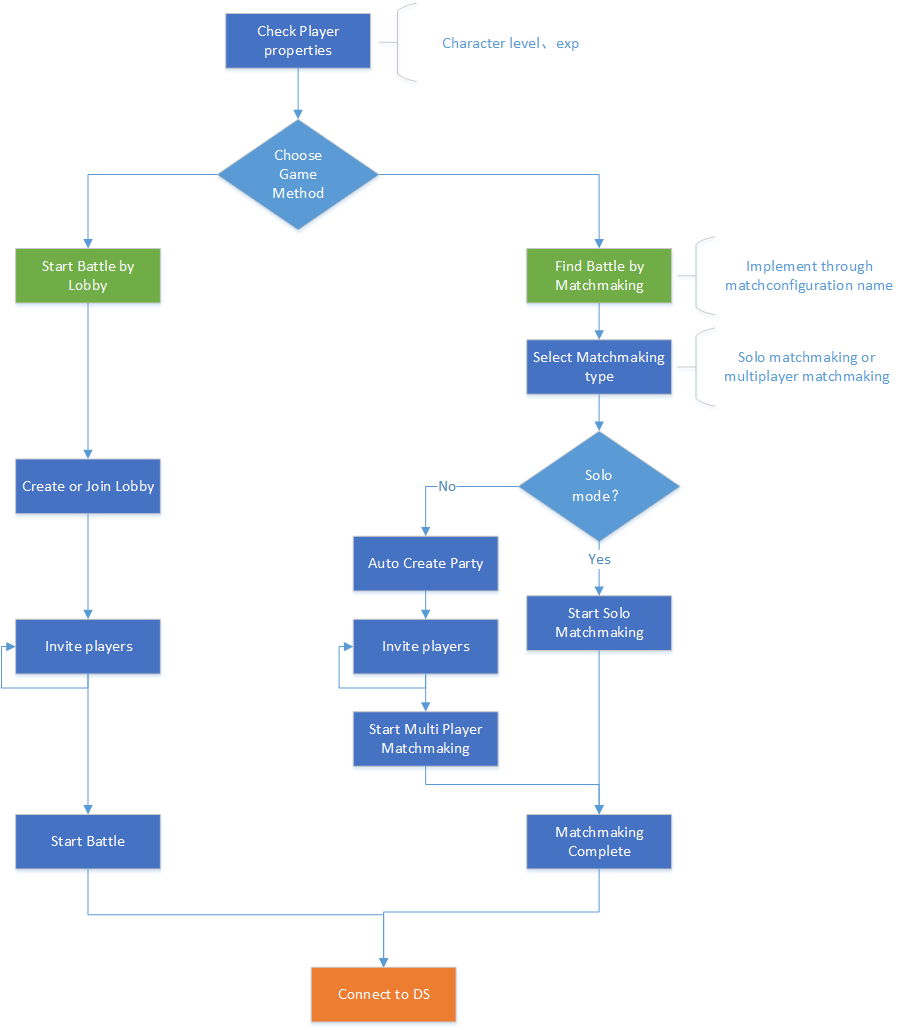
Function: This level simulates the entrance to the game hall before a battle session. It integrates player information, team formation, and matchmaking, and loads other modules.
Flowchart
1.3 Battle Level (game server level)
This level simulates a game battle. It implements DS hosting access, battle information display, simple gameplay, battle result processing, player data updates and other modules.

2. Use of PGOS Features
Player Management is used in the Login Level, and includes features such as player sessions and a fake account system.
Player Data is used in the Hall Level and Battle Level. It allows player data to be updated in the Battle Level and player data to be pulled in the Hall Level.
Party is used in the Hall Level. The sample uses parties to handle multiplayer matchmaking requests.
Matchmaking is used in the Hall Level. Both single-player matchmaking requests and multiplayer matchmaking requests are handled in the sample.
Lobby is used in the Hall Level. The sample supports the creation of two types of lobbies.
DS Hosting Interfaces are invoked in the Battle Level to manage the activation and termination of battle sessions.
3. Gameplay
3.1 Game Client
3.1.1 LoginPage
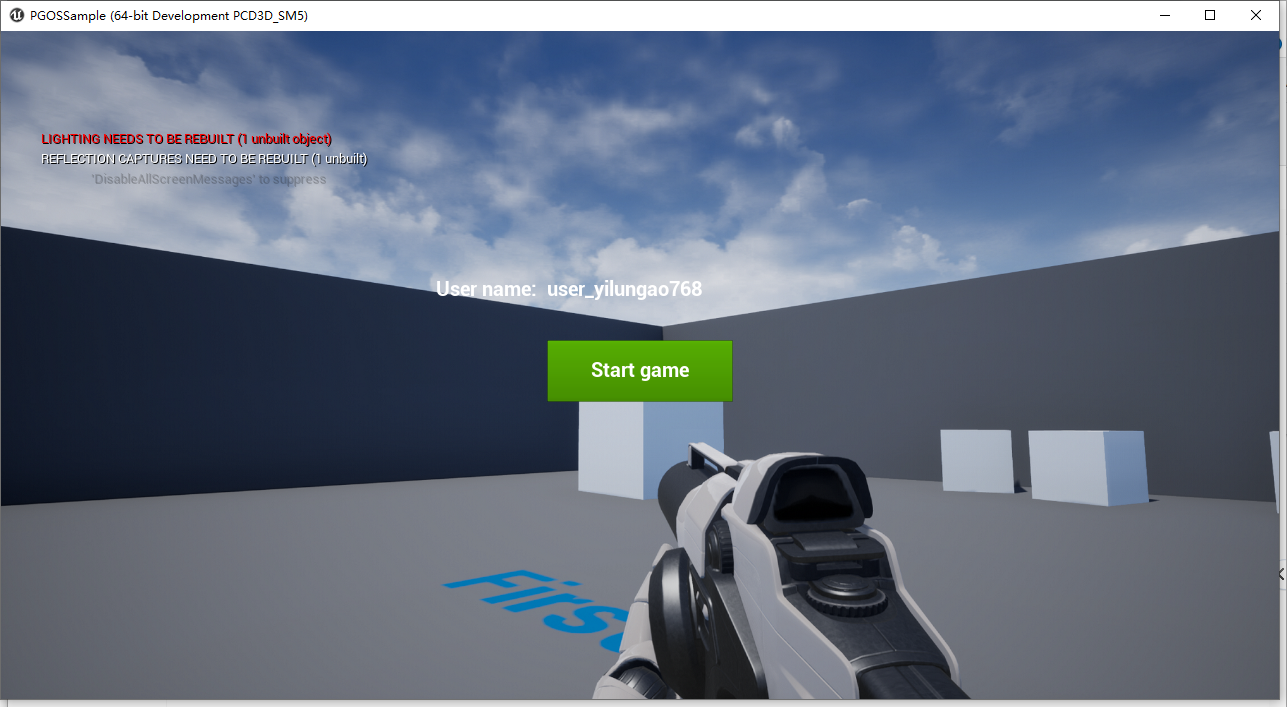
Launches the Pingpong Shooter process in the client to access the login page. Click Start Game to log in using the default configuration parameters.
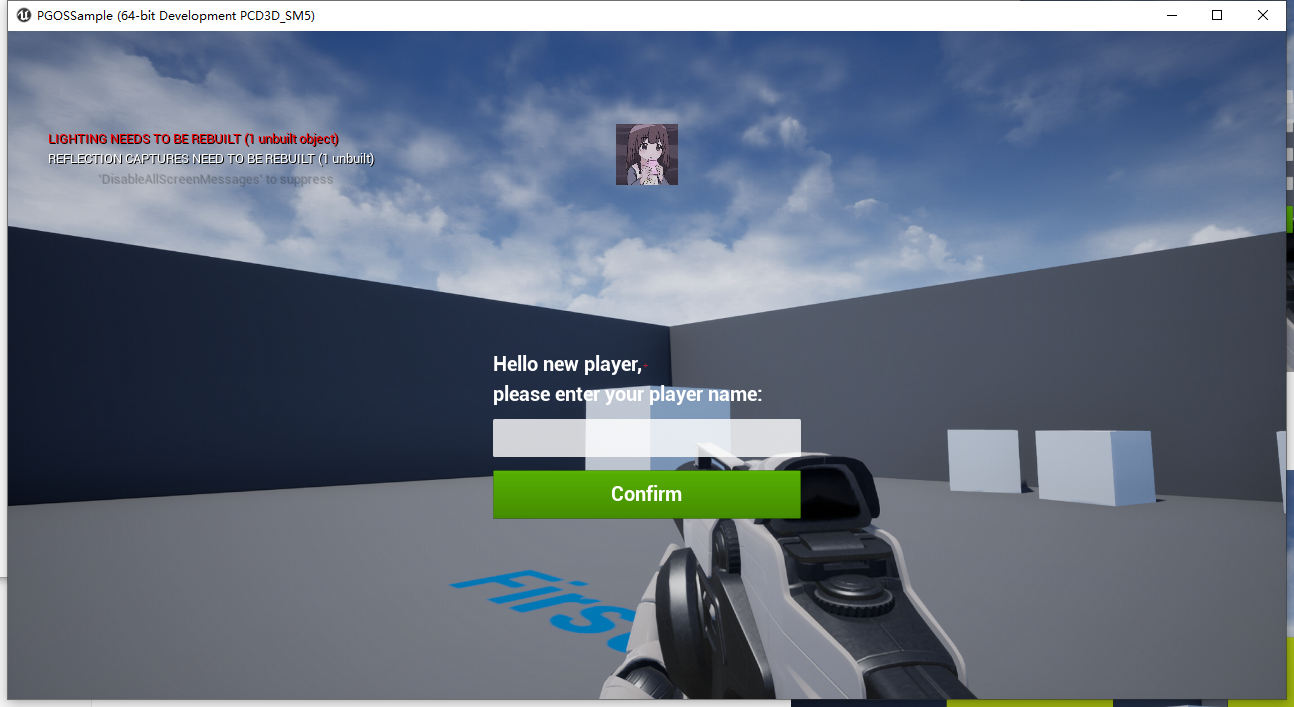
A display name is required to log in for the first time.
After logging in successfully, a version check will be executed to ensure that the client is always running the latest version of Pingpong Shooter. An upgrade tip will pop up if the client is not the latest version.
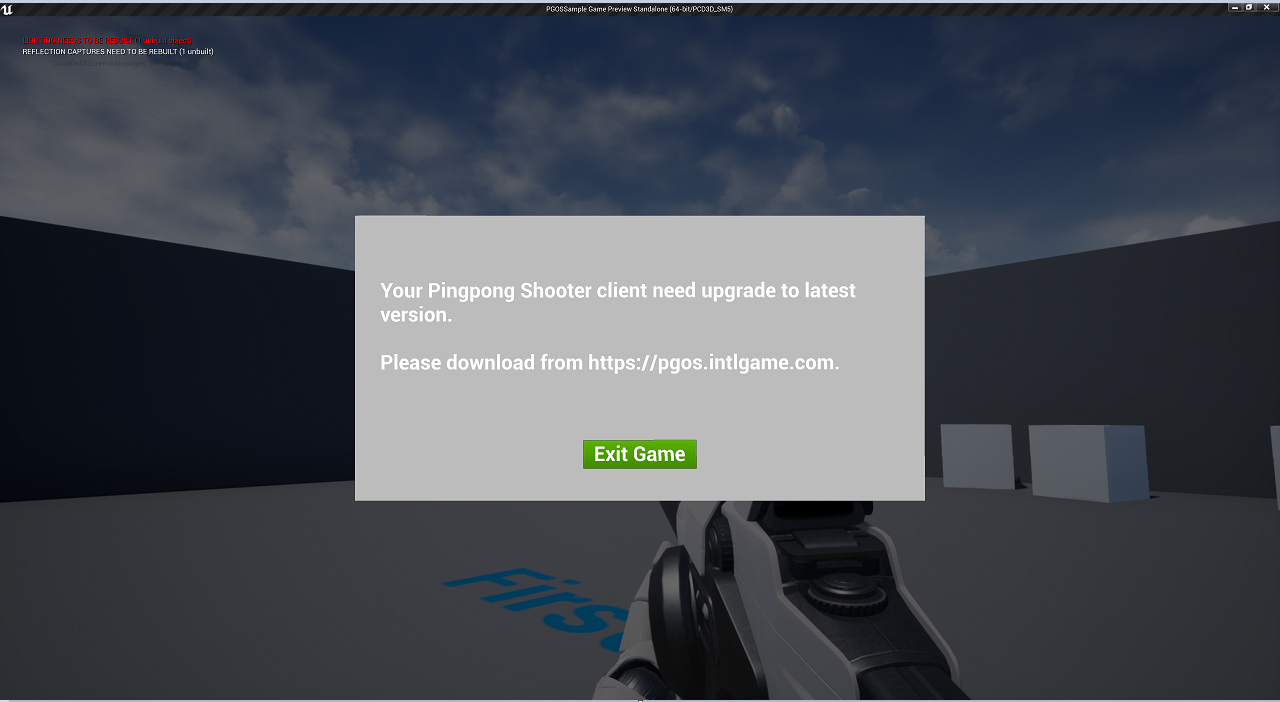
If login fails, a prompt message will be displayed, such as this player is banned.

3.1.2 MainPage
If the login is successful, you will be taken to the main page.
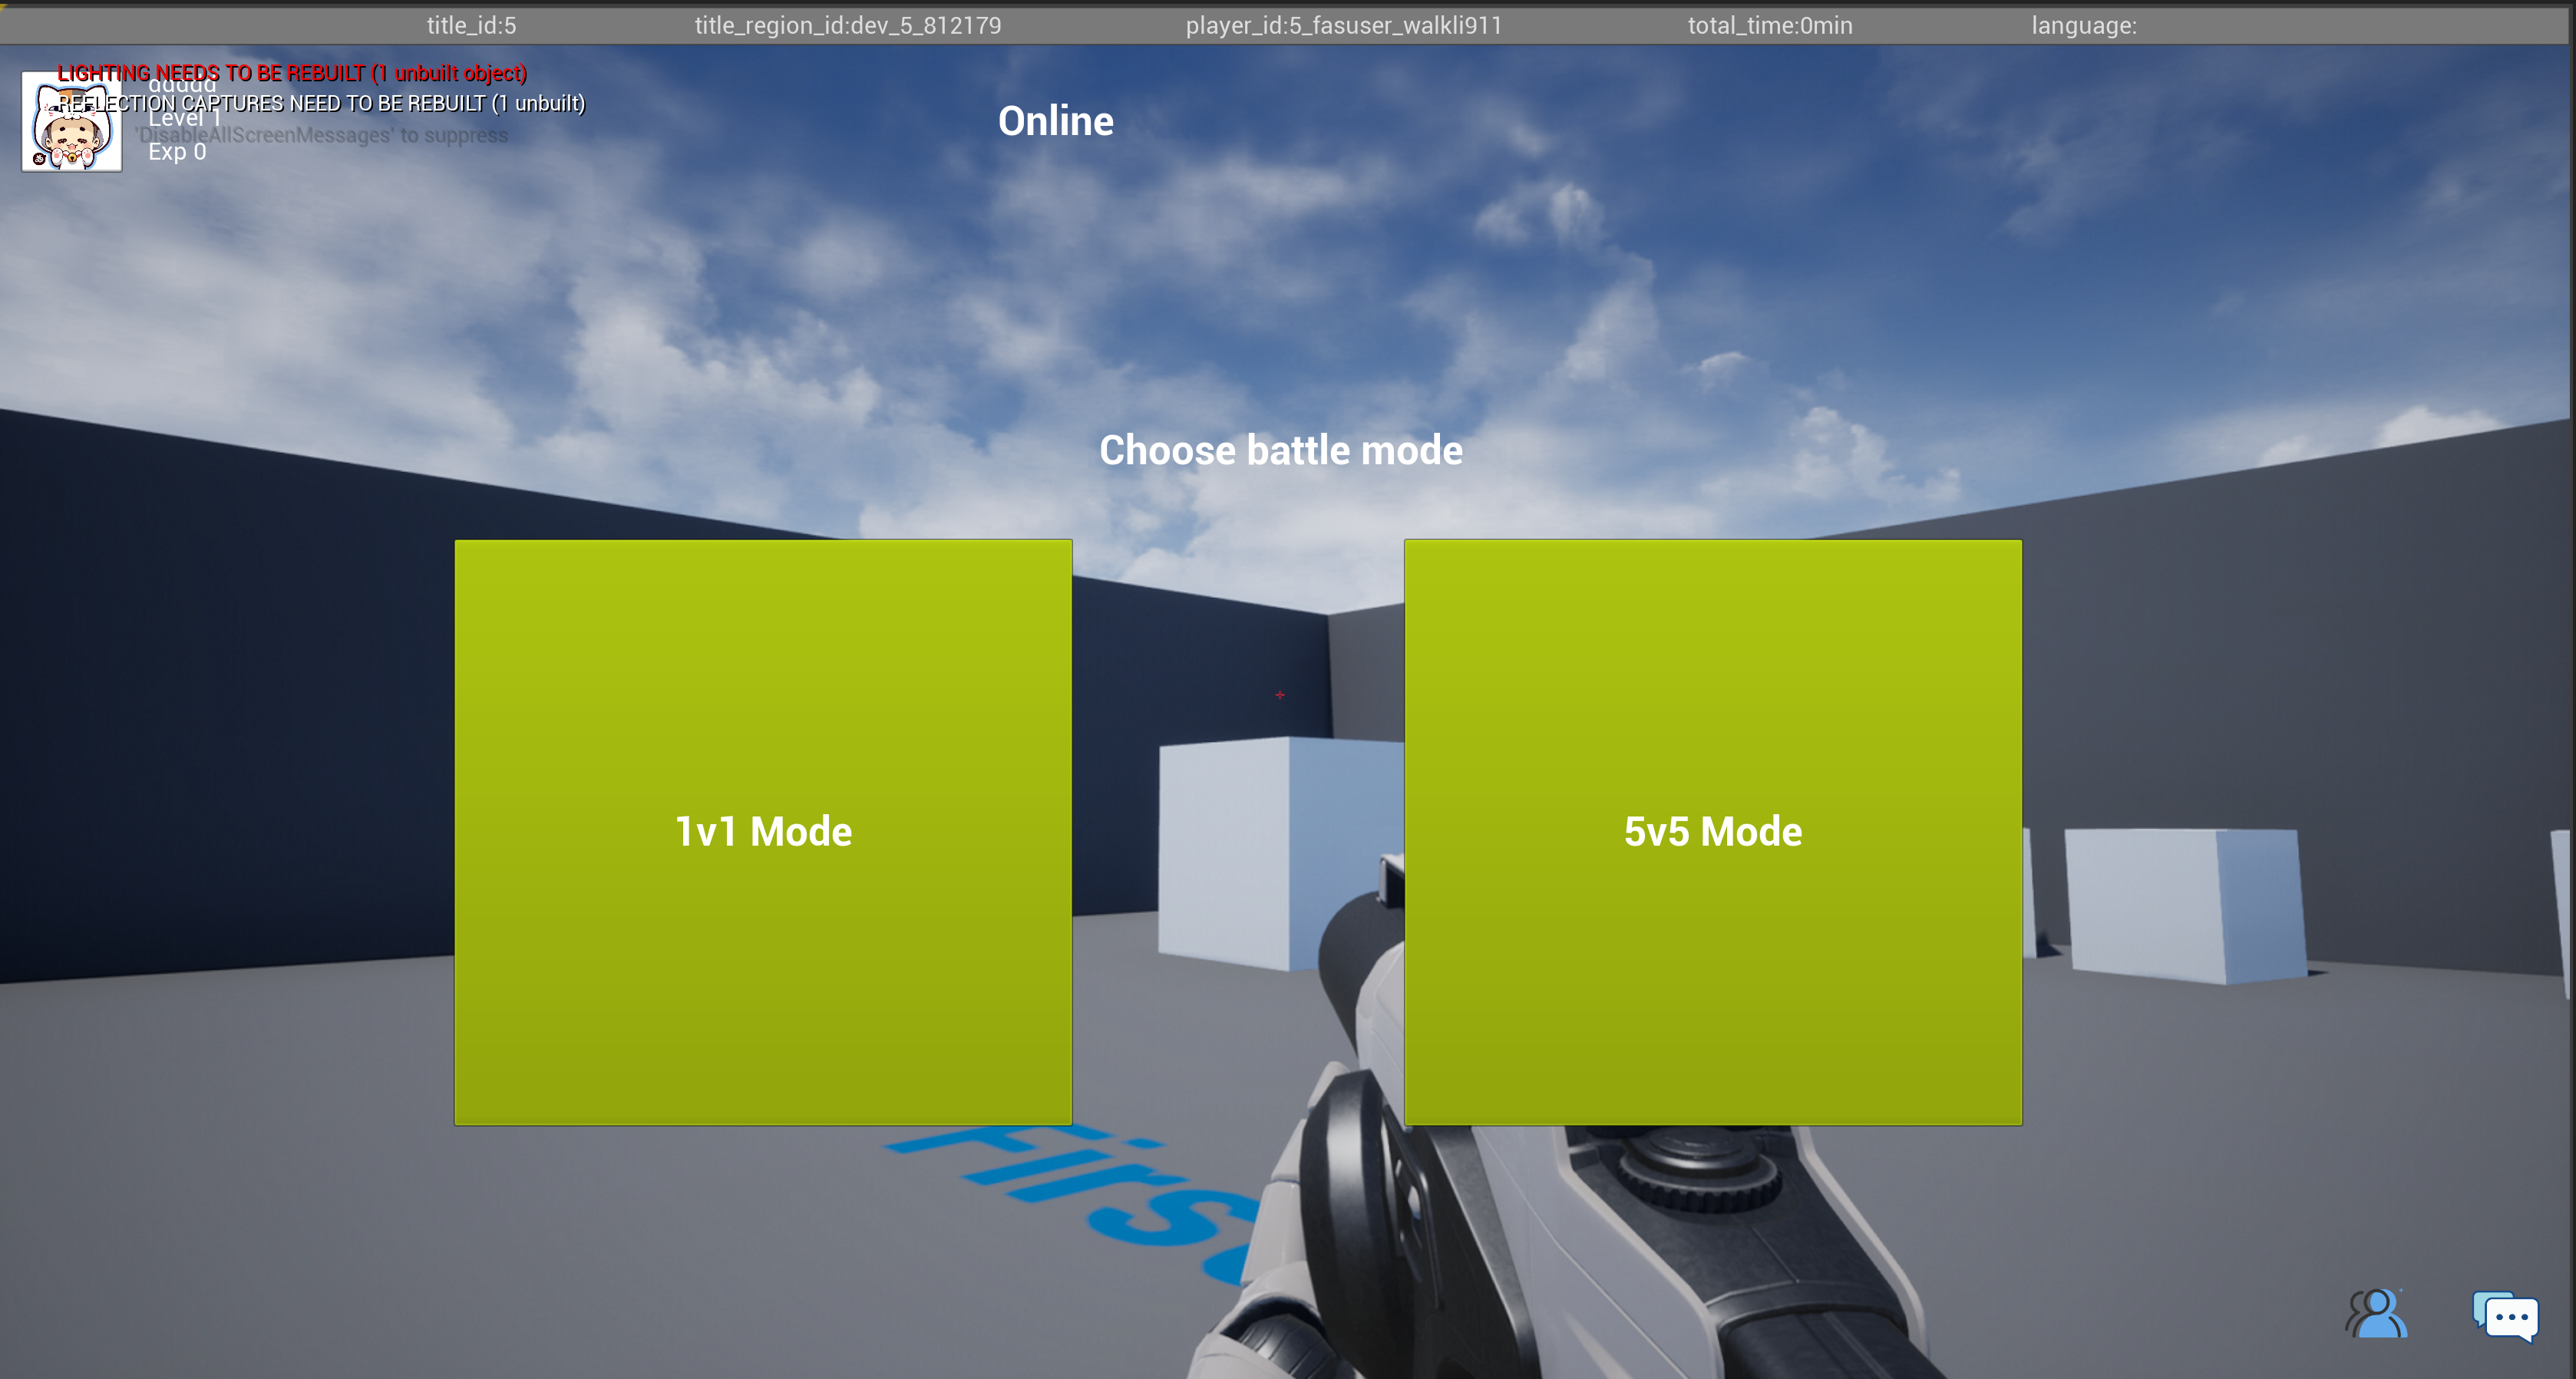
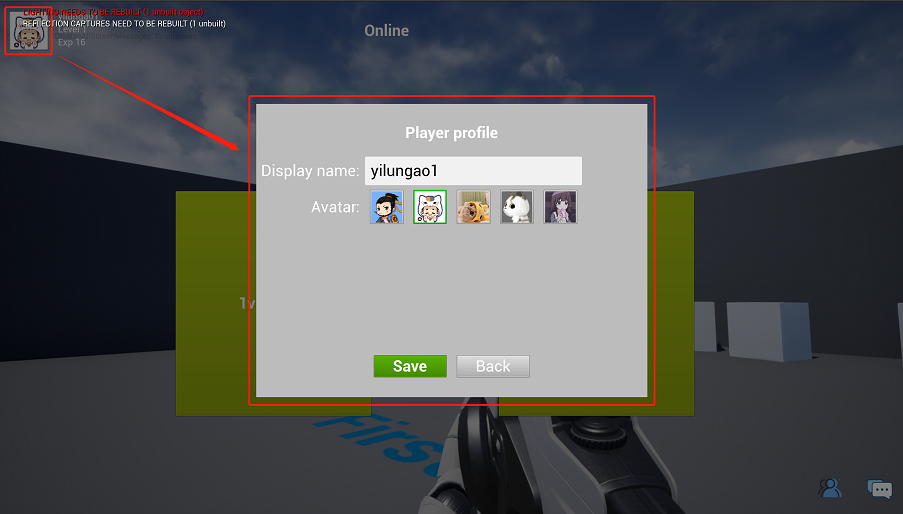
Modify Player Data: Click the avatar to modify the player information.
Game Mode:
- 1v1 Mode: A total of 2 players; click the button to enter single-player battle mode.
- 5v5 Mode: A total of 10 players; click the button to enter multiplayer game mode.
3.1.3 Friends & Blocklist Page
Friends & Blocklist
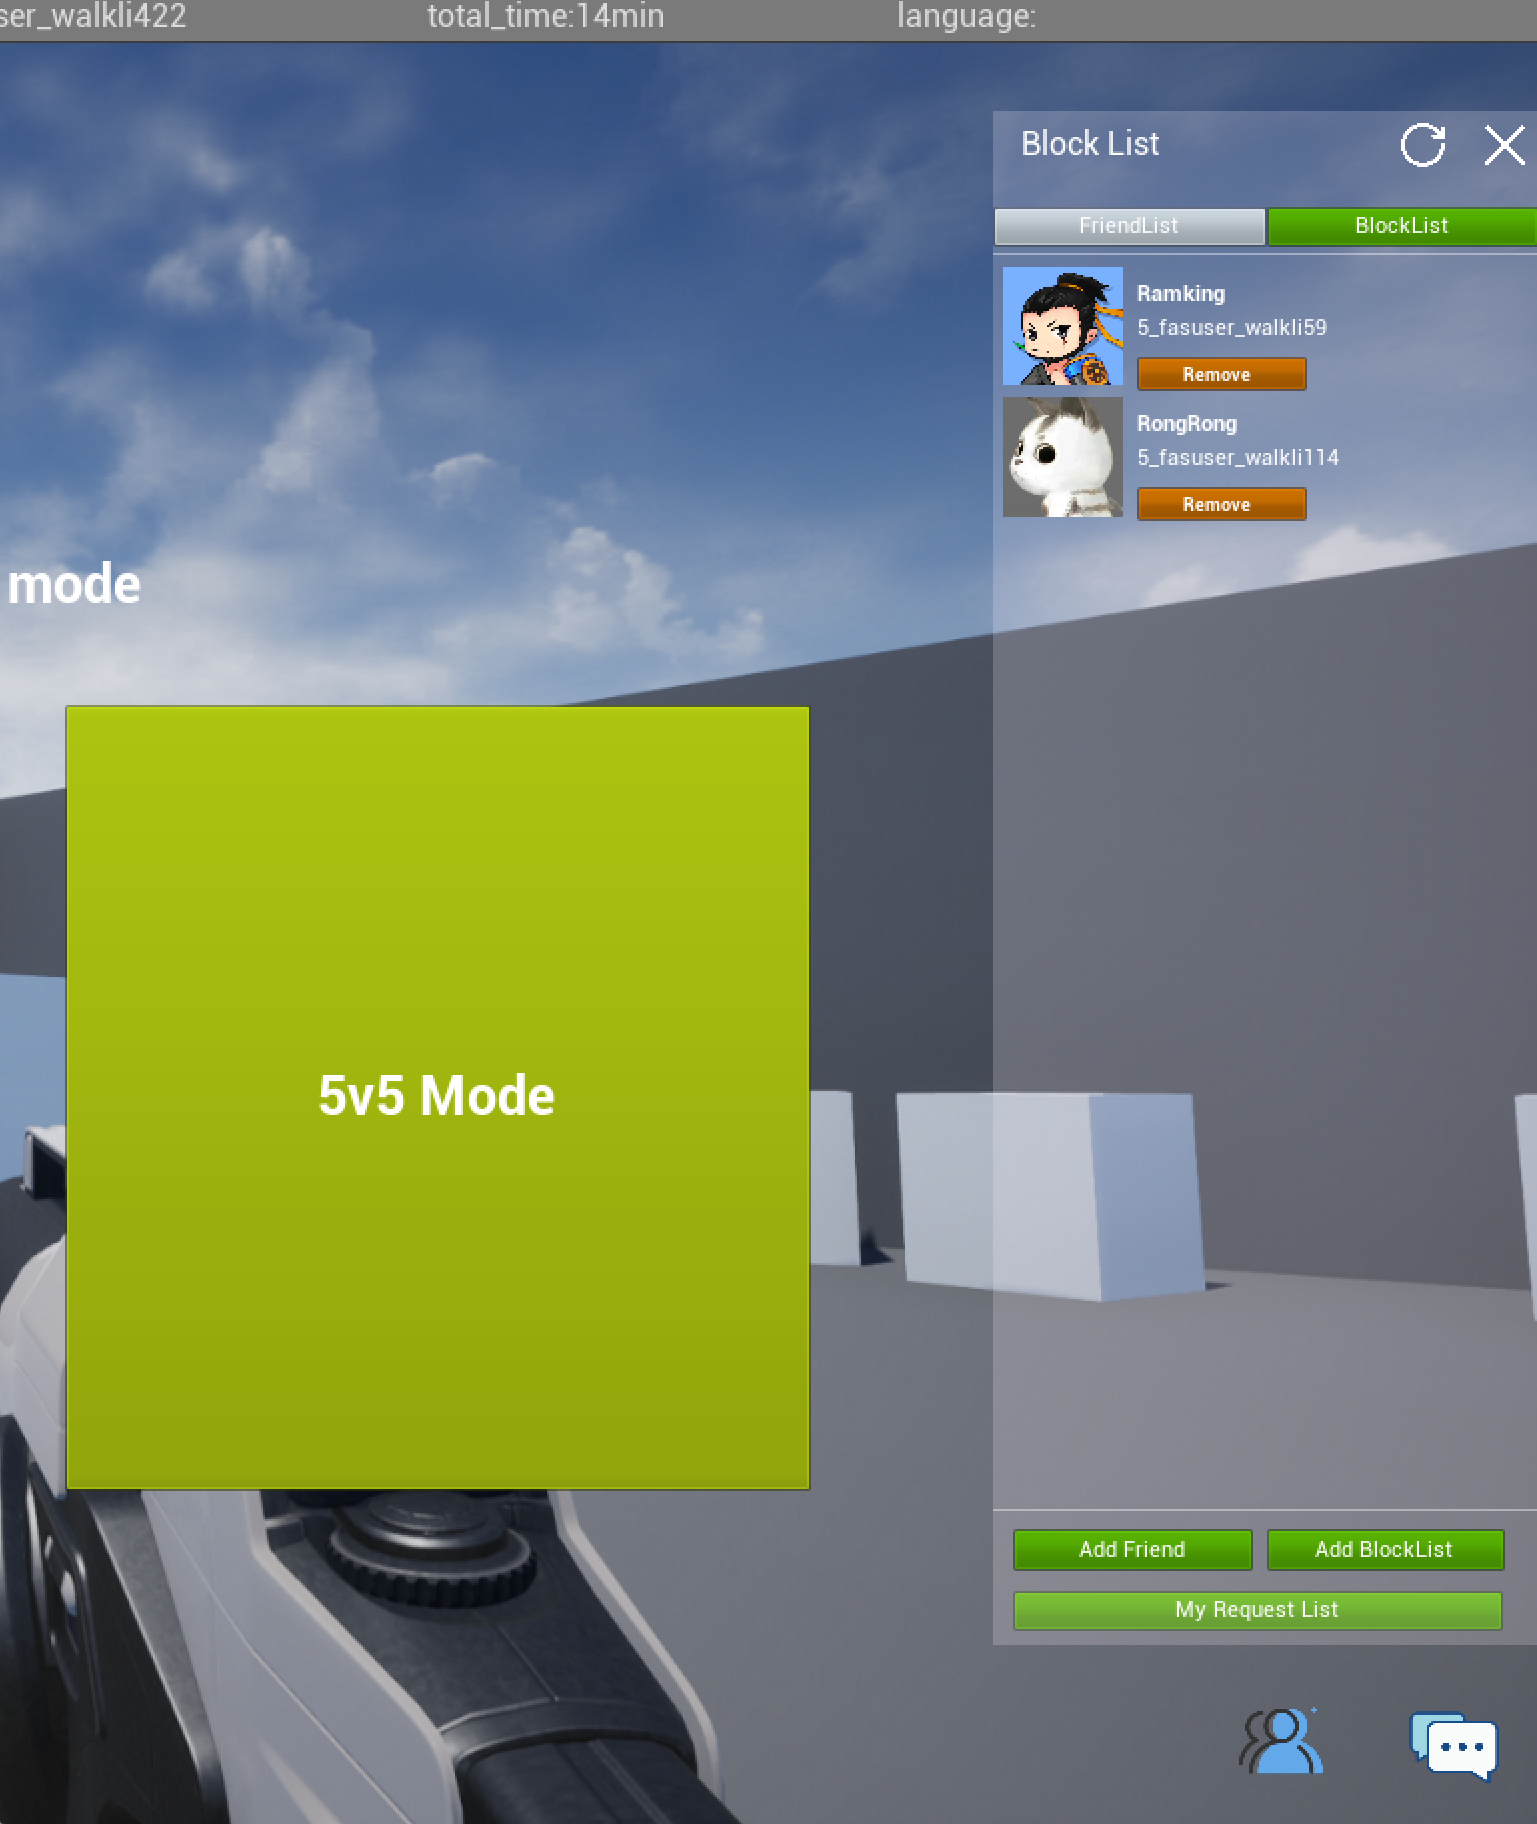
Click the button in the lower right corner of the MainPage to open two lists, the friend list and blocklist.
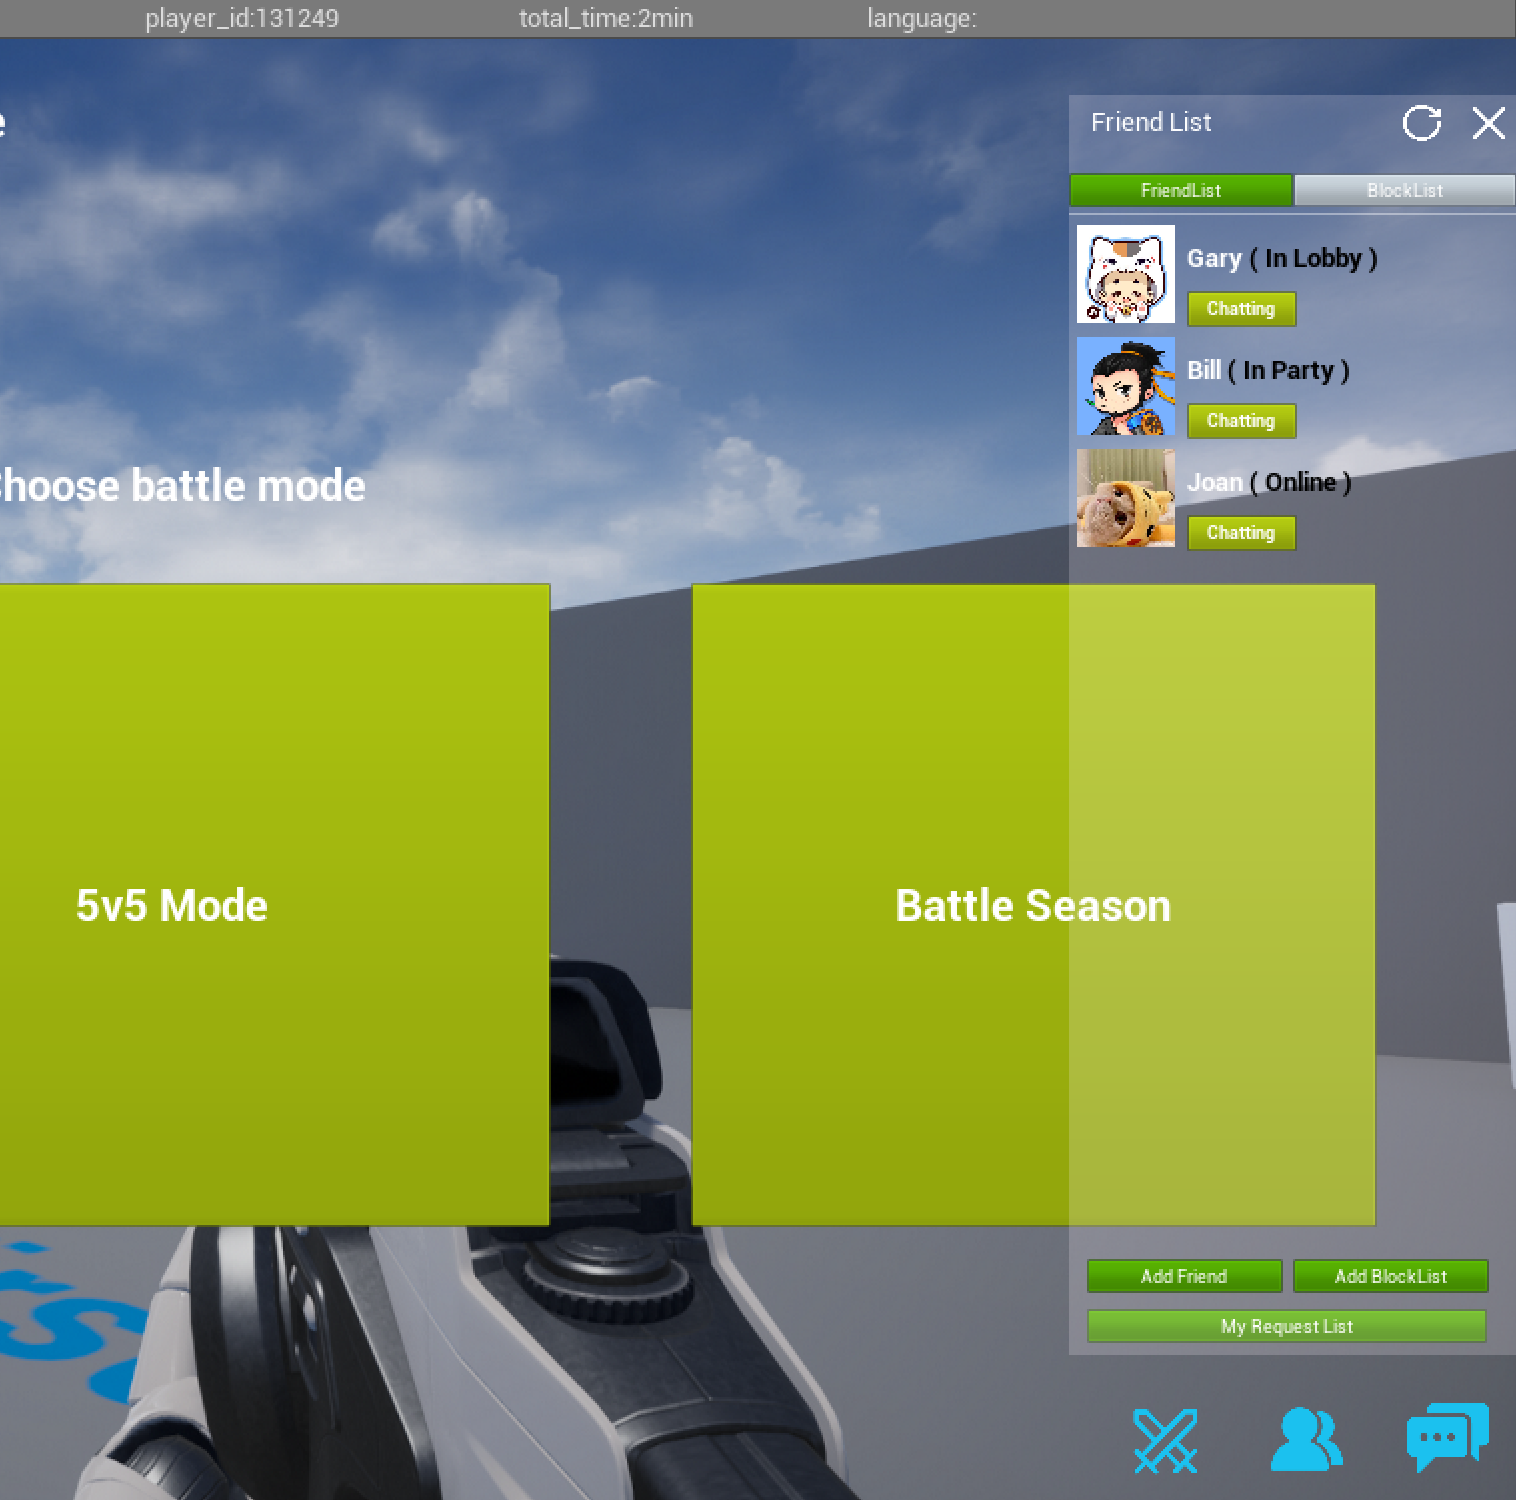
You can also open the lists in the MultiMatching page. Click the Invite button next to a player avatar to invite the player to join the current party.
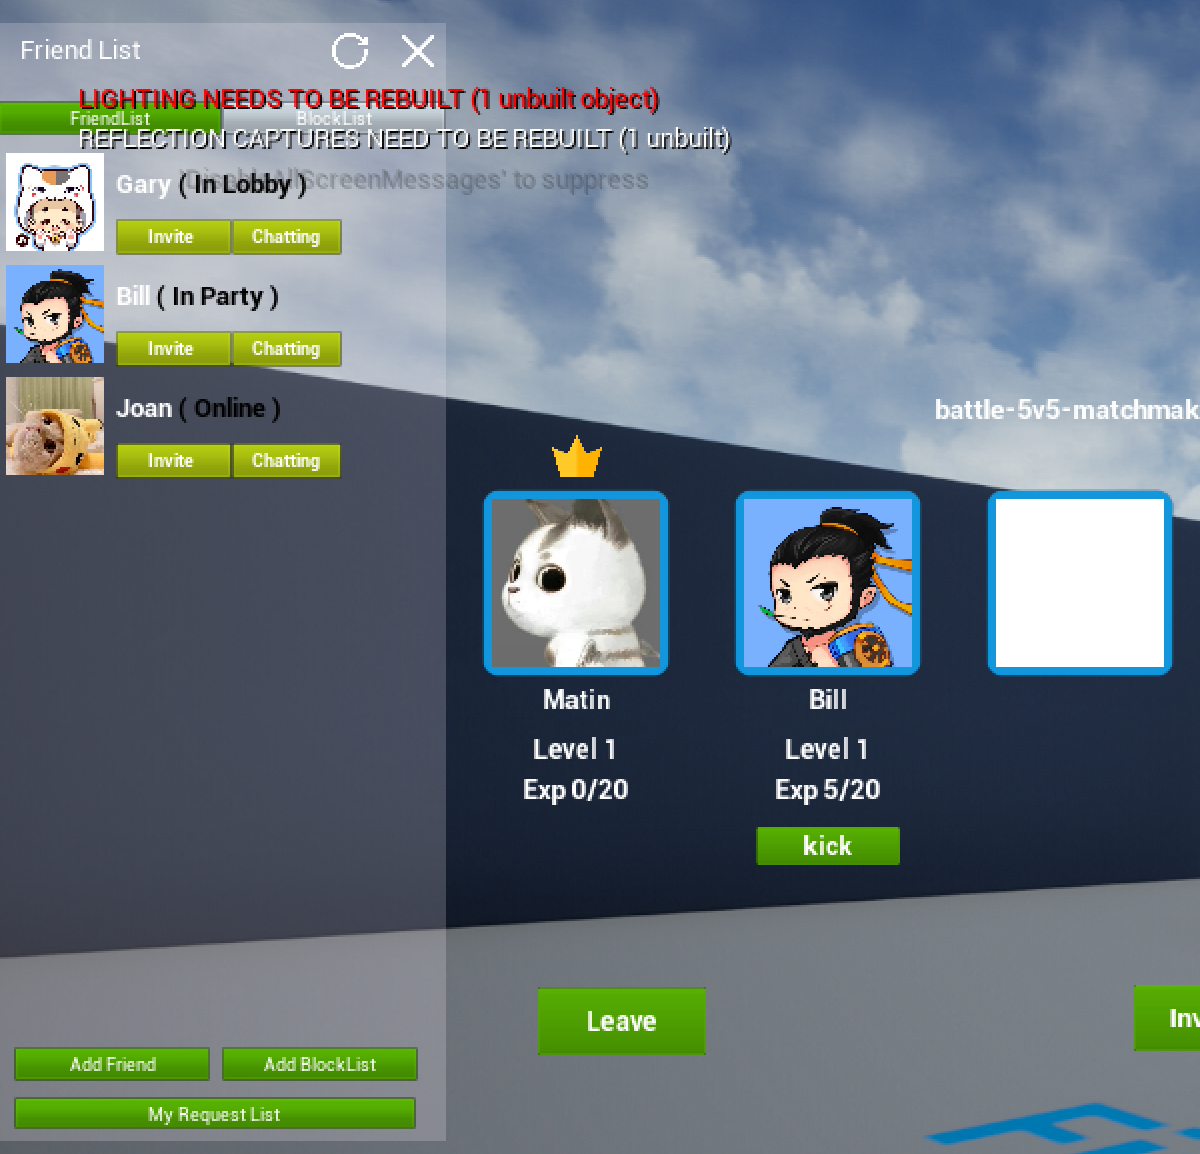
Click the FriendList or BlockList tab to switch between the lists.
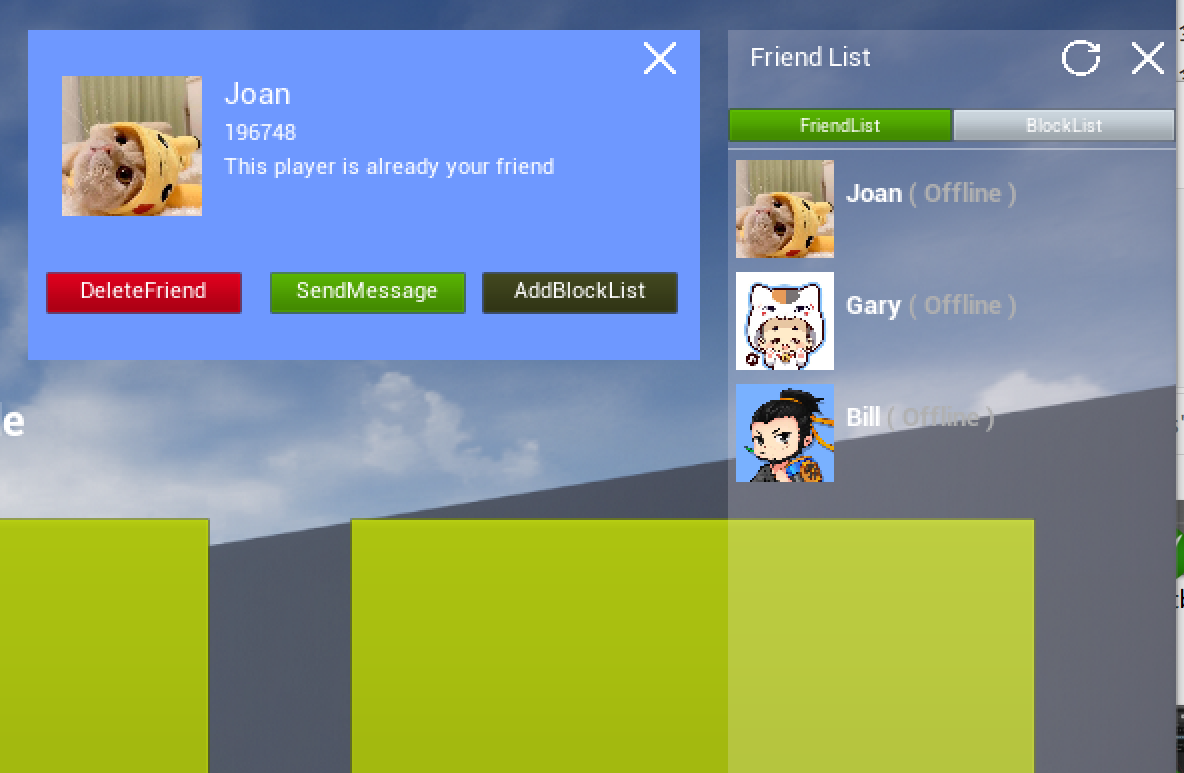
In addition, the player can click a player avatar in a list to display more information on the friend.
Friend Presence
Currently, there are six kinds of player status in Sample, and it will refresh the player status every two seconds.
- Online
- In Party
- In LobbyLobby
- In Matchmaking
- In Battle
- Offline
Friend Request List
Click My Request List to open the friend request list.
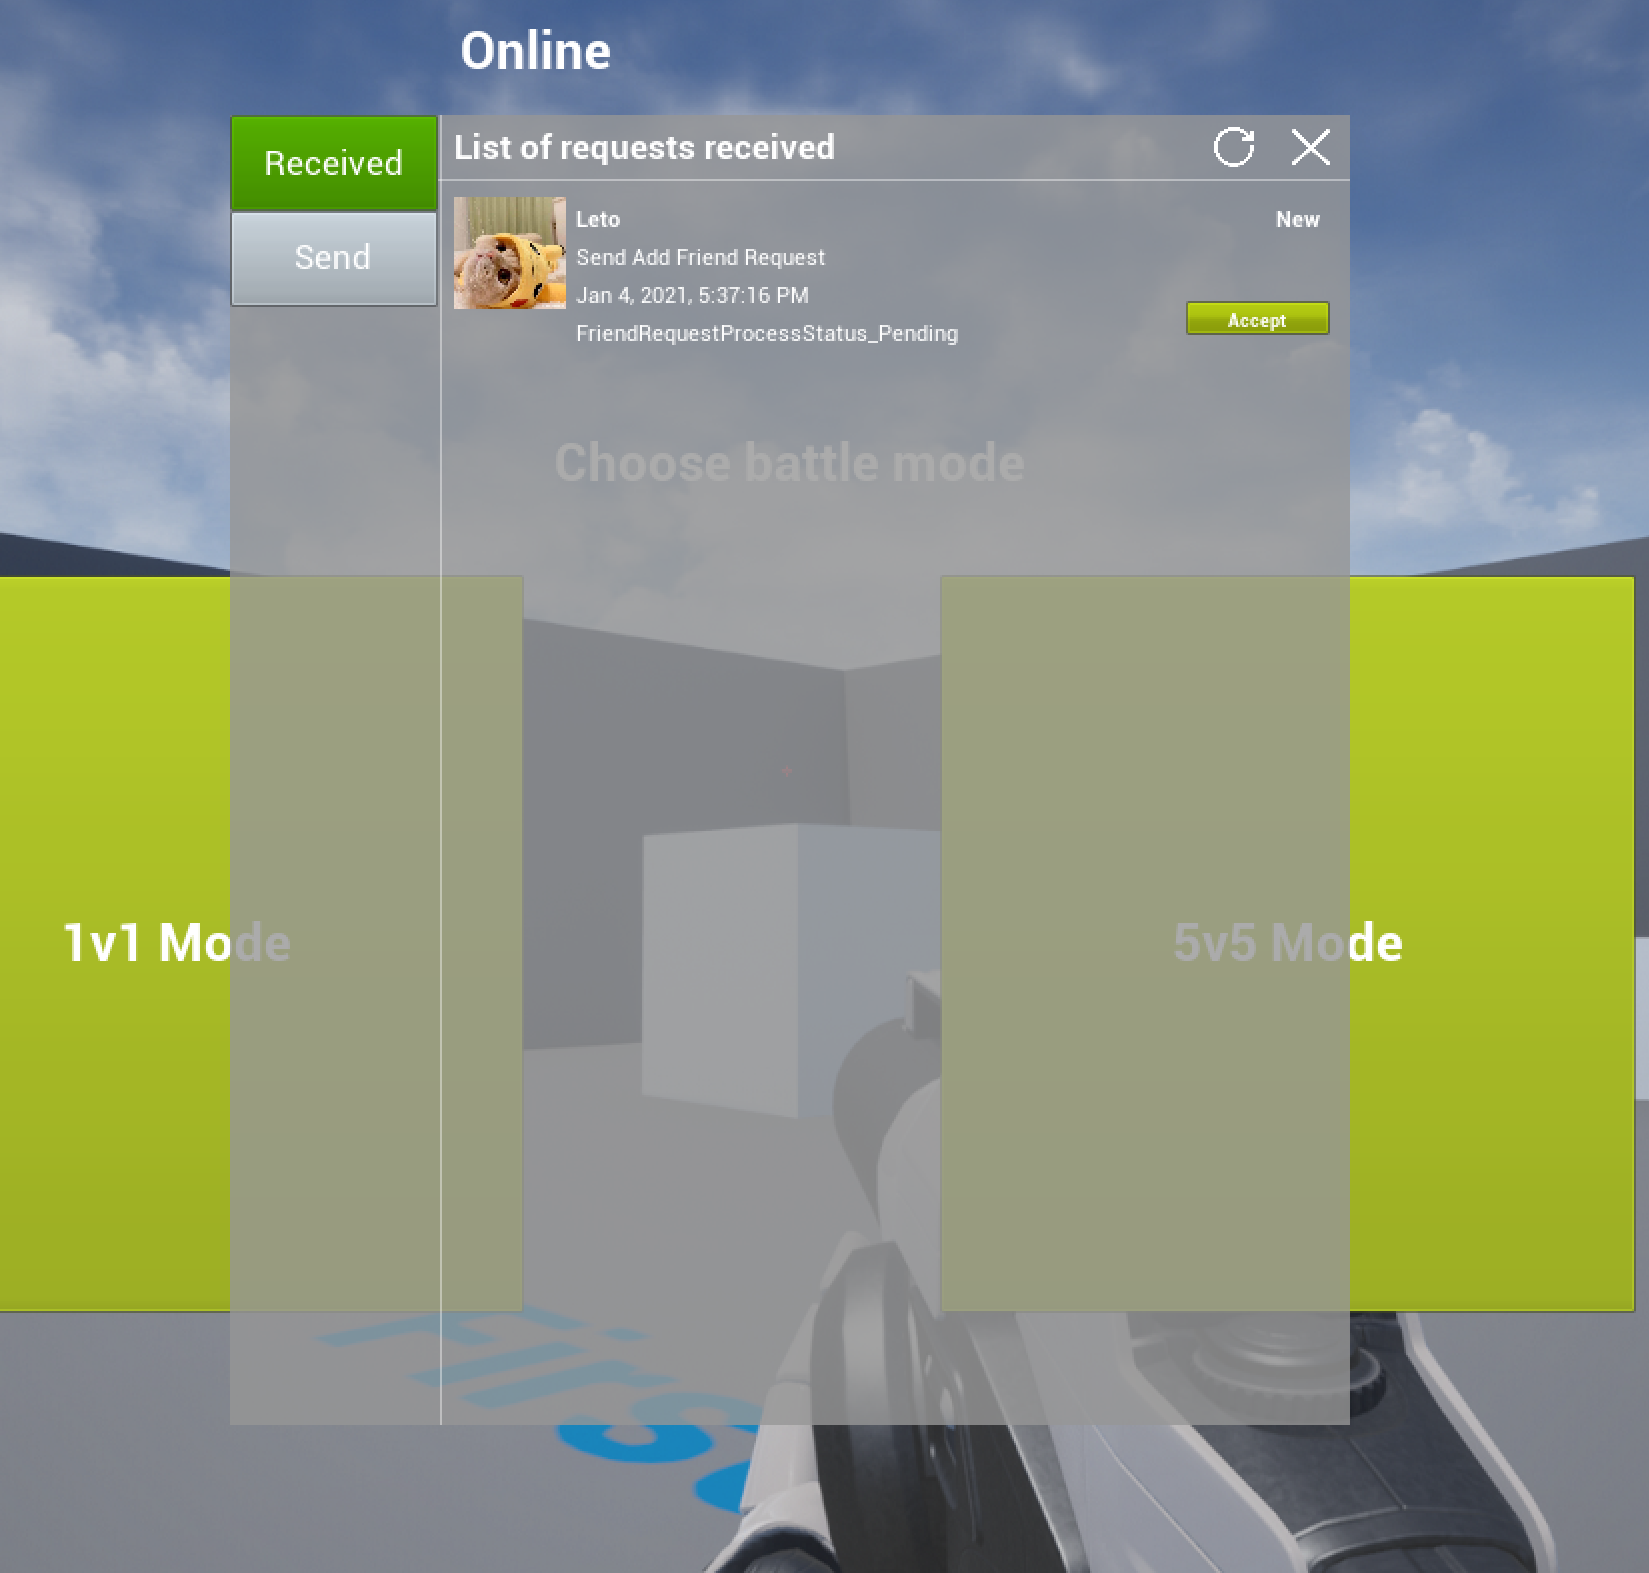
- Received: Displays the friend requests received. If the status of request is *pending*, an Accept button will be shown.
- Sent: Sent requests.
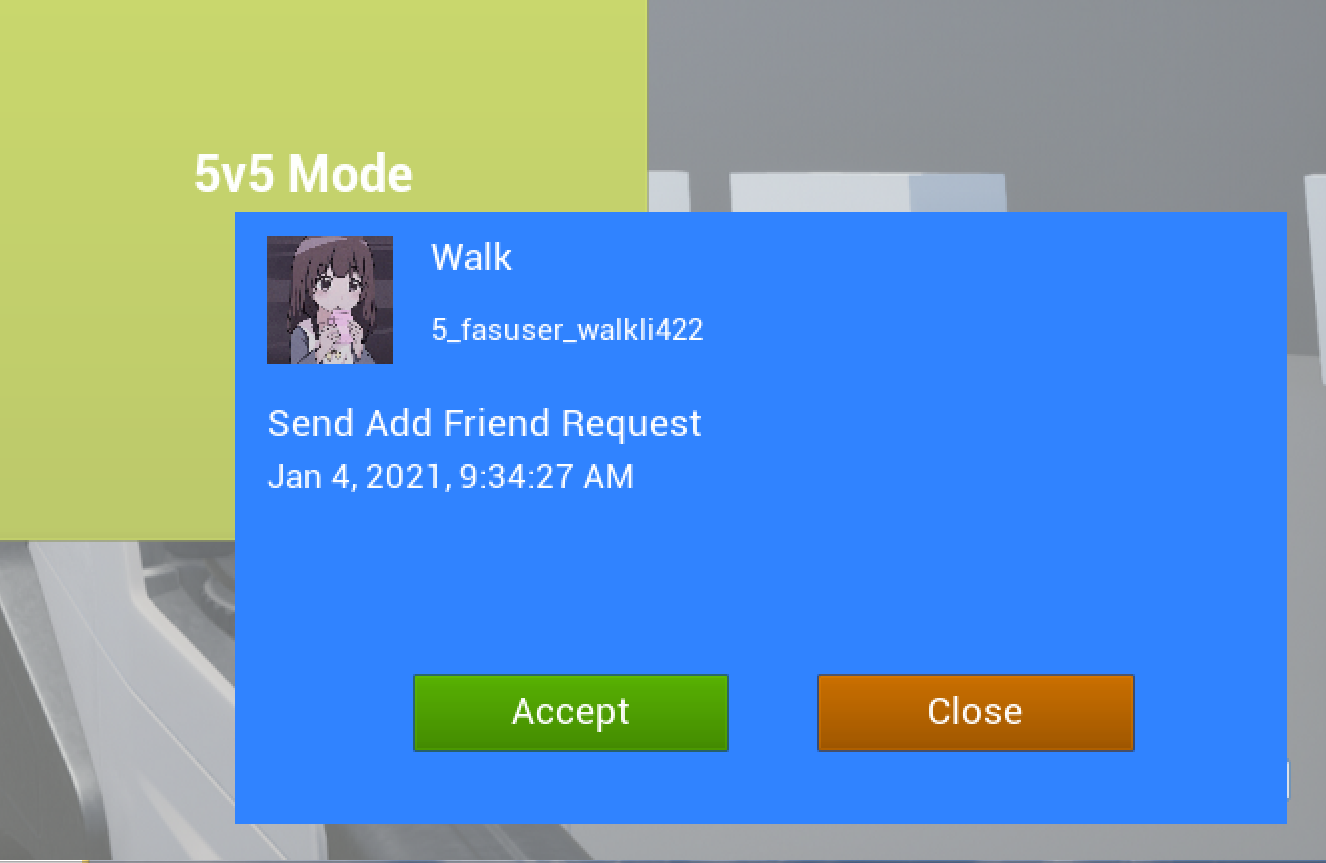
Friend Request Page
A player will be shown the friend request page when friend requests are received from other players.
3.1.4 LobbyPage
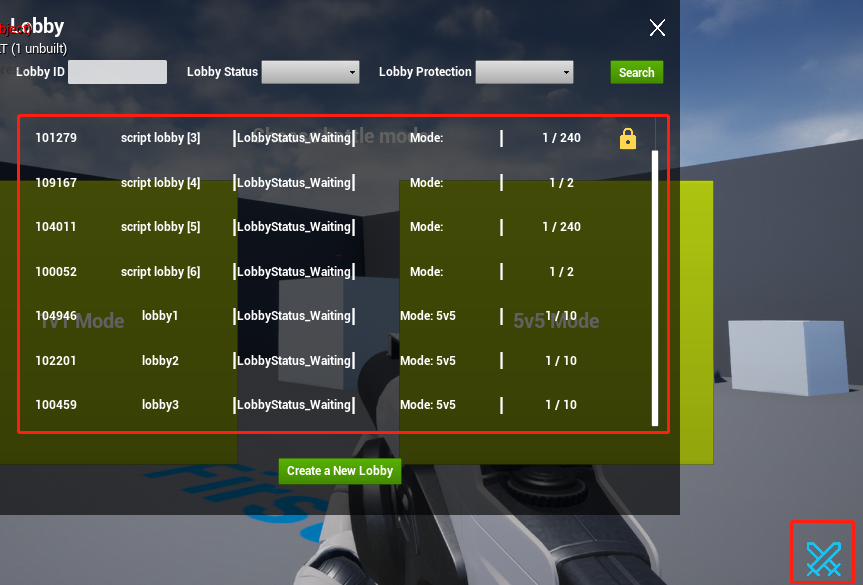
Click on the sword icon in the lower right corner of MainPage to open LobbyPage. You will see a list of active lobbies. Double-click a lobby to join it or click Create a New Lobby to create a new lobby.
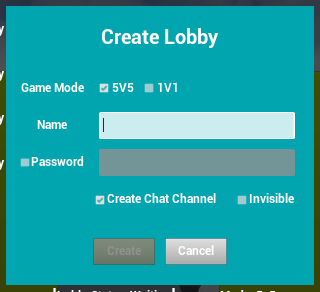
Create a Lobby
- Game Mode determines how many teams there are in a battle and the capacity of each team.
- The Name of the lobby.
- The Password of the lobby. A password is optional.
- Choose whether to Create a Chat Channel.
- Select Invisible to create a lobby that will not appear in the lobbies list.
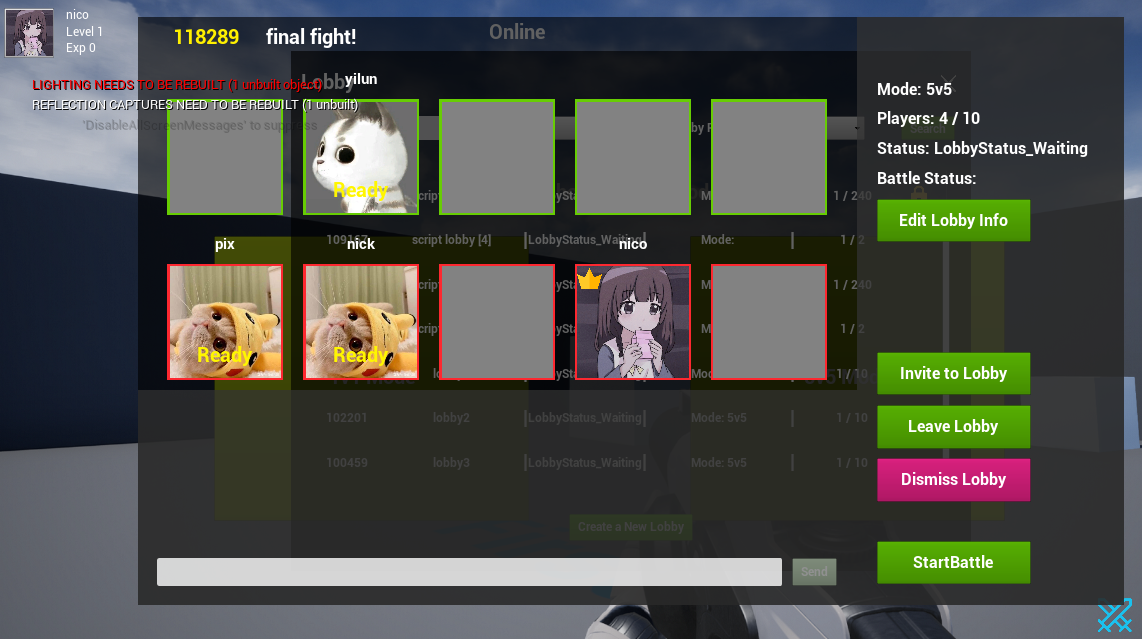
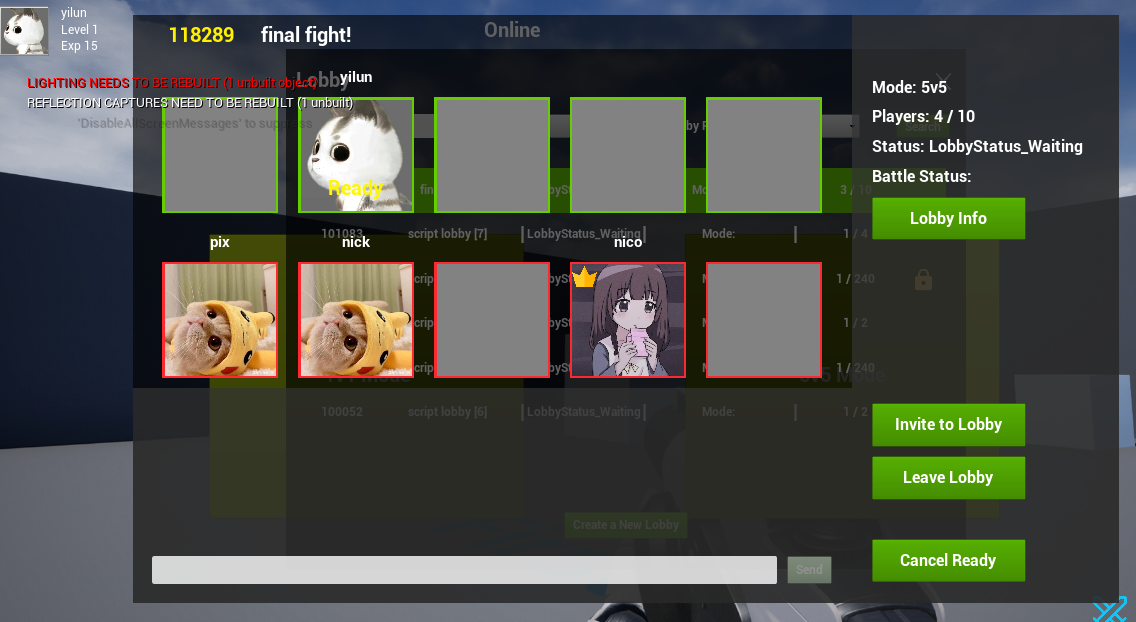
Lobby
- Double-click any empty slot to add the player to this slot.
- Double-click any player‘s avatar to show the owner's menu, which has the options to kick the player out or set them as the lobby owner.
- Click
Invite to Lobbyto invite a player to the lobby. - Click
Leave Lobbyto leave the lobby. - Click
Dismiss Lobbyto dismiss the lobby. This option is visible for the lobby owner only. - Click
Edit Lobby Infoto edit the lobby info: the lobby name, password and whether the lobby is visible or not. - Ready: The ready button is visible to lobby members. Using a typical implementation of the lobby service, the sample disables the lobby owner's
StartBattlebutton until all lobby members are Ready. - StartBattle: The
StartBattlebutton is available when all lobby members are Ready. Click it to start a battle with lobby members.
Lobby owner's screen:
Lobby member's screen:
3.1.5 PartyPage
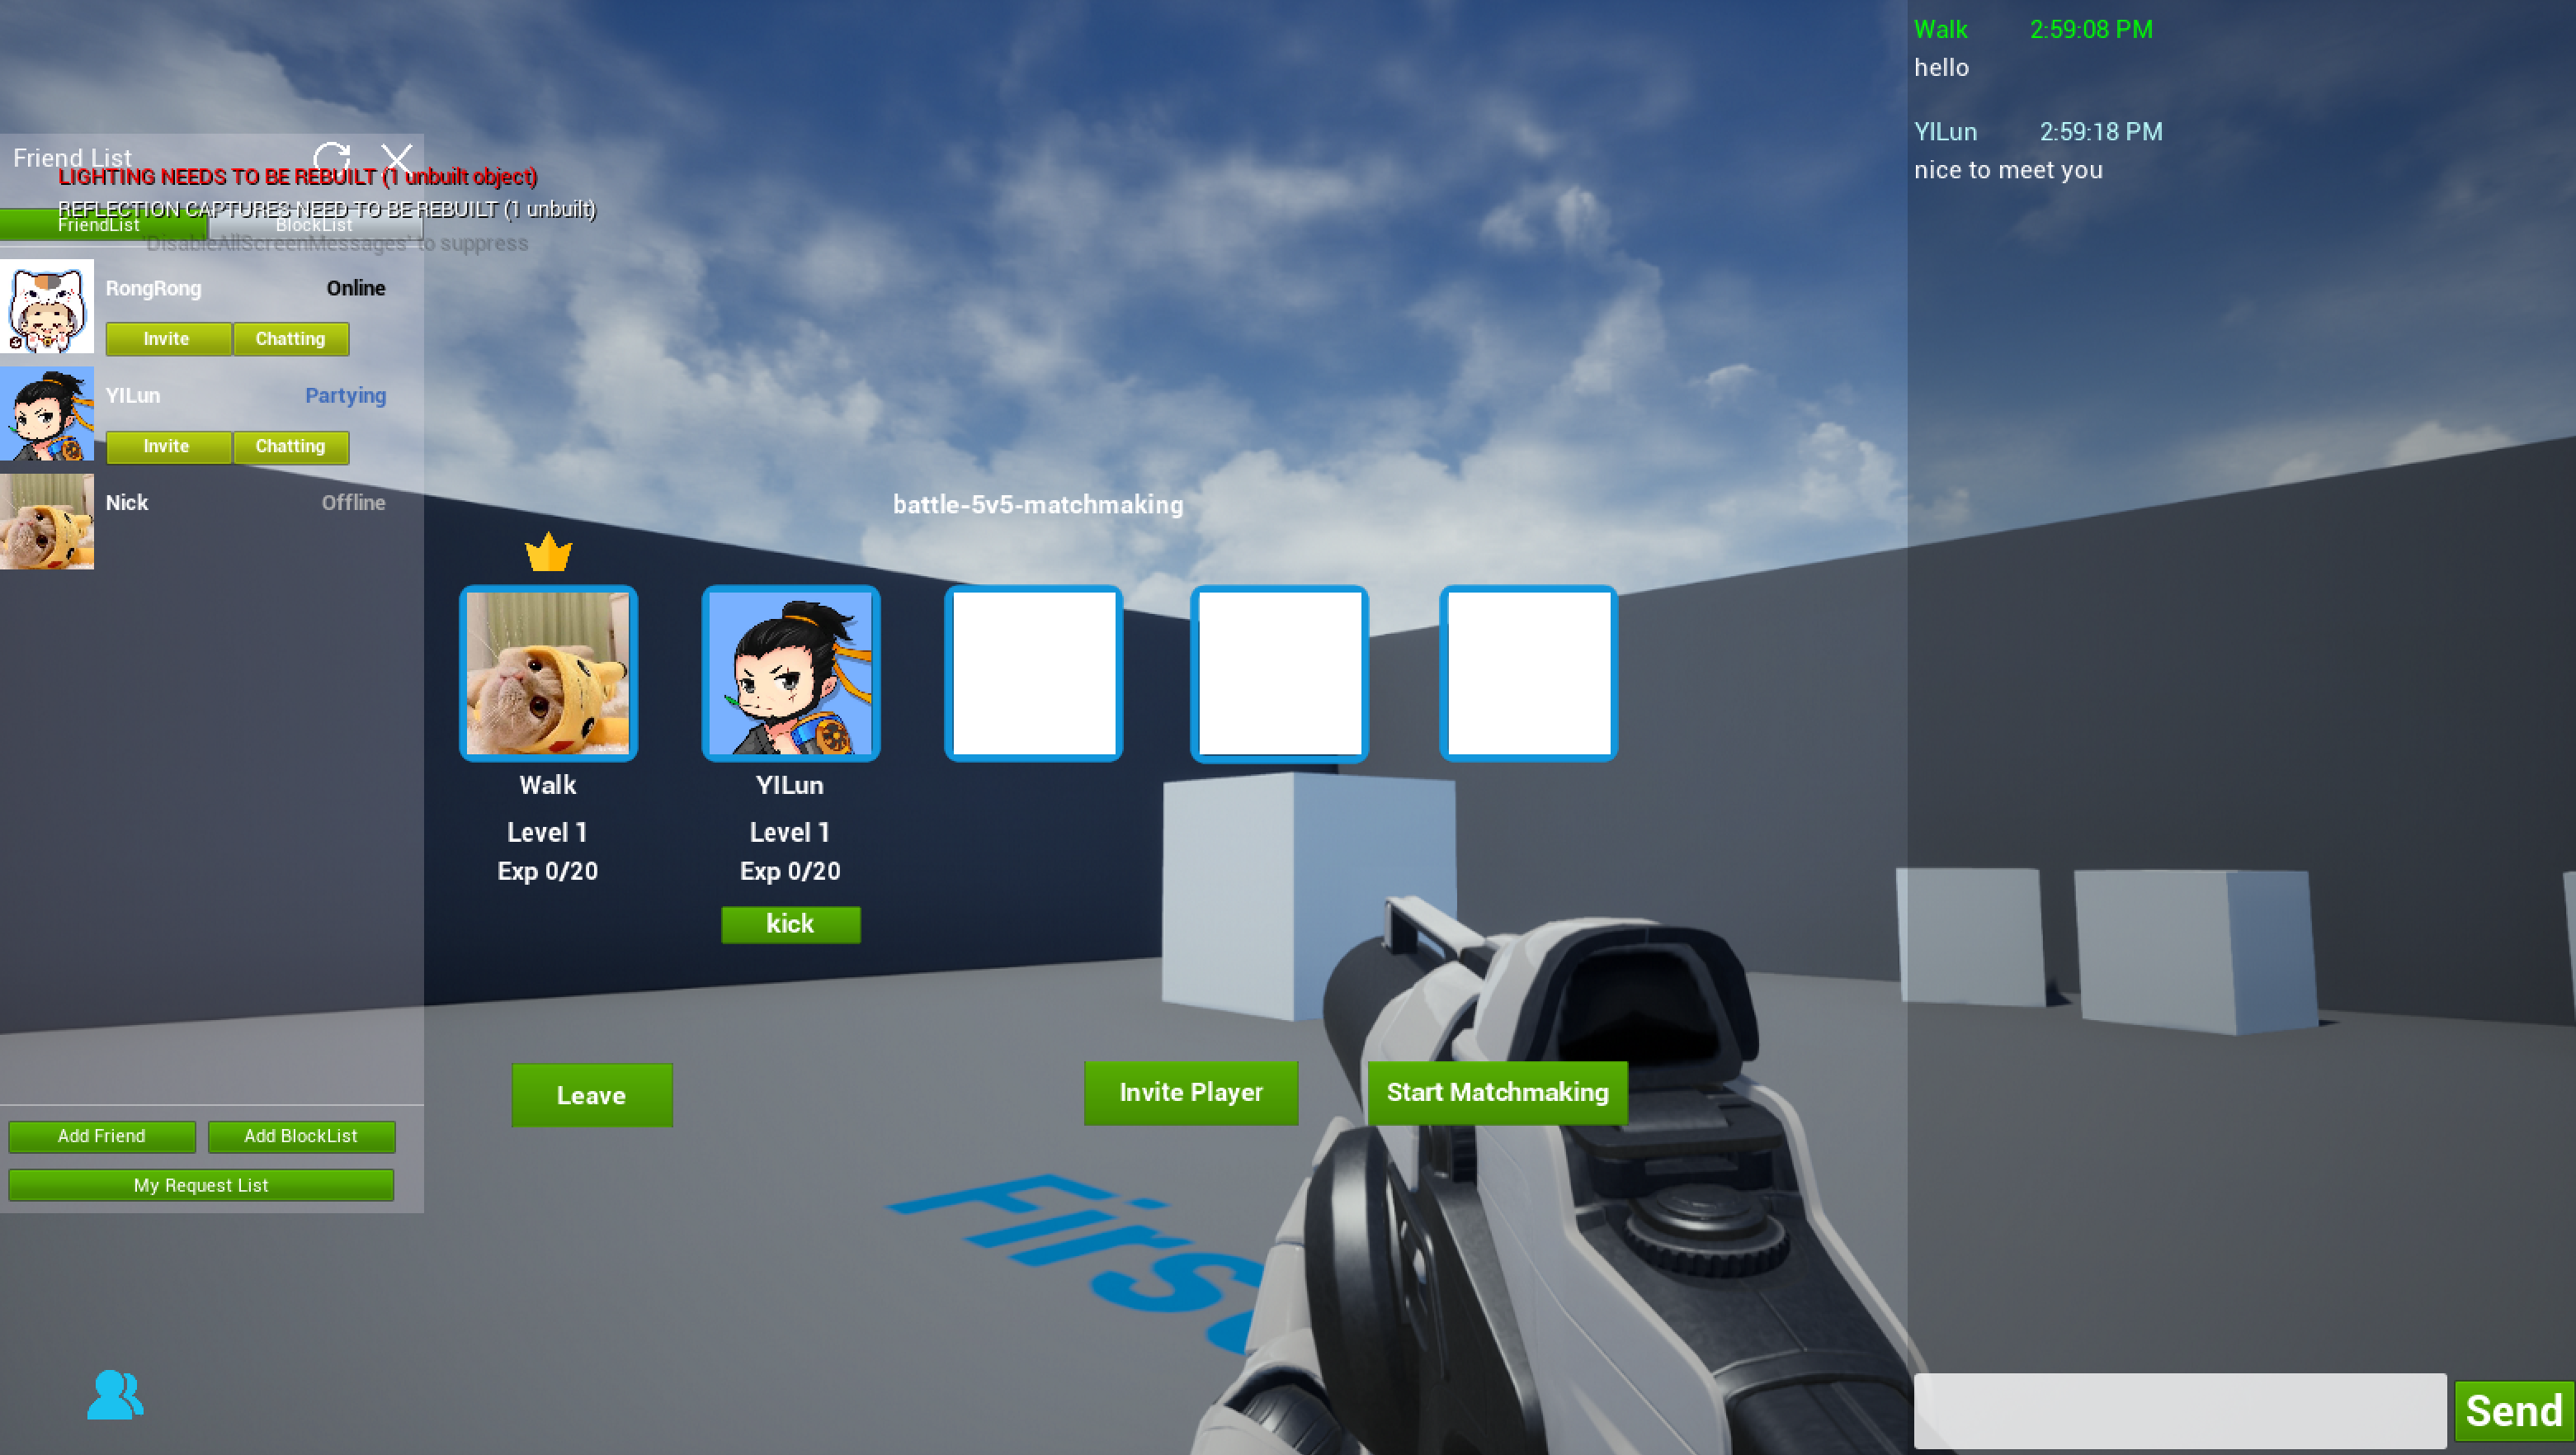
Leader Logo: An icon displayed above the leader’s avatar.
Kick Out Player: A Kick button is displayed under each player. Clicking it will kick the player out of the party.
Invite Player: Click the "Invite Player" button and enter a valid player ID to send an invitation request.
Leave Party: Click the "Leave" button to leave the party. If the player is the leader, the leader role will be automatically transferred to another member.
Start Matchmaking : Click the "Start Matchmaking" button to start matchmaking along with all the players in the party.
Party Record: A list of player records is displayed on the right to quickly invite players.
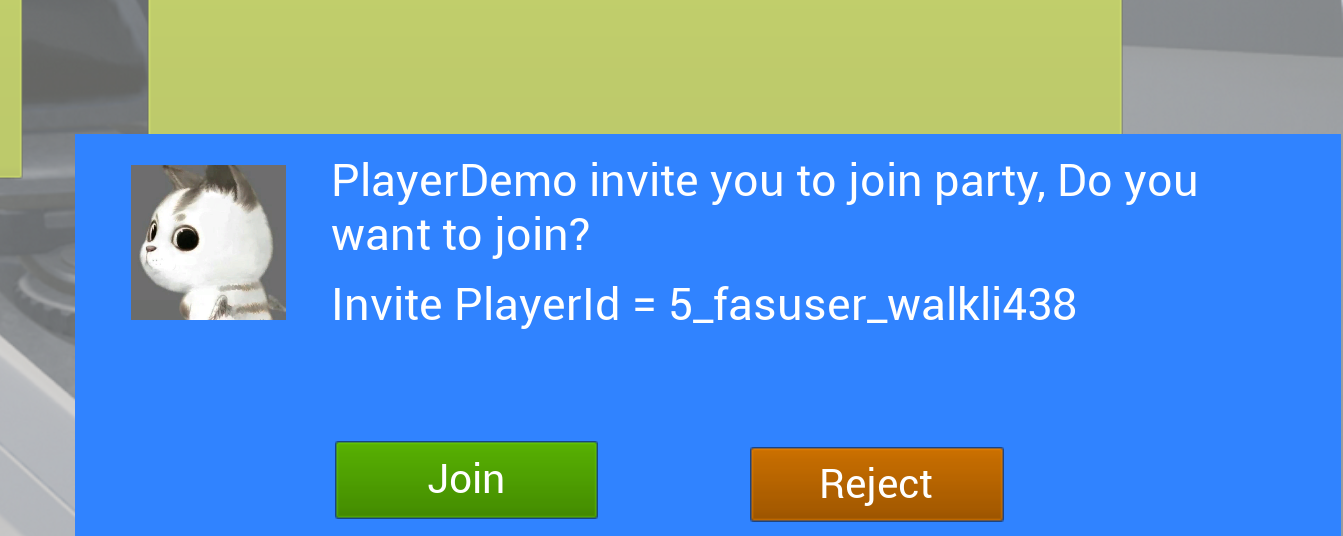
3.1.6 Invite a Player
The invitee will receive an invitation notification and may choose to join or reject the invitation.
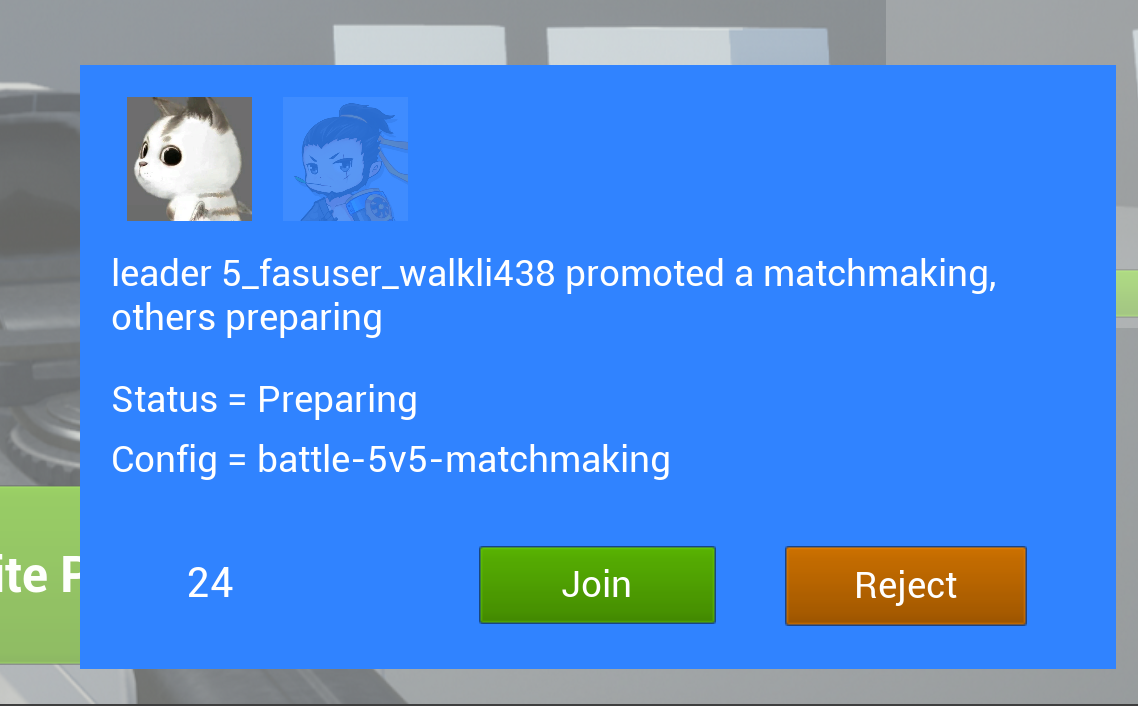
3.1.7 Start Matchmaking
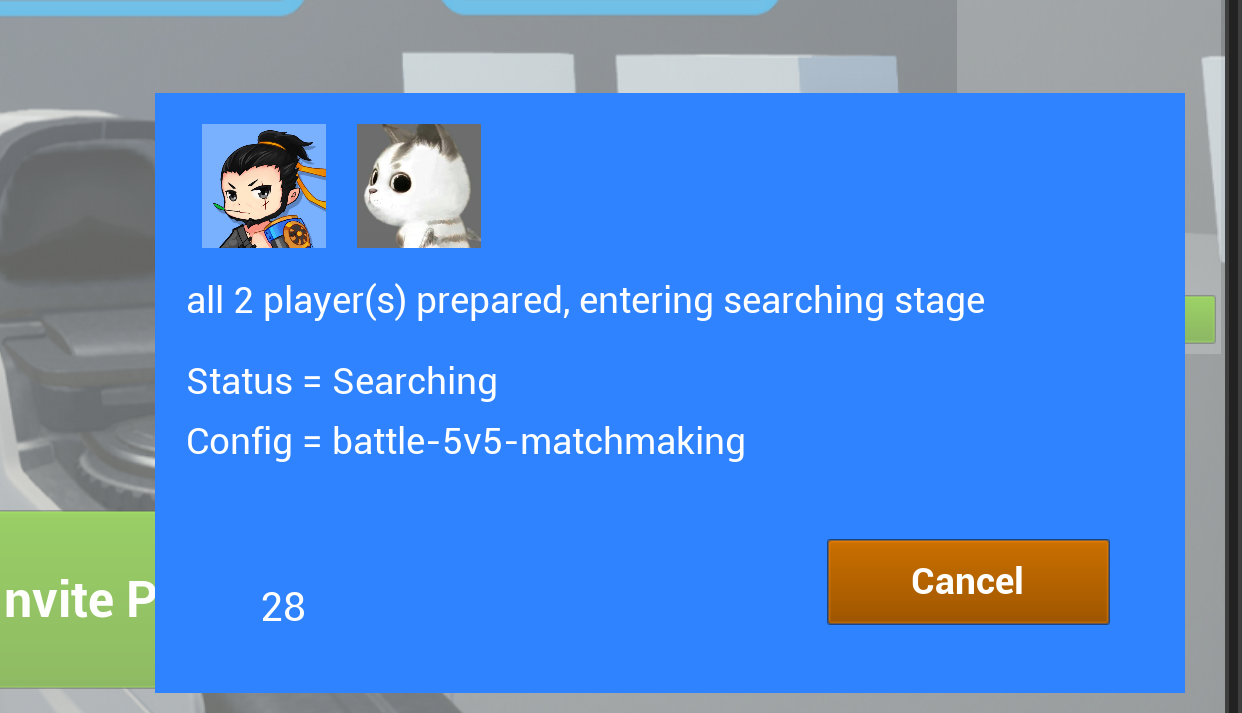
After matchmaking is started, all the players in the party will receive an invitation notification. The matchmaking begins after everyone accepts the matchmaking invitation.
3.2 Battle Server
Pingpong Shooter supports two teams in one battle session. The members of the two teams compete with each other until only one team survives, and the battle is over.
3.2.1 Spawn Point
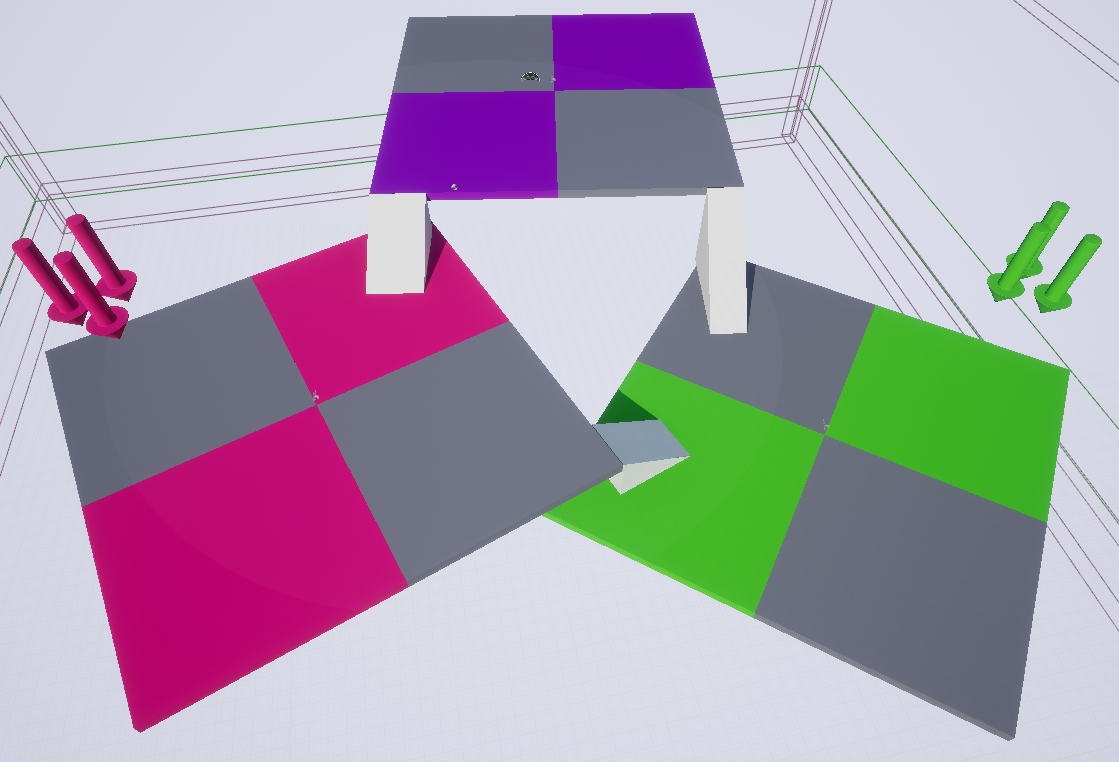
Pingpong Shooter has three platforms for team members. Members in the red team are spawned on the red platform, and so on.
3.2.2 Battle Start
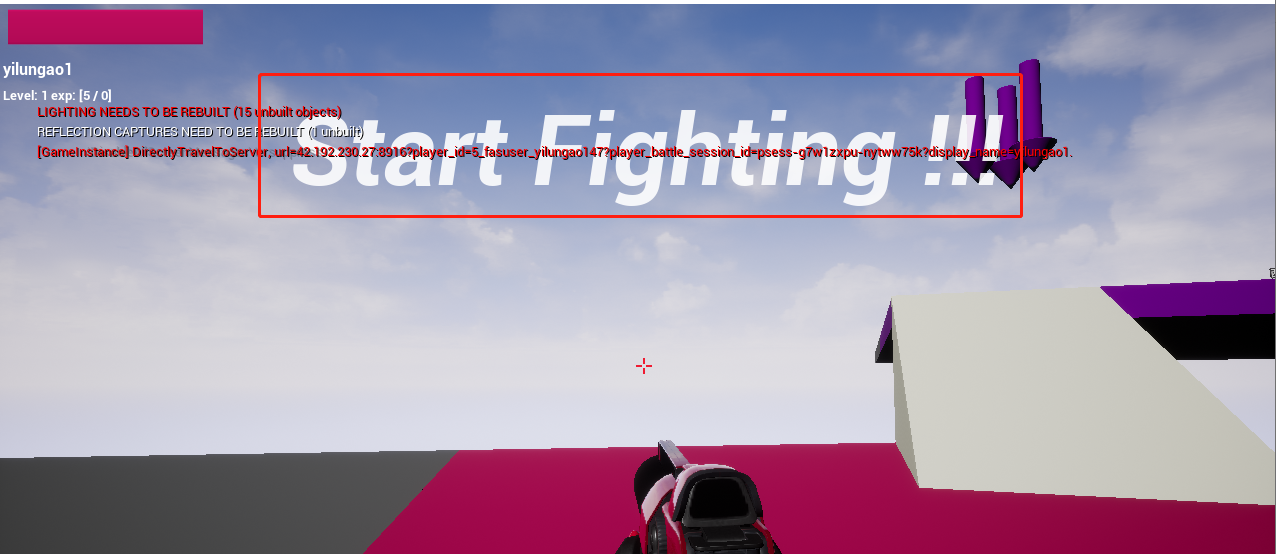
Each player gets a Start Fighting !!! prompt when all players have entered the battle level.
3.2.3 Numerical design
Pingpong Shooter stores player attributes using Player Data.
LN() means natural logarithm
| Field | Description | Algorithm |
|---|---|---|
| level_exp | The experience needed to reach the next level | Increase level_exp by 5 when killed |
| level | Player Level | The exp needed to go from level(n-1) to level(n) is 10*2^Level | The top level is 10 |
| hit_point | Player Hit Points | HP = 10*2^LN(Level) | From 10 to 49 |
| attack_point | Player Attack Points | Attack= 4*2^LN(Level) |
Attribute value enumeration:
| level | level_exp | hit_point | attack_point |
|---|---|---|---|
| 001 | 20 | 10 | 4 |
| 002 | 40 | 16.16806672 | 6.467226689 |
| 003 | 80 | 21.41486064 | 8.565944256 |
| 4 | 160 | 26.14063815 | 10.45625526 |
| 5 | 320 | 30.5132936 | 12.20531744 |
| 6 | 640 | 34.62368957 | 13.84947583 |
| 7 | 1280 | 38.52807616 | 15.41123046 |
| 8 | 2560 | 42.26435818 | 16.90574327 |
| 9 | 5120 | 45.85962562 | 18.34385025 |
| 10 | - | 49.33409668 | 19.73363867 |
3.2.4 Battle Chat
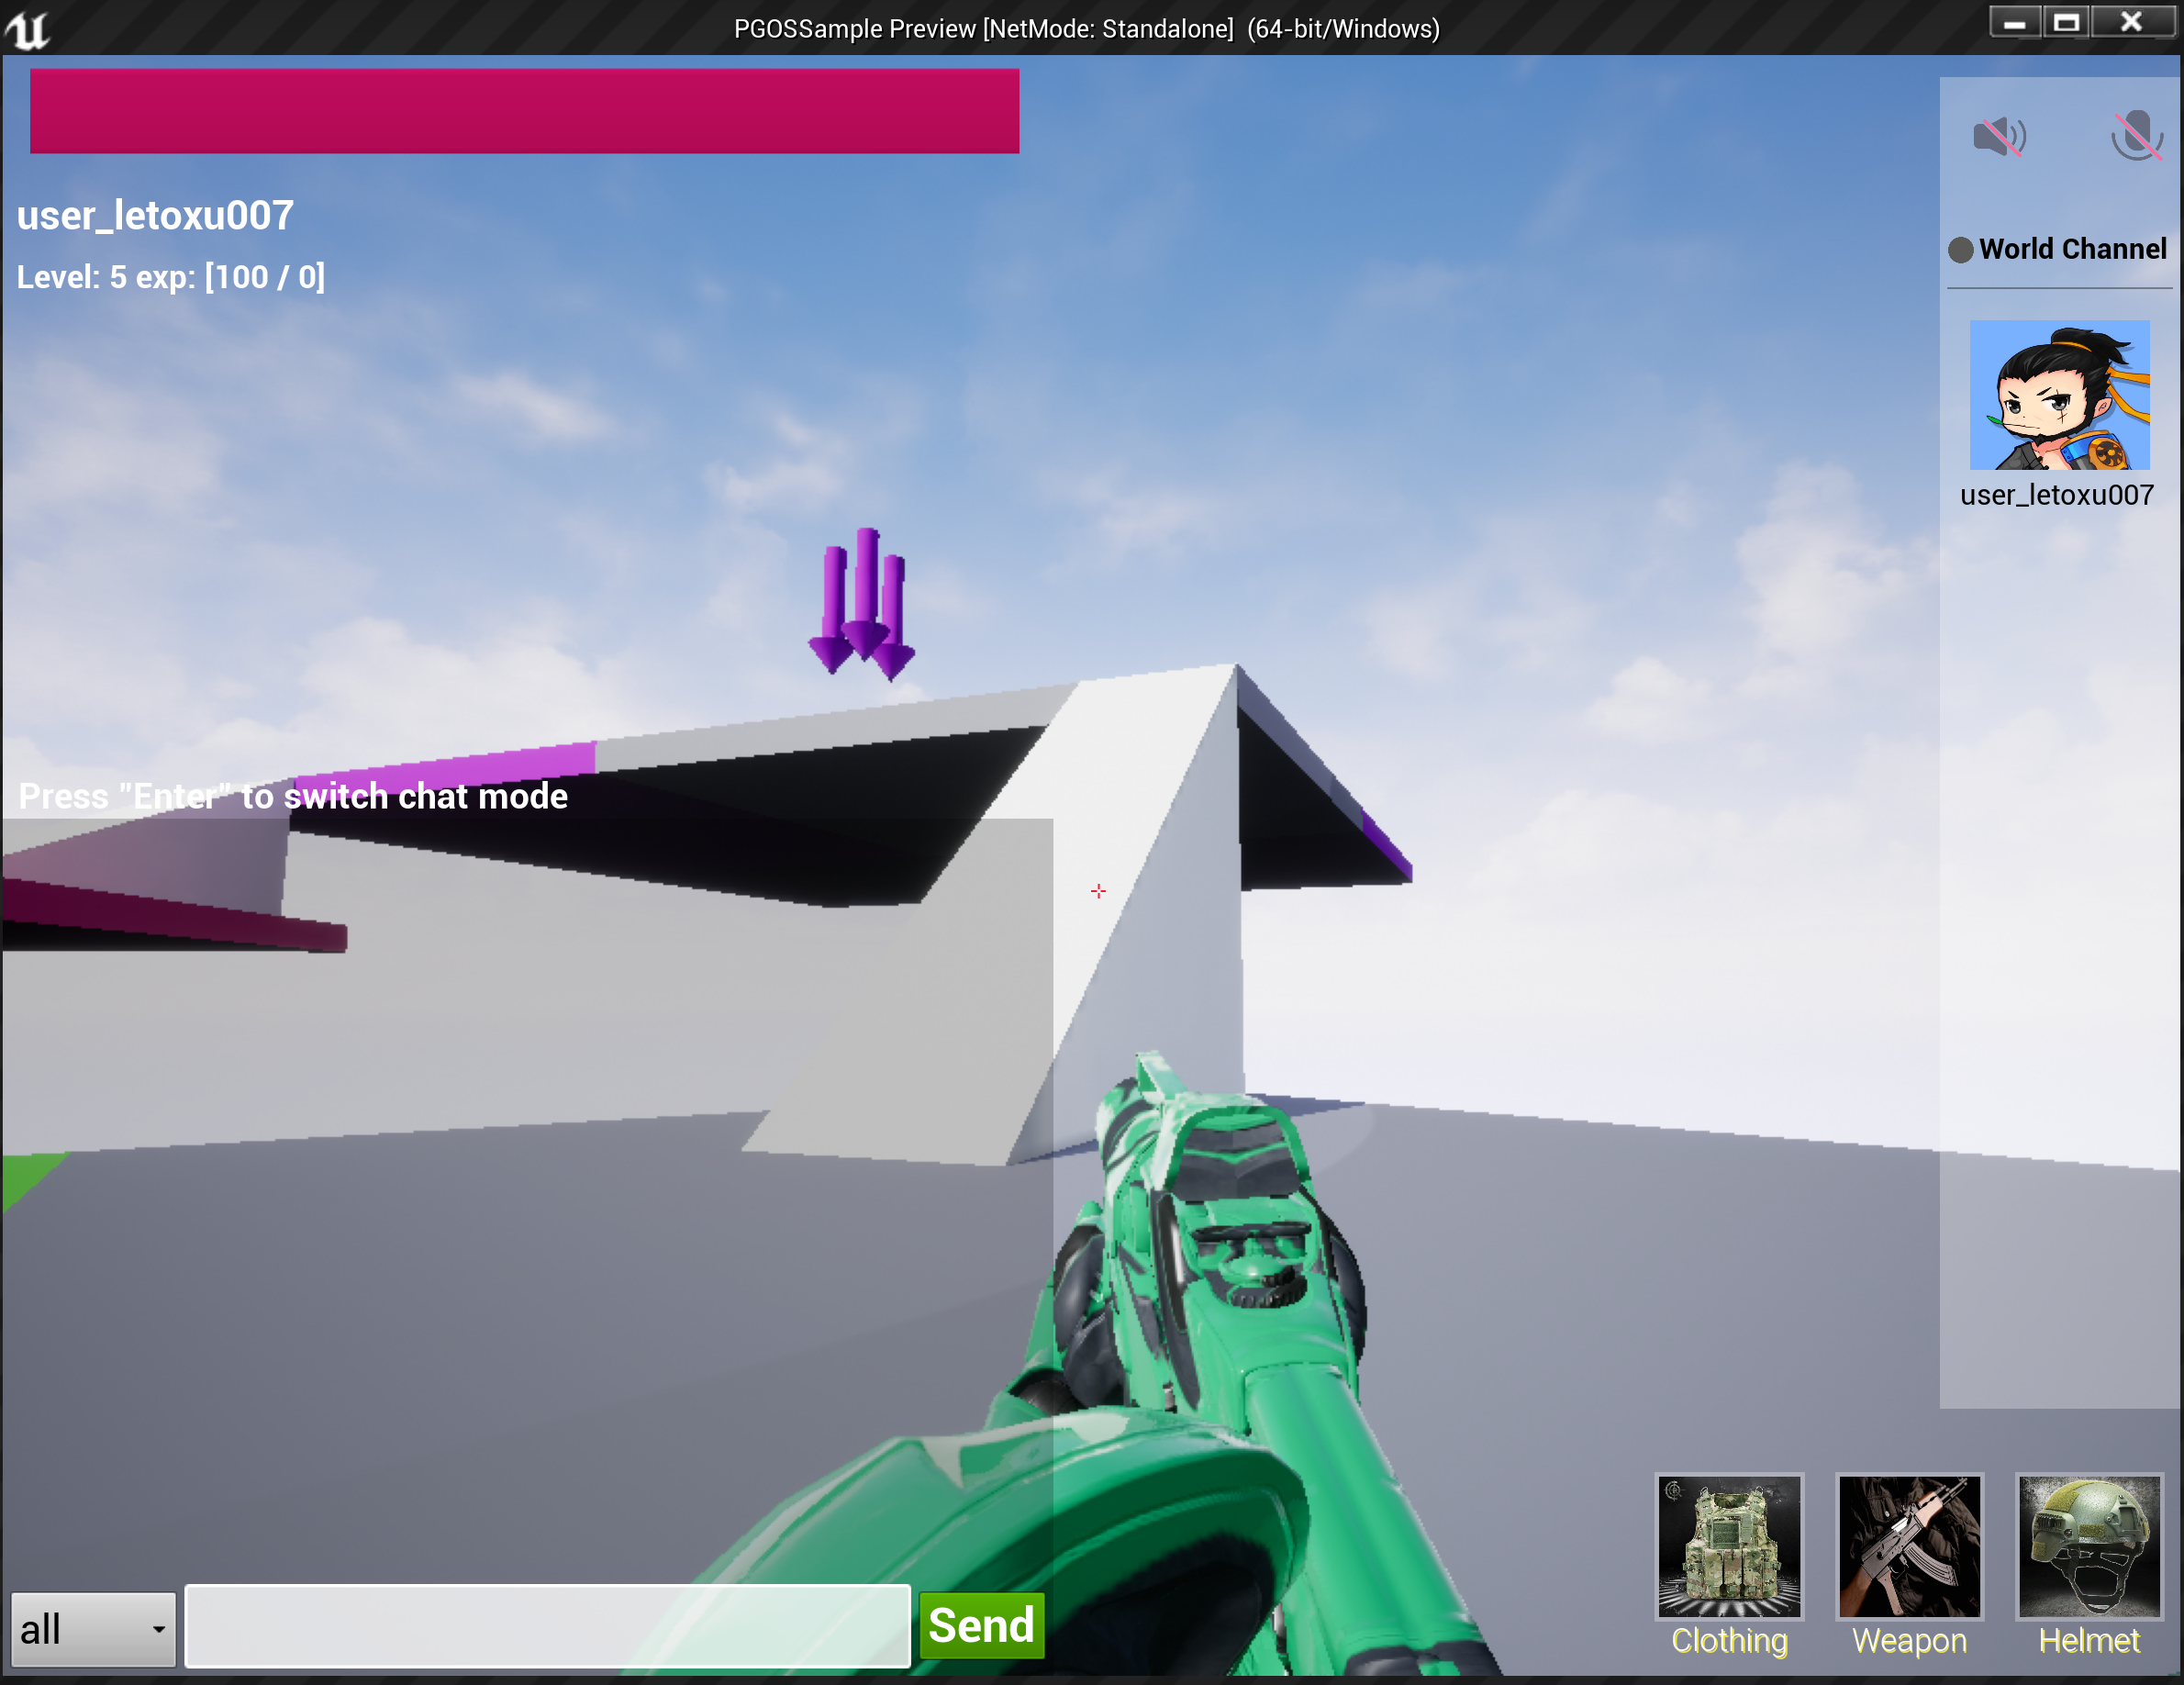
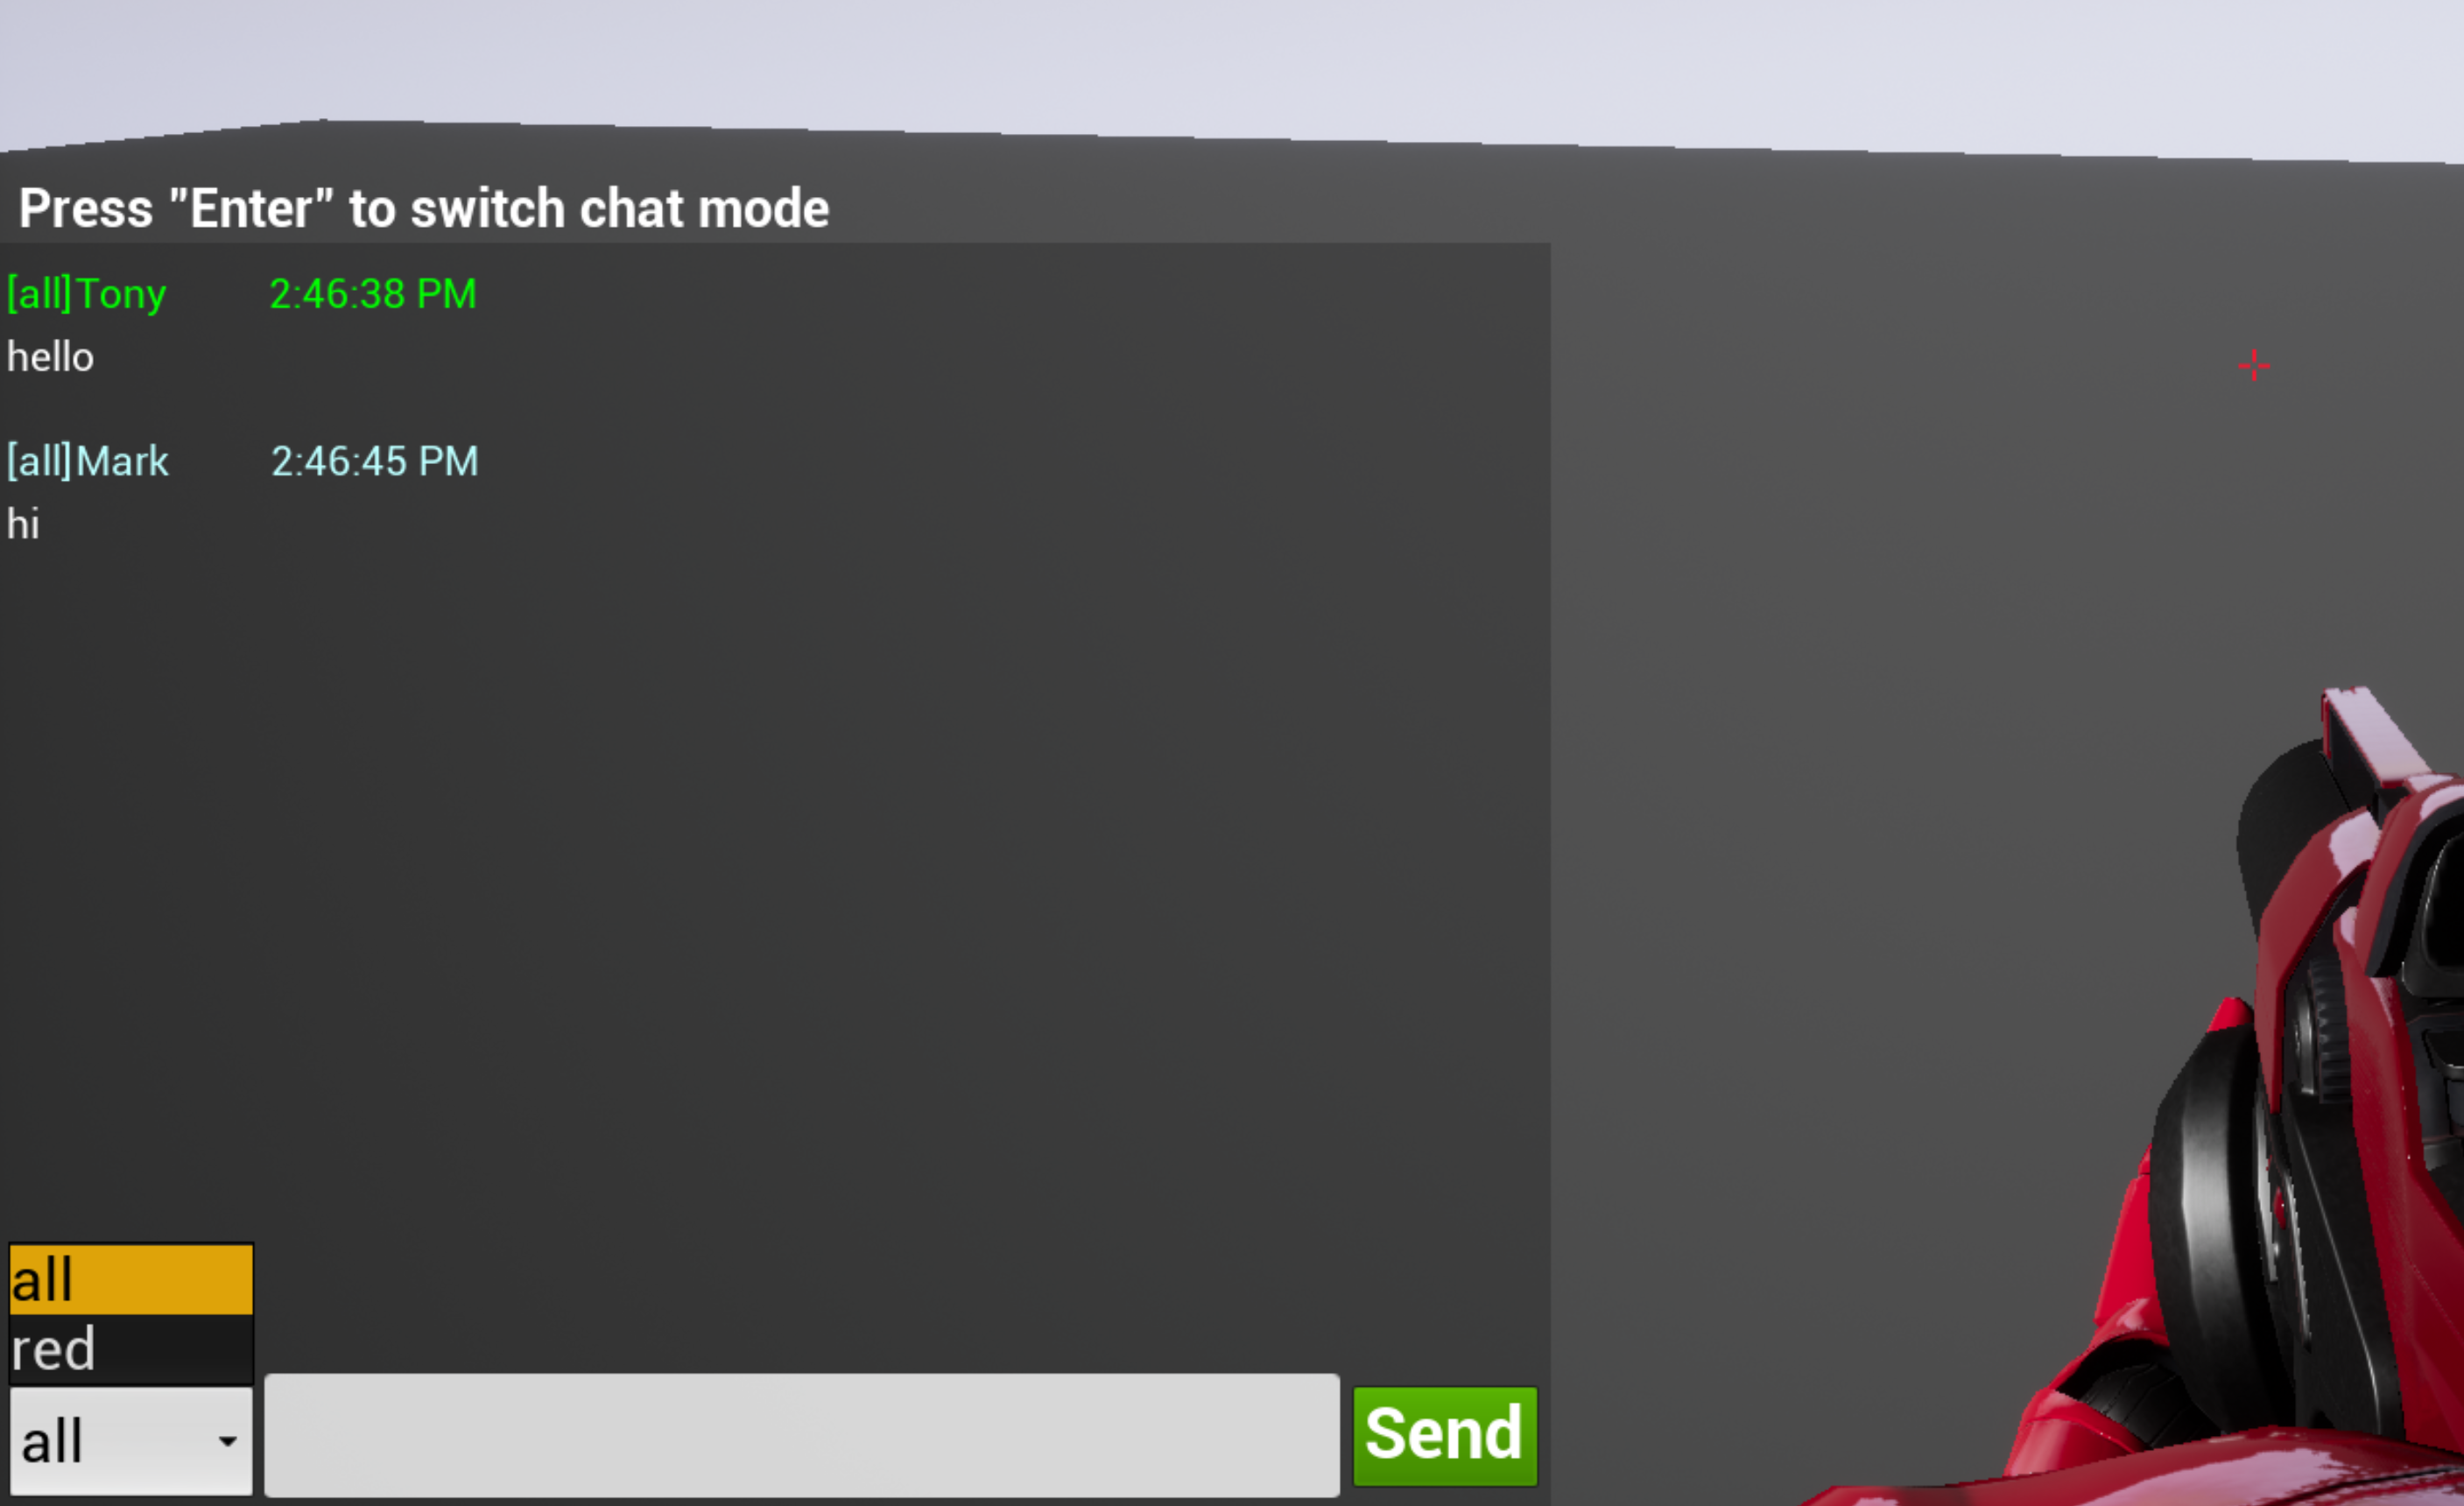
If you want to chat with other players in a battle, press the "Enter" key to enter the chat as shown below.
There is a chat dialog box in the lower left corner. There are two chat channels: "all" and "red".
- all: All players in the battle will receive messages sent in this channel.
- red: This channel is for team members in the battle. Messages sent in this channel will only be received by members of your team.
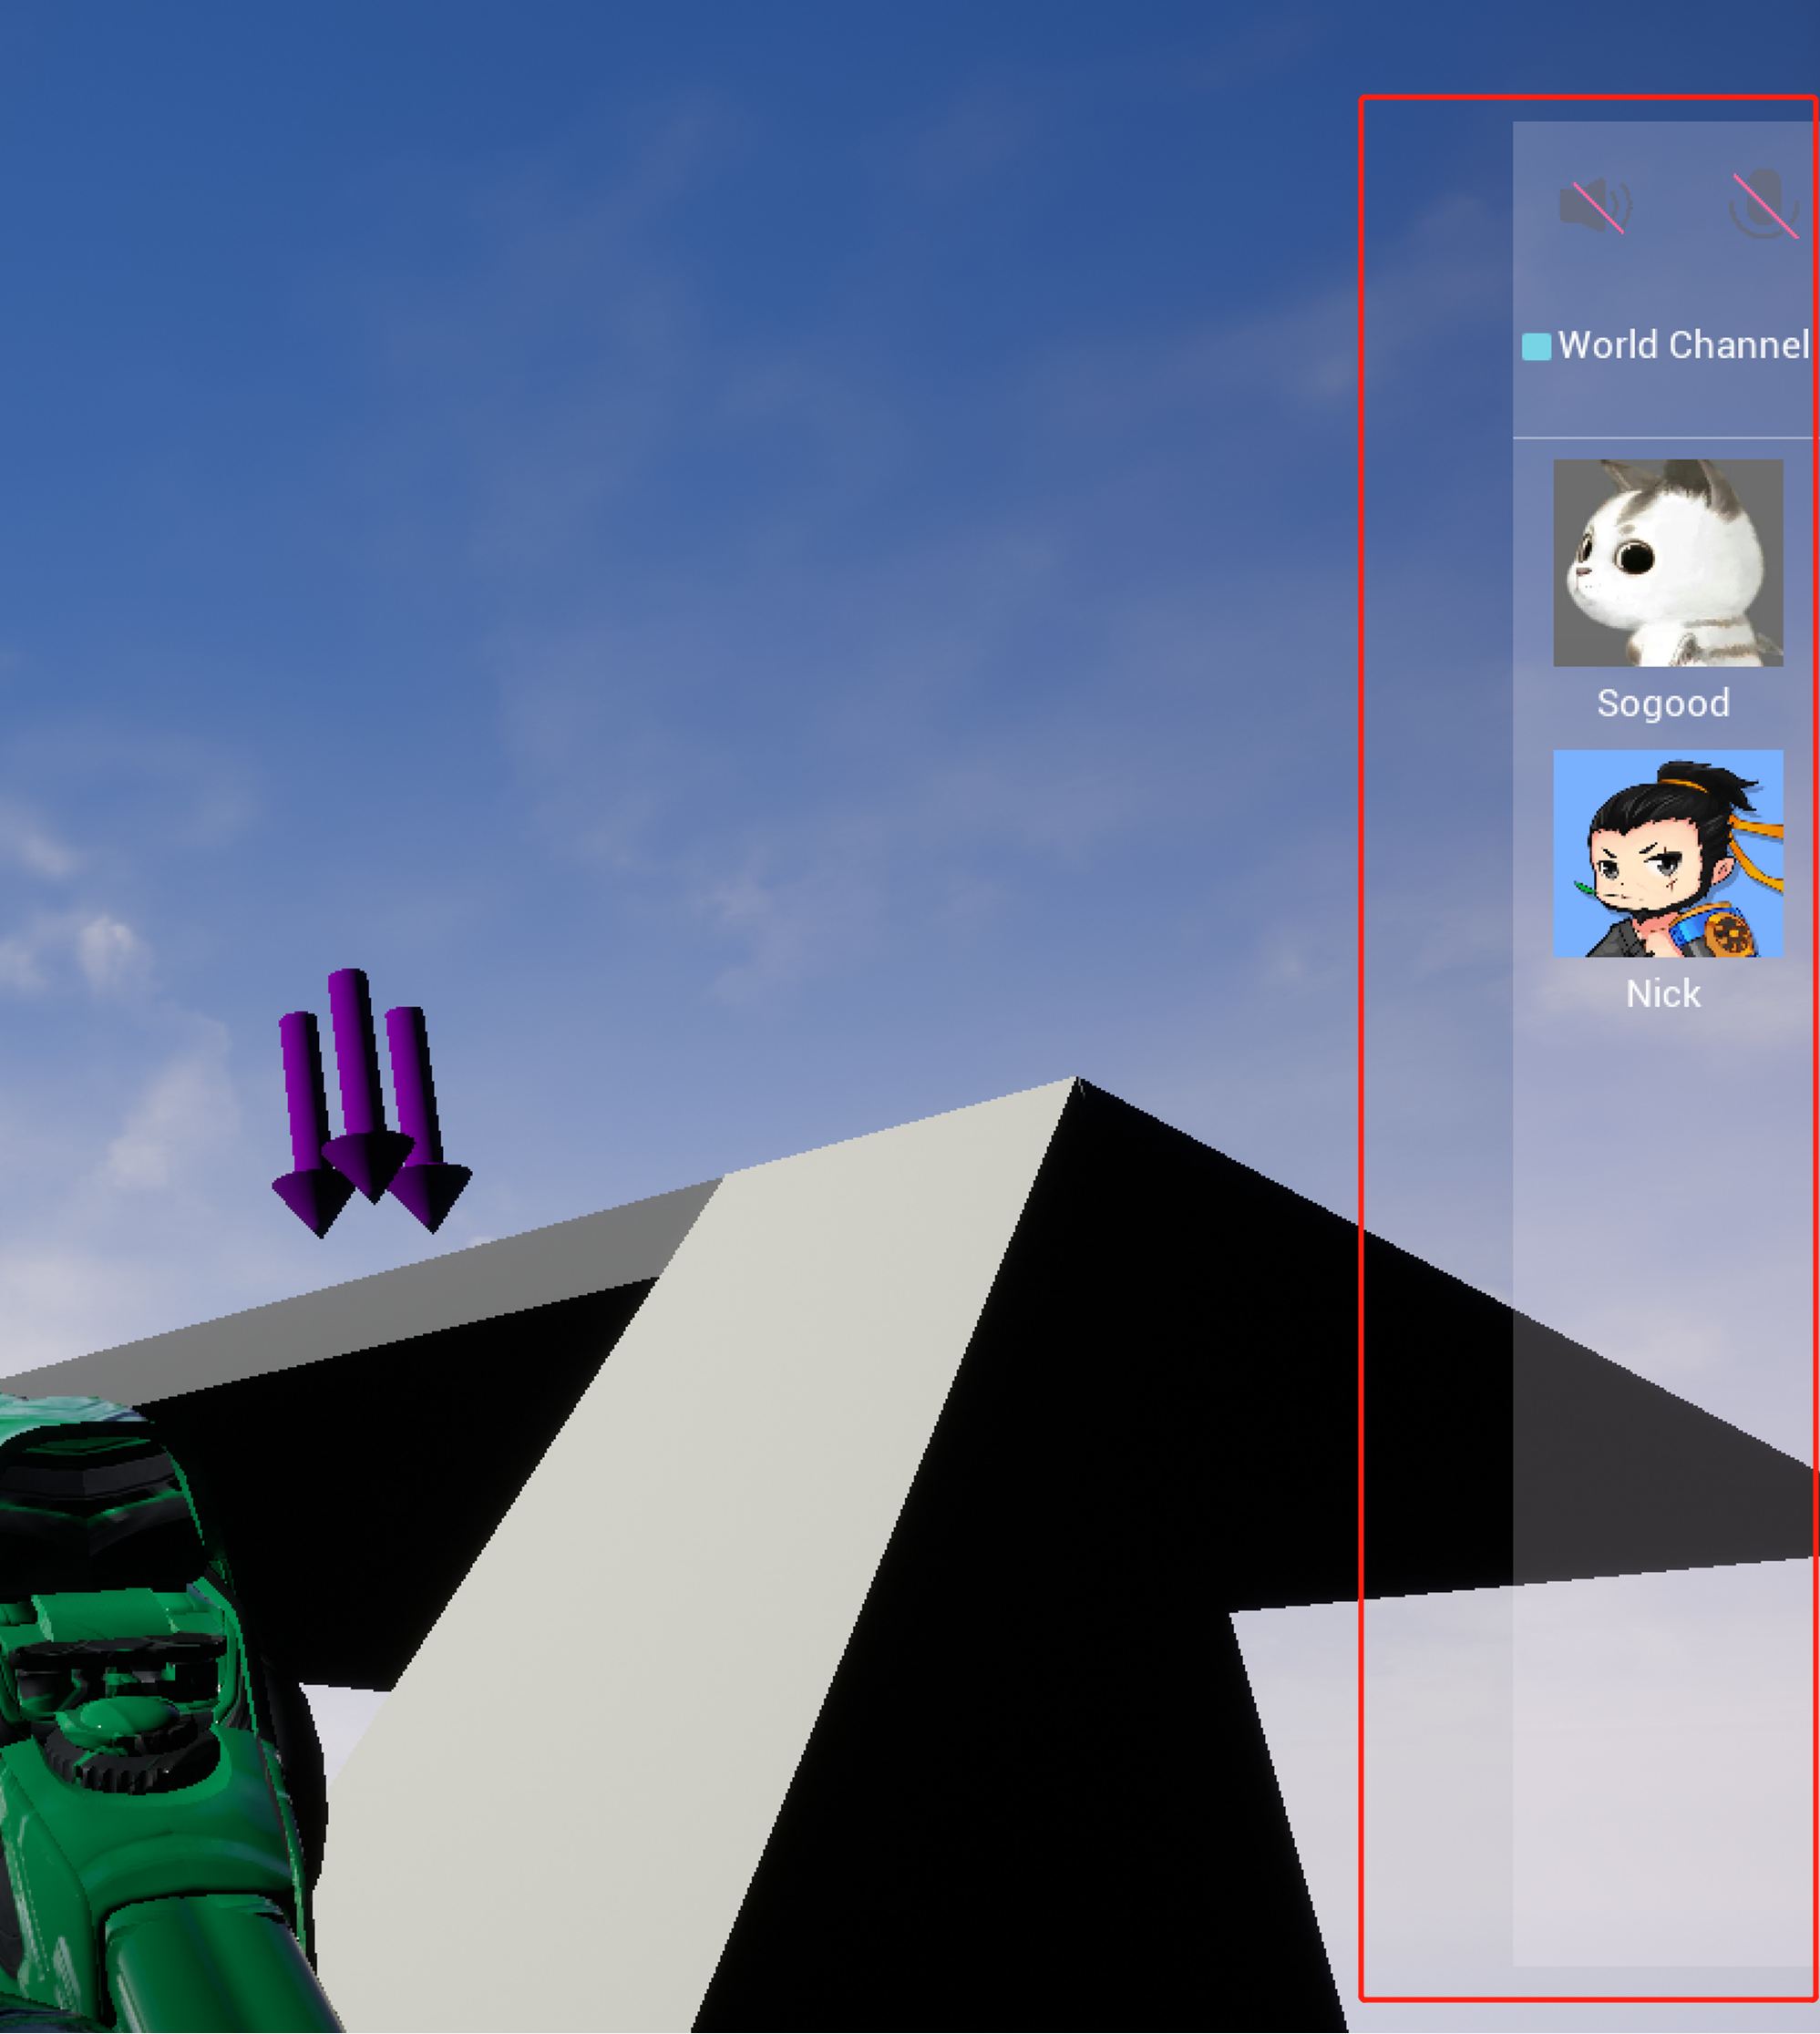
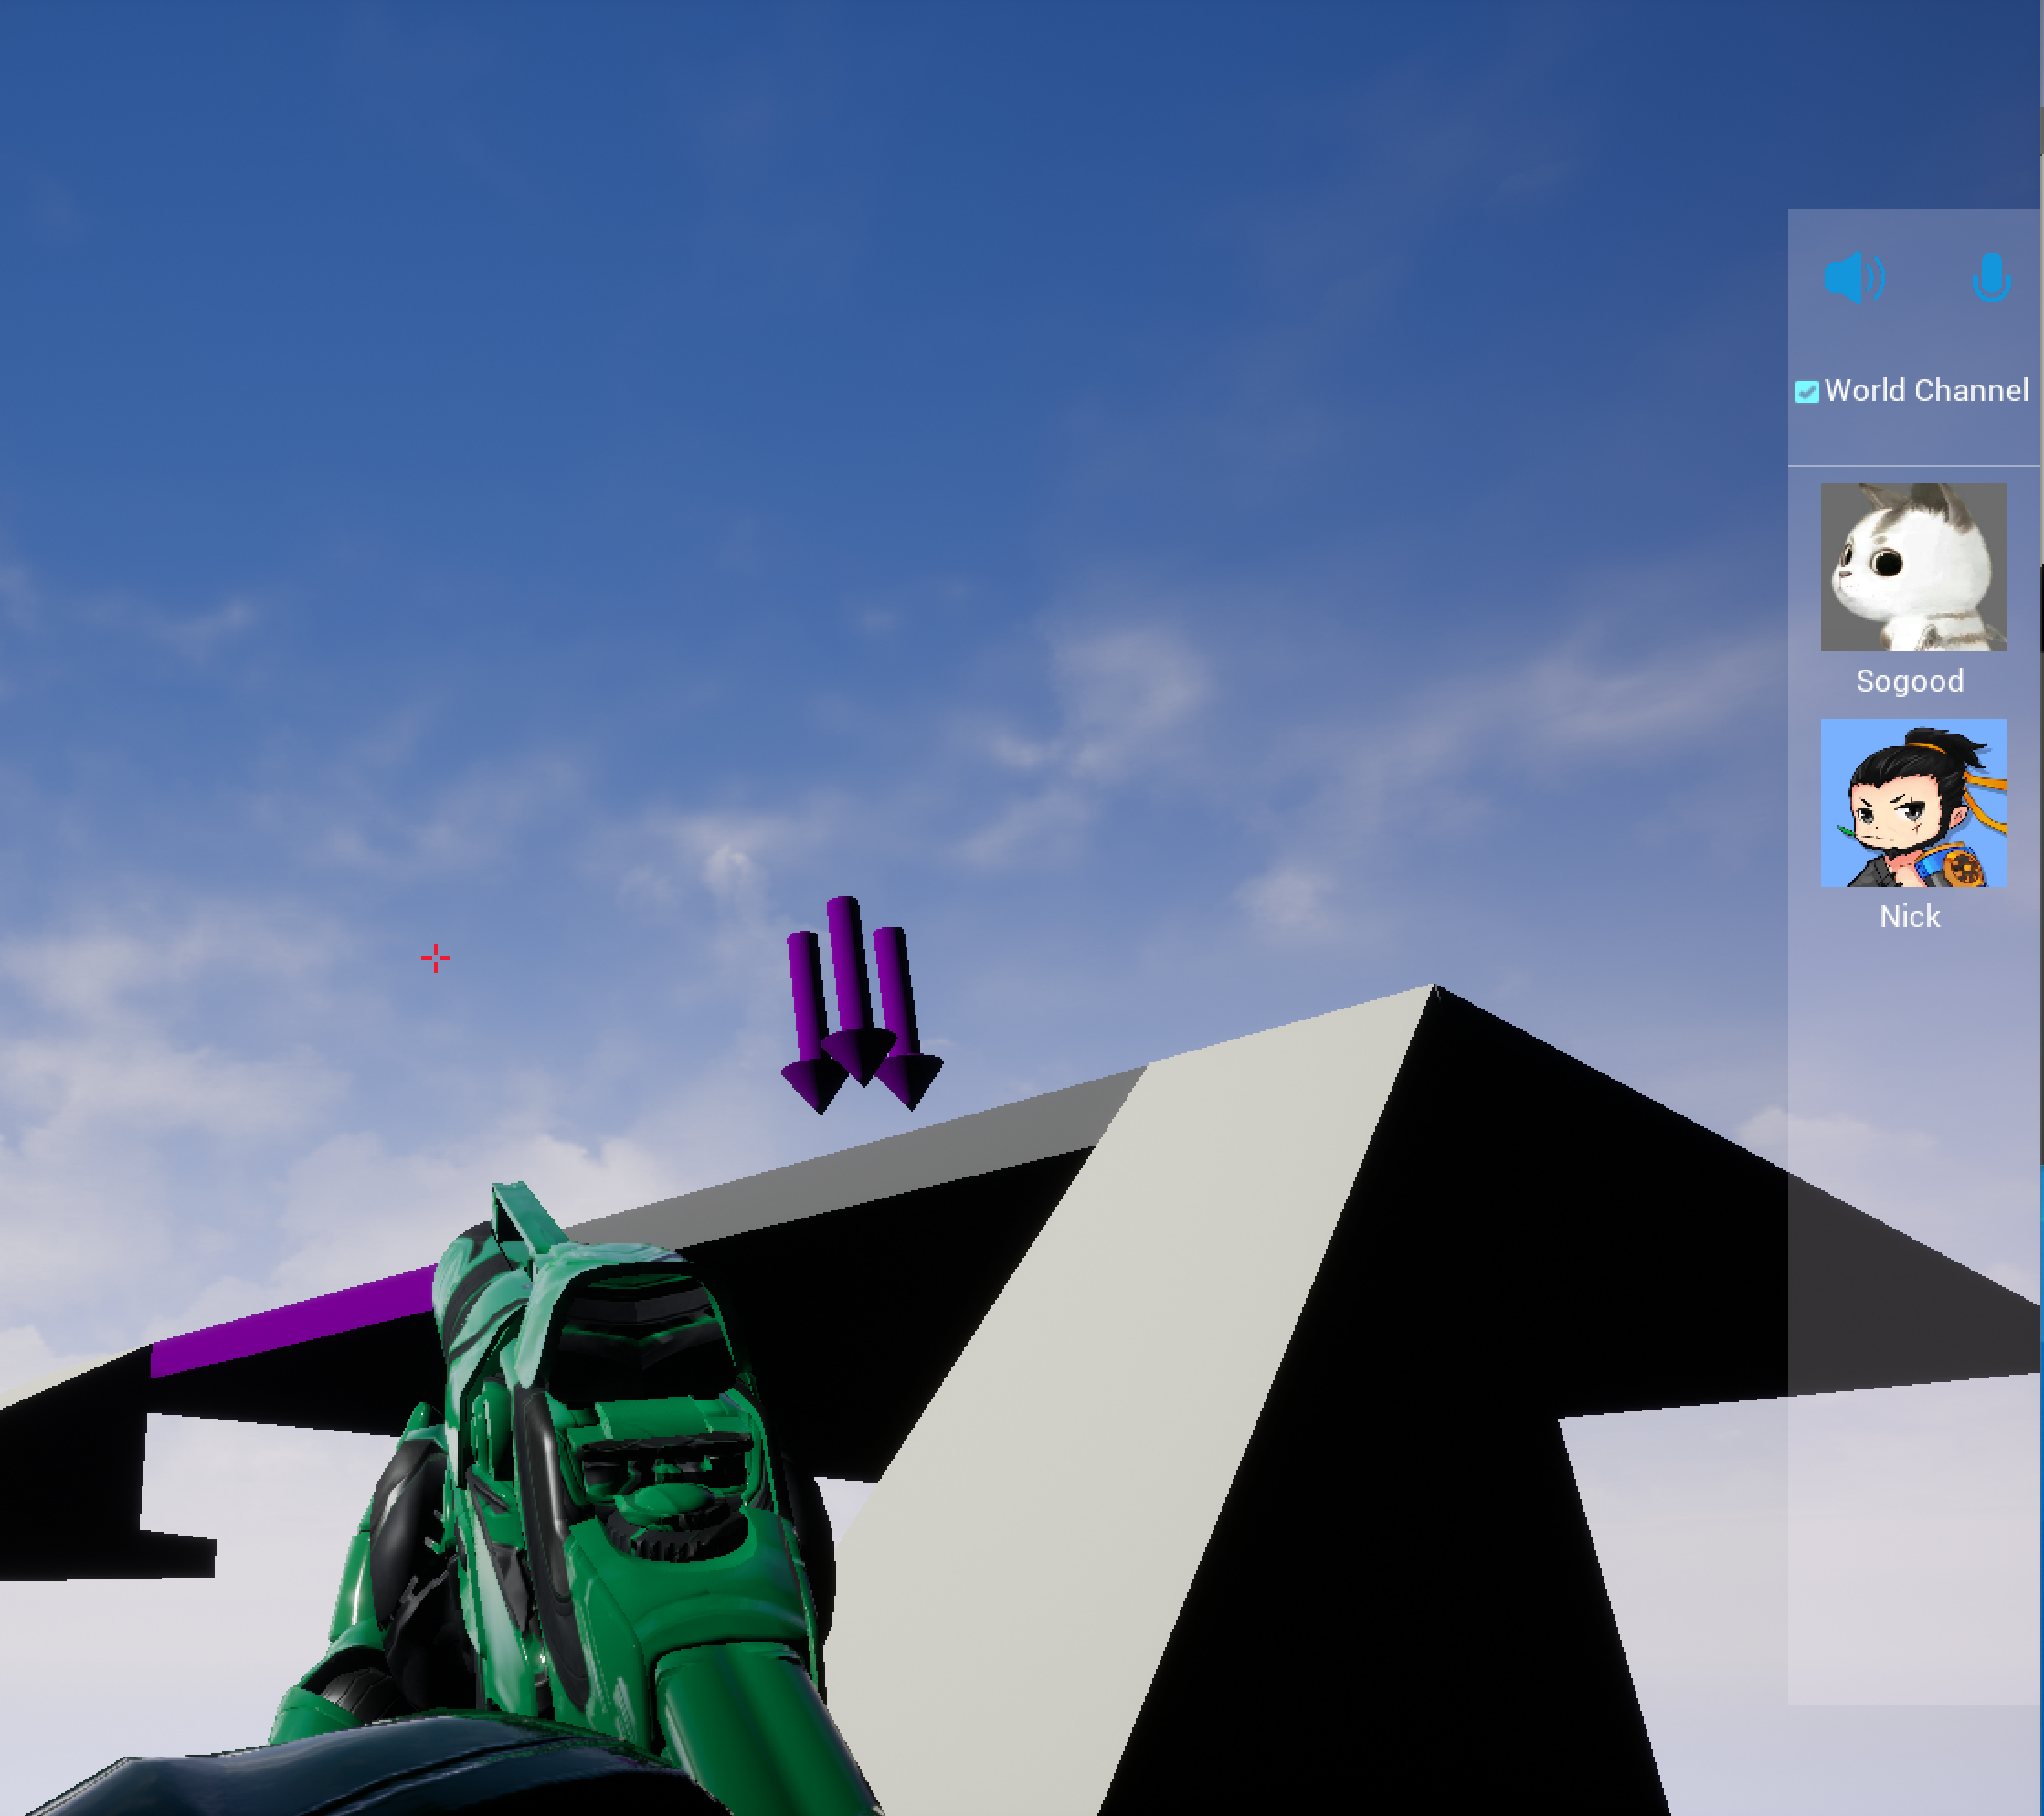
3.2.5 Voice Chat
When entering the battle, the players will join a positional voice channel. The players from different teams join the same channel through battle session ID, but have different team IDs. The player's speaker and microphone are off by default. To use these features, the player needs to press the "Enter" key and then click the corresponding icons to enable them. The world channel is off by default. Players can check the checkbox to switch to the world channel.
- Speaker: The player can hear other players' voices when the speaker is turned on.
- Microphone: The player can be heard by other players when the microphone is turned on.
- World Channel: Players in the world channel can voice chat with all the players in the battle. If not checked, the players can only voice chat with the members of their own team.
A list shows players from the same team. A microphone icon will be displayed in the player's avatar when he/she is talking.
❗ Note
The players joined a positional channel. This means when the world channel is turned on, the player can hear the voices of the other team's players when those players are within the audible distance. Voice chats within the same team are non-positional and no audible distance is applied.
3.2.6 Simple Battle Season
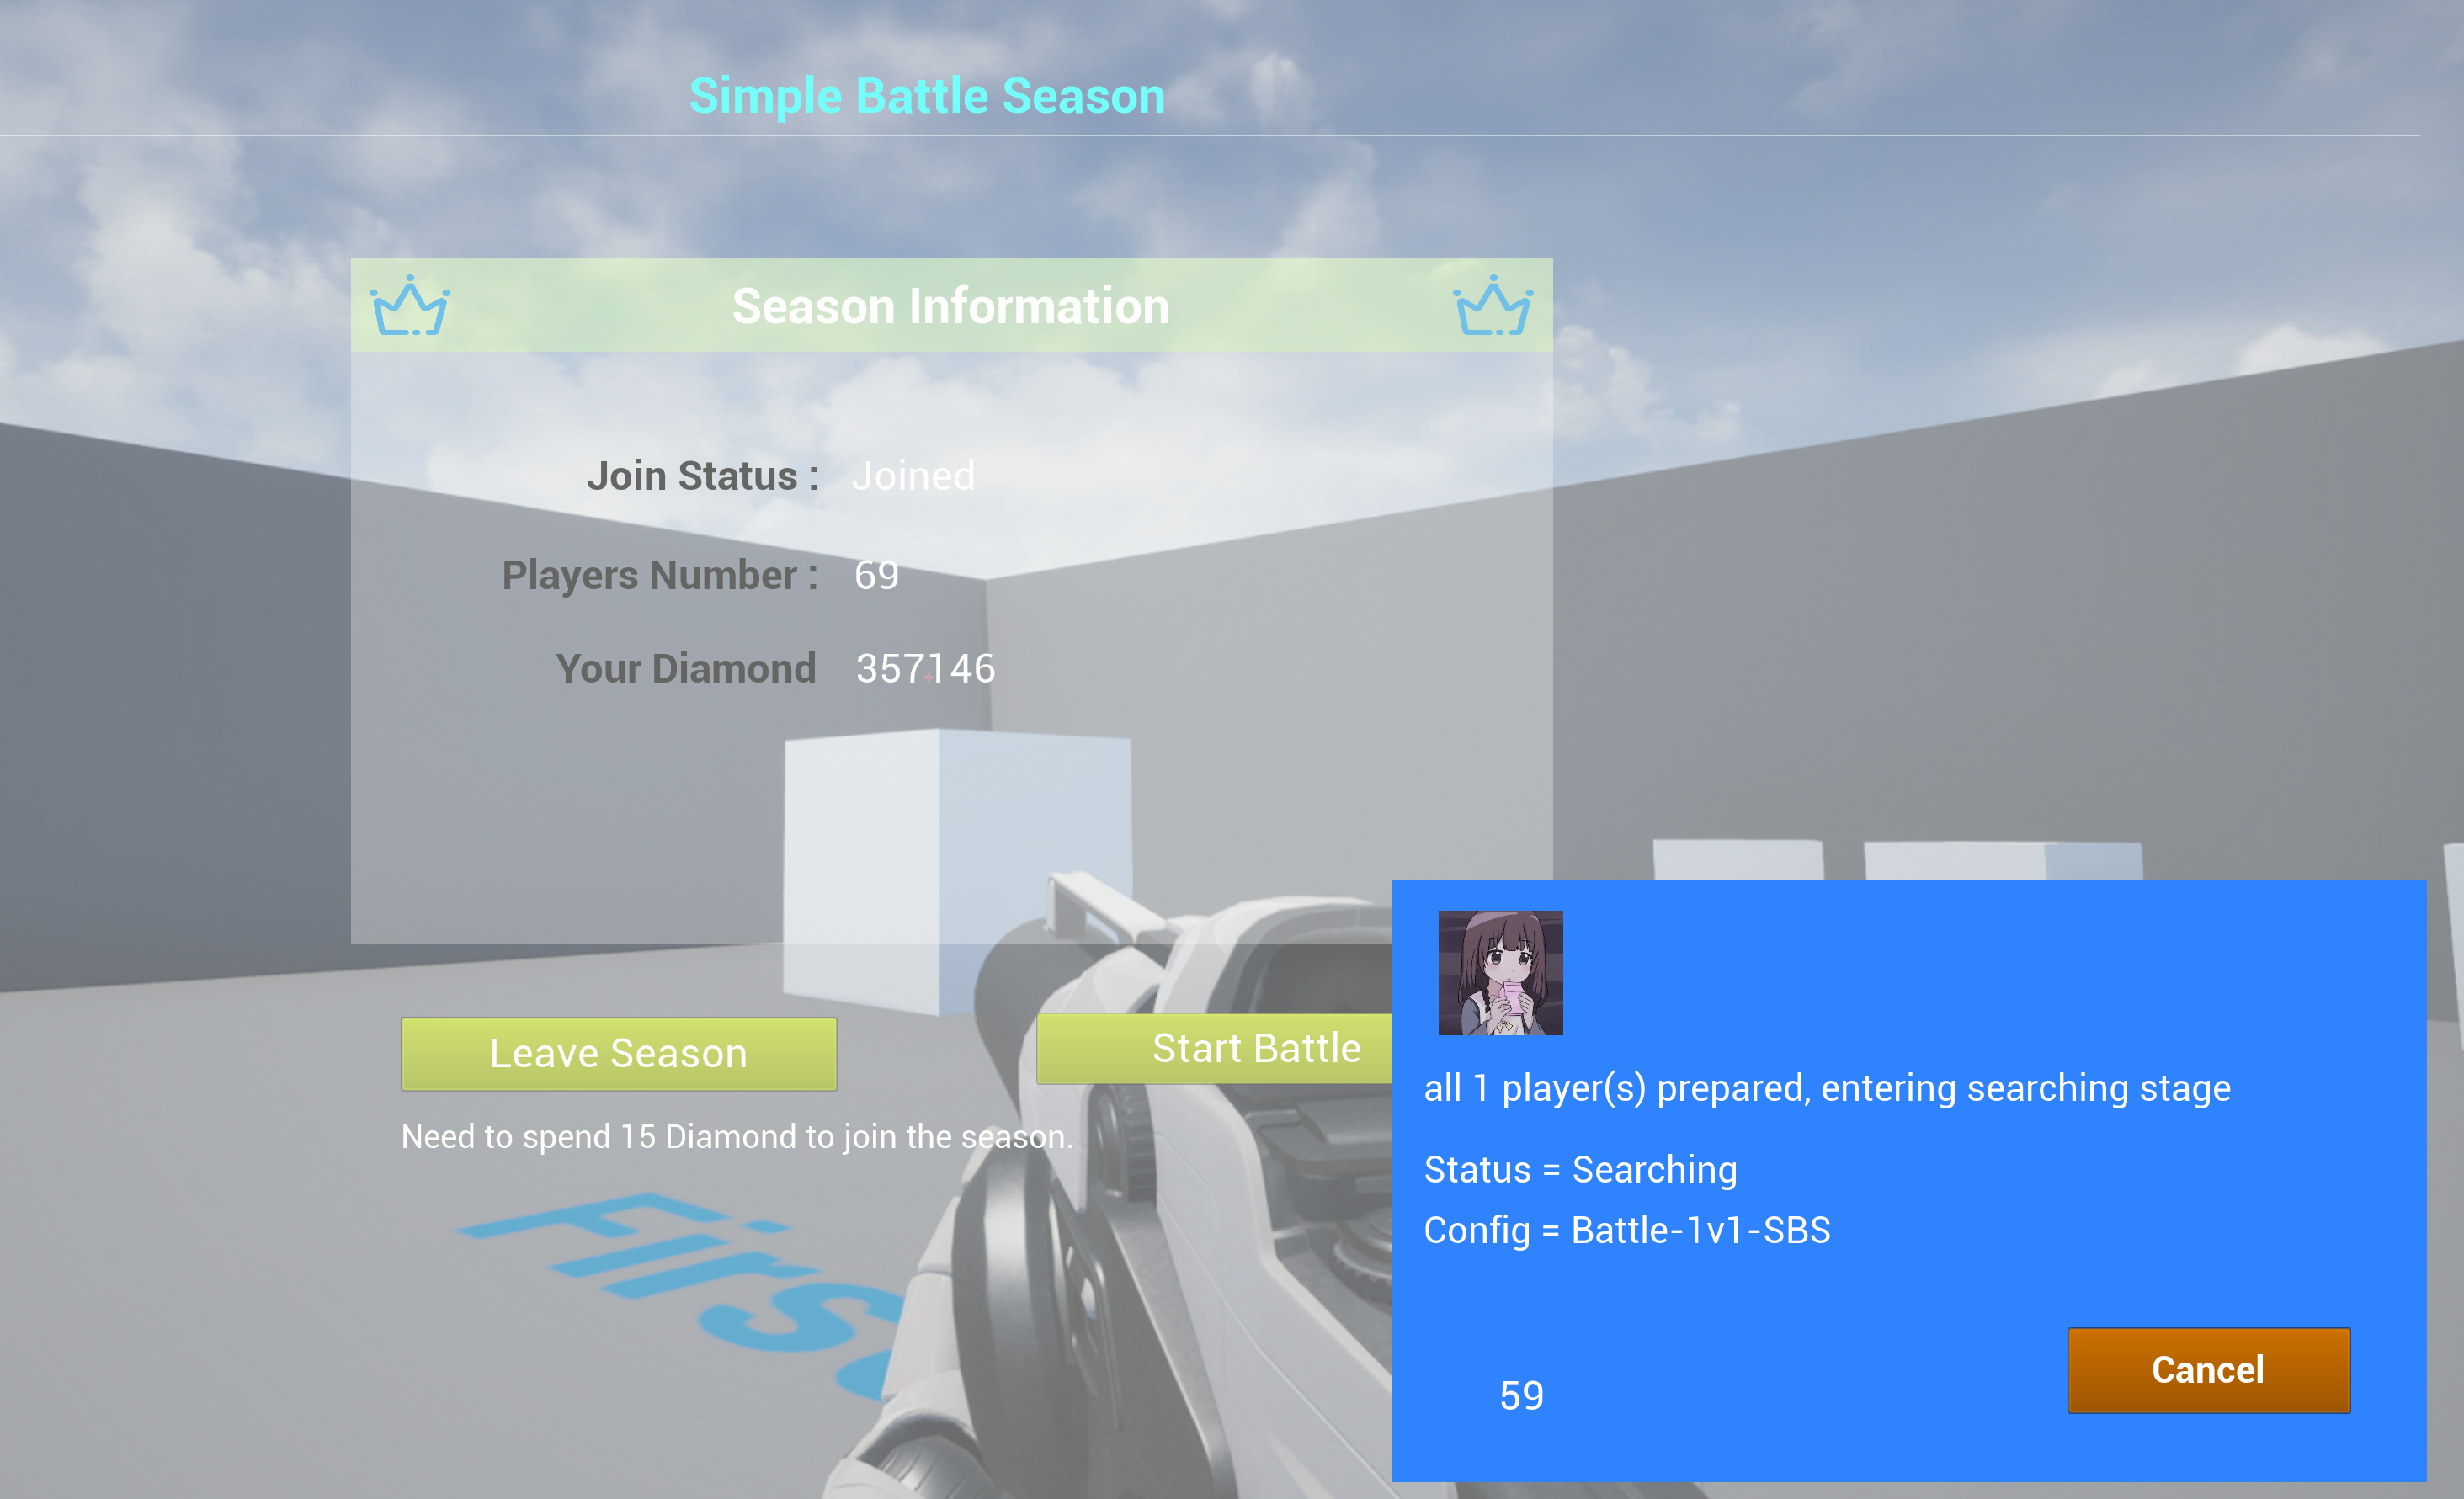
The sample currently uses a Virtual Server to implement a simple battle season. Battle season features include request season information, join or leave the season, and battle result processing. Diamond are used in the battle season, as a certain number of diamond are required to join it.
- Join Status: Whether a player has joined the season.
- Players Num: The number of all players who have joined the season.
- Your Diamond: The number of diamond for player.
- Join Battle: The number of diamond required to join the season.
- Start Battle: Players must join the season before they start the battle.
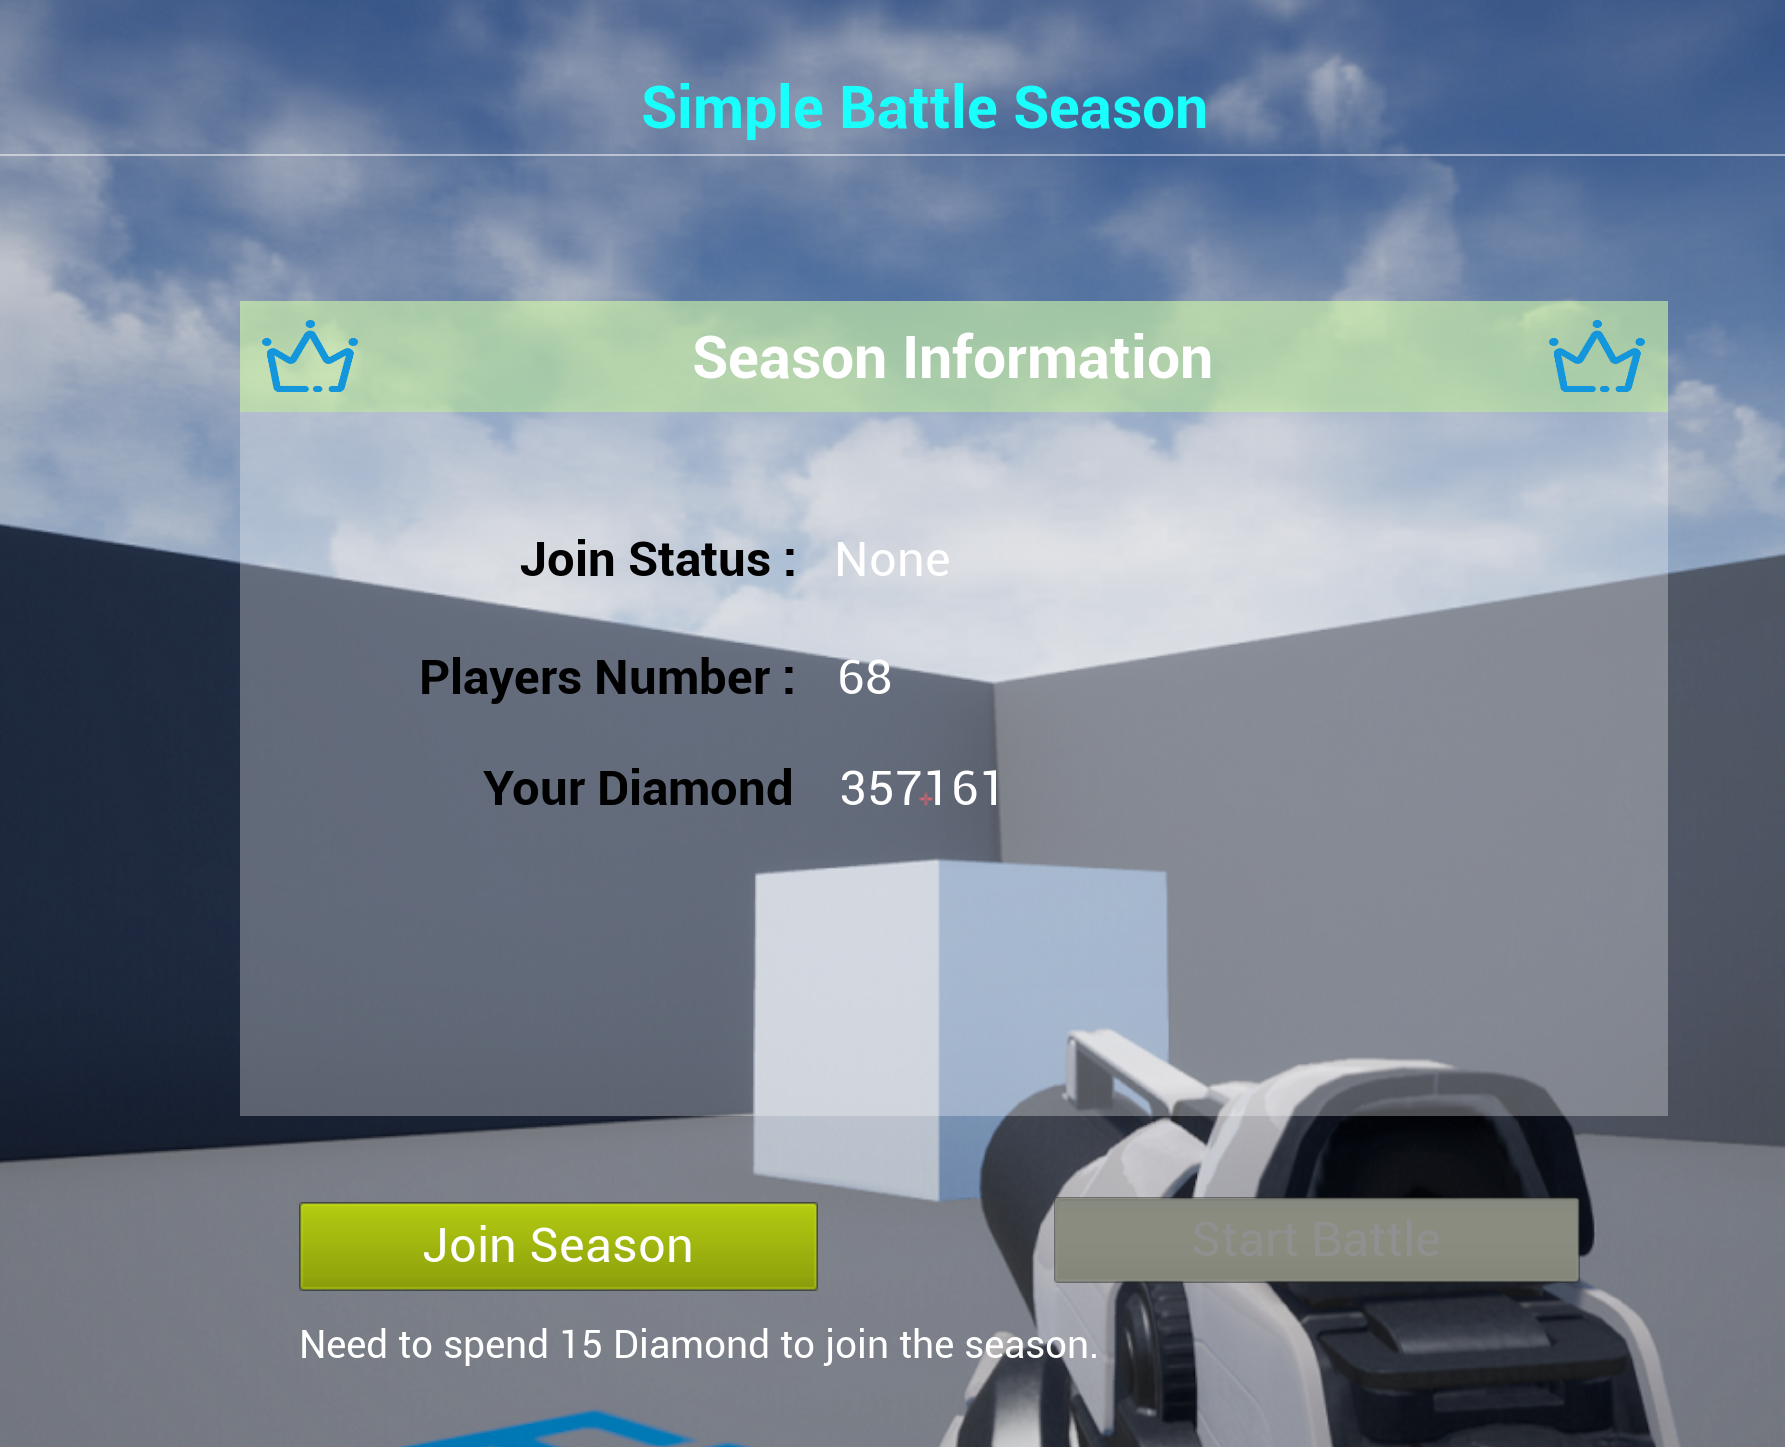
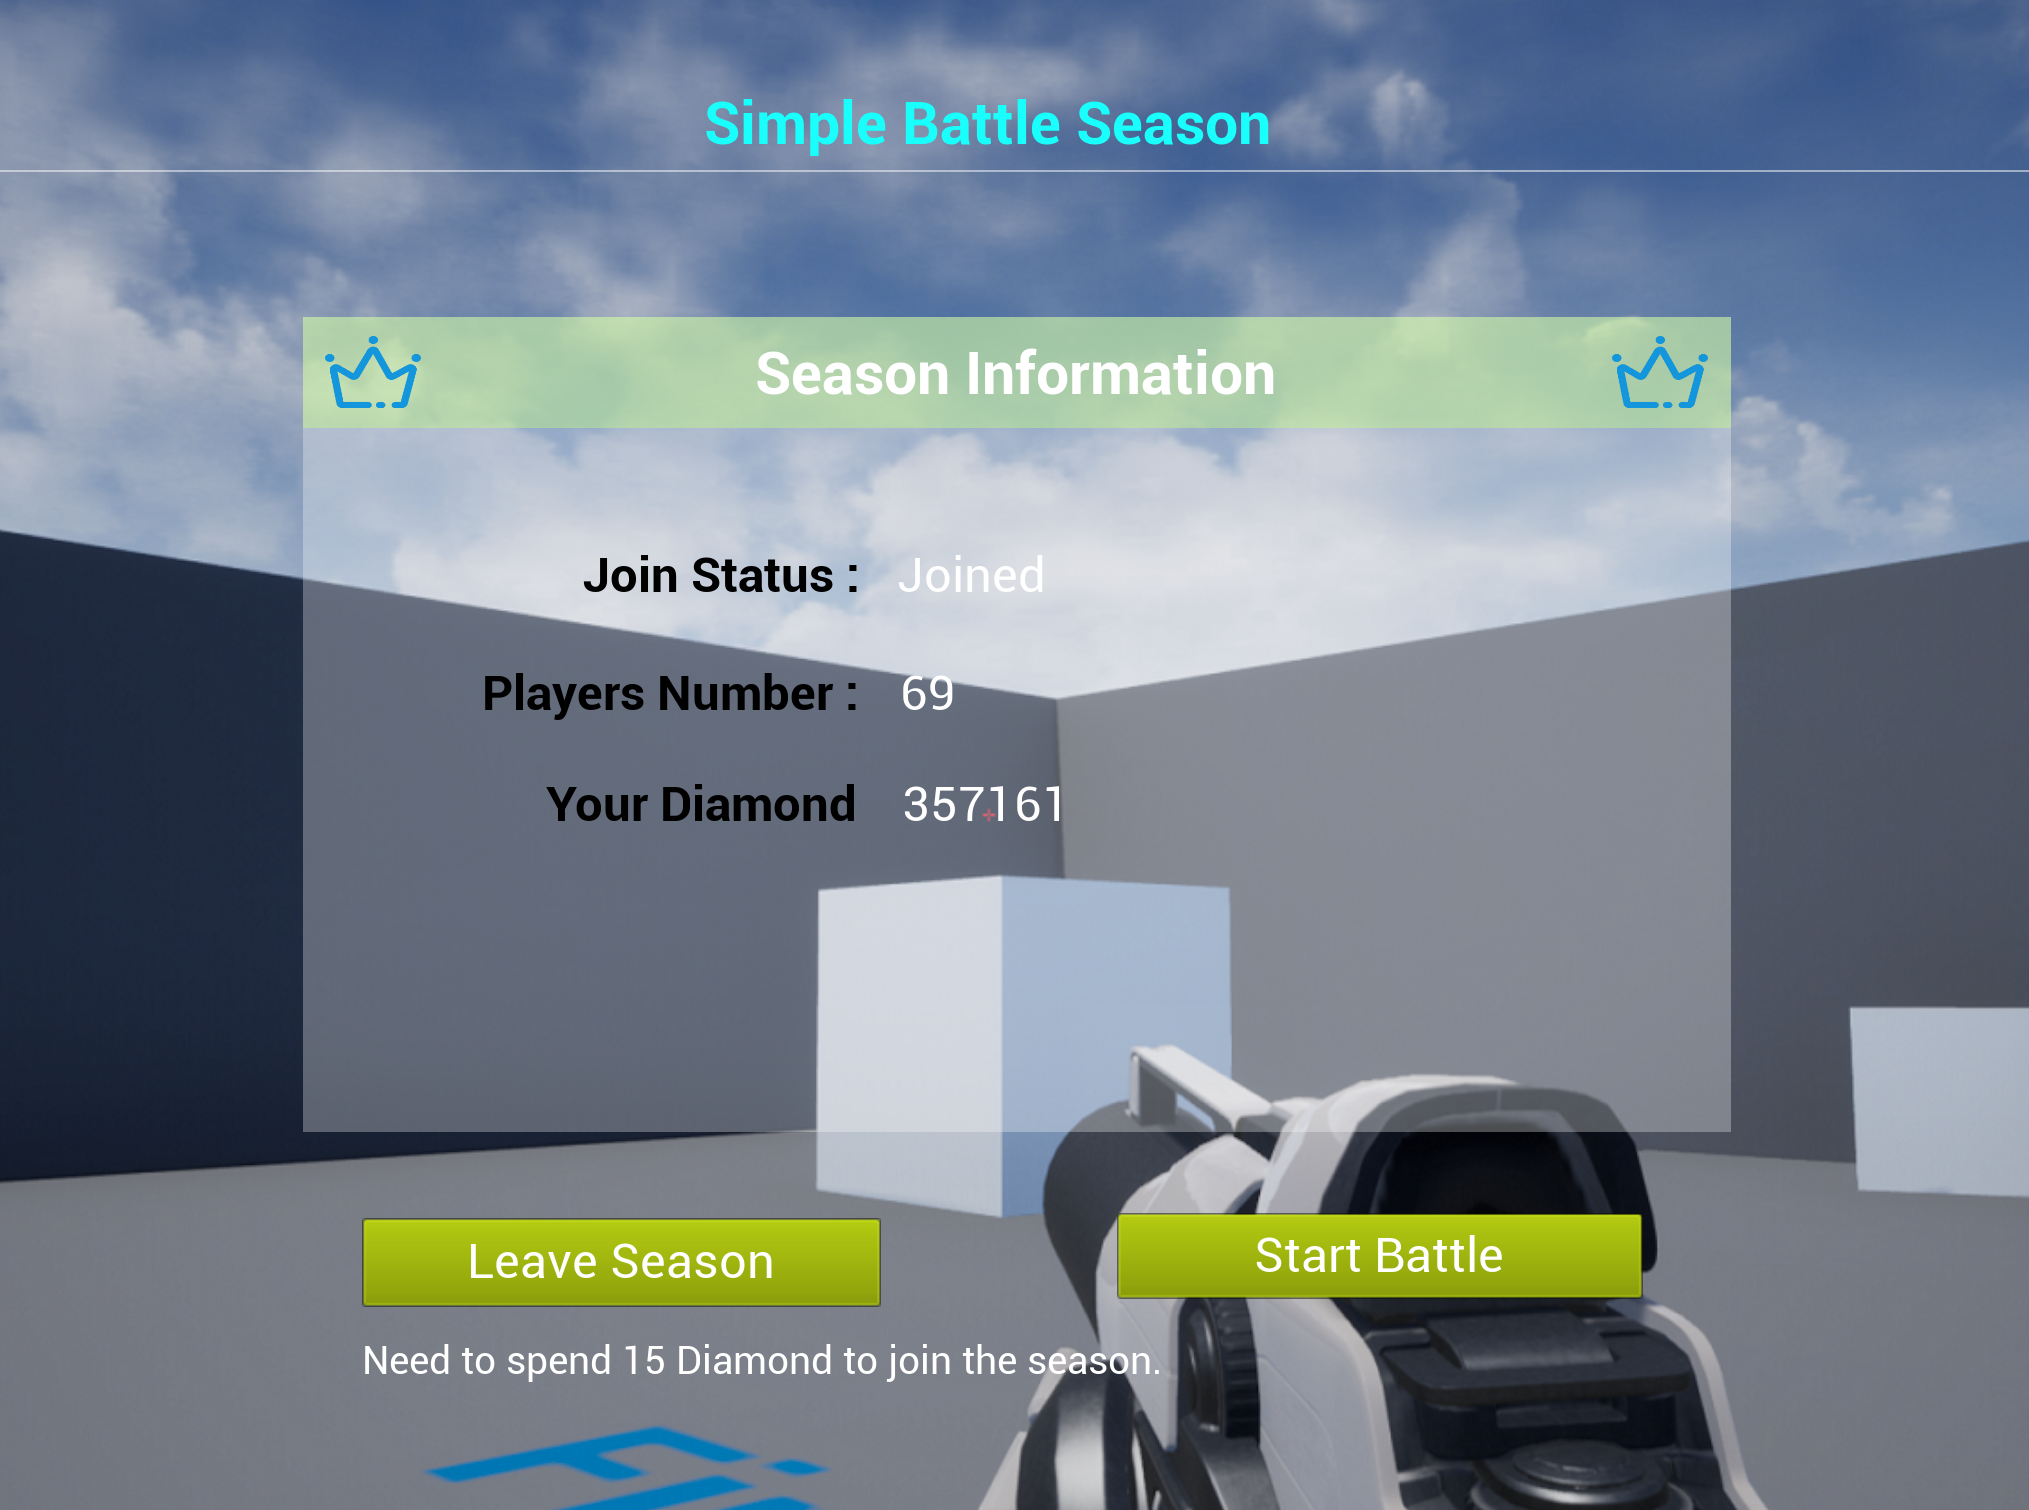
The player can click the "Start Battle" button to start matchmaking. Players can only be matched with other players who have joined this season. The matchmaking rule is 1v1.
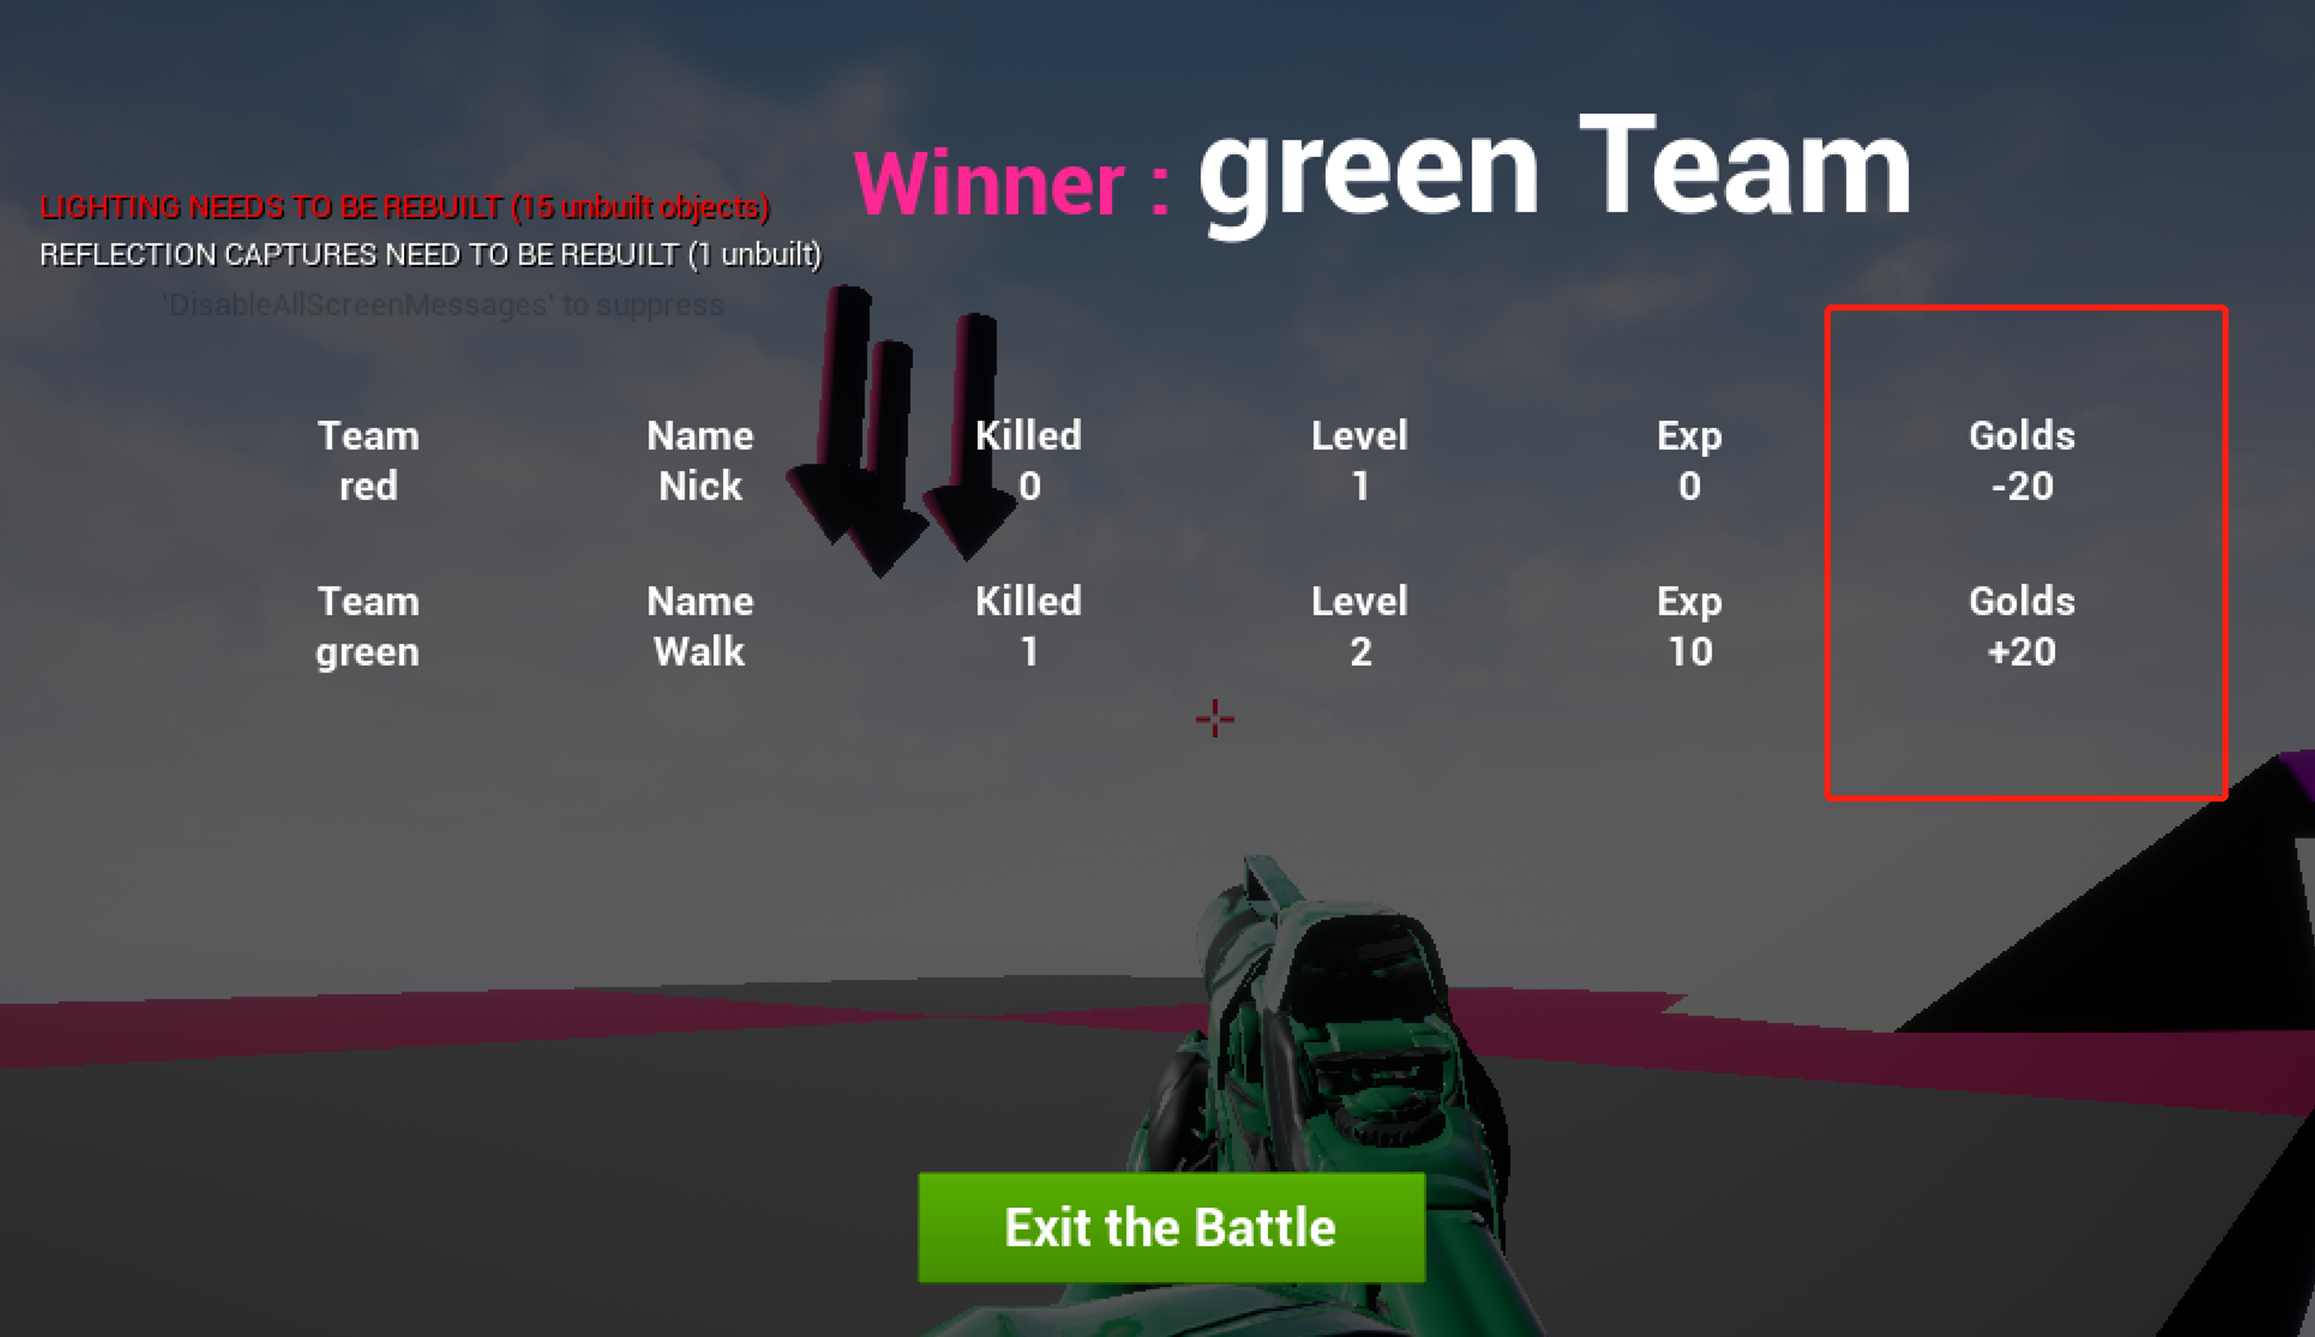
At the end of the battle, the winner will be rewarded with currency and the loser will see a corresponding number of diamond deducted.
3.2.7 Economy
Here in the sample, we use the Economy APIs to implement the Balances, Store, and Inventory functions and demonstrate their actual effects.
Balances
Displays the Currency and Amount information of players.
Currency types:
- Gold: Used to buy buff scrolls and other store items.
- Diamond: Used to buy gear and other important store items, mainly acquired through Simple Battle Season battles.
Store
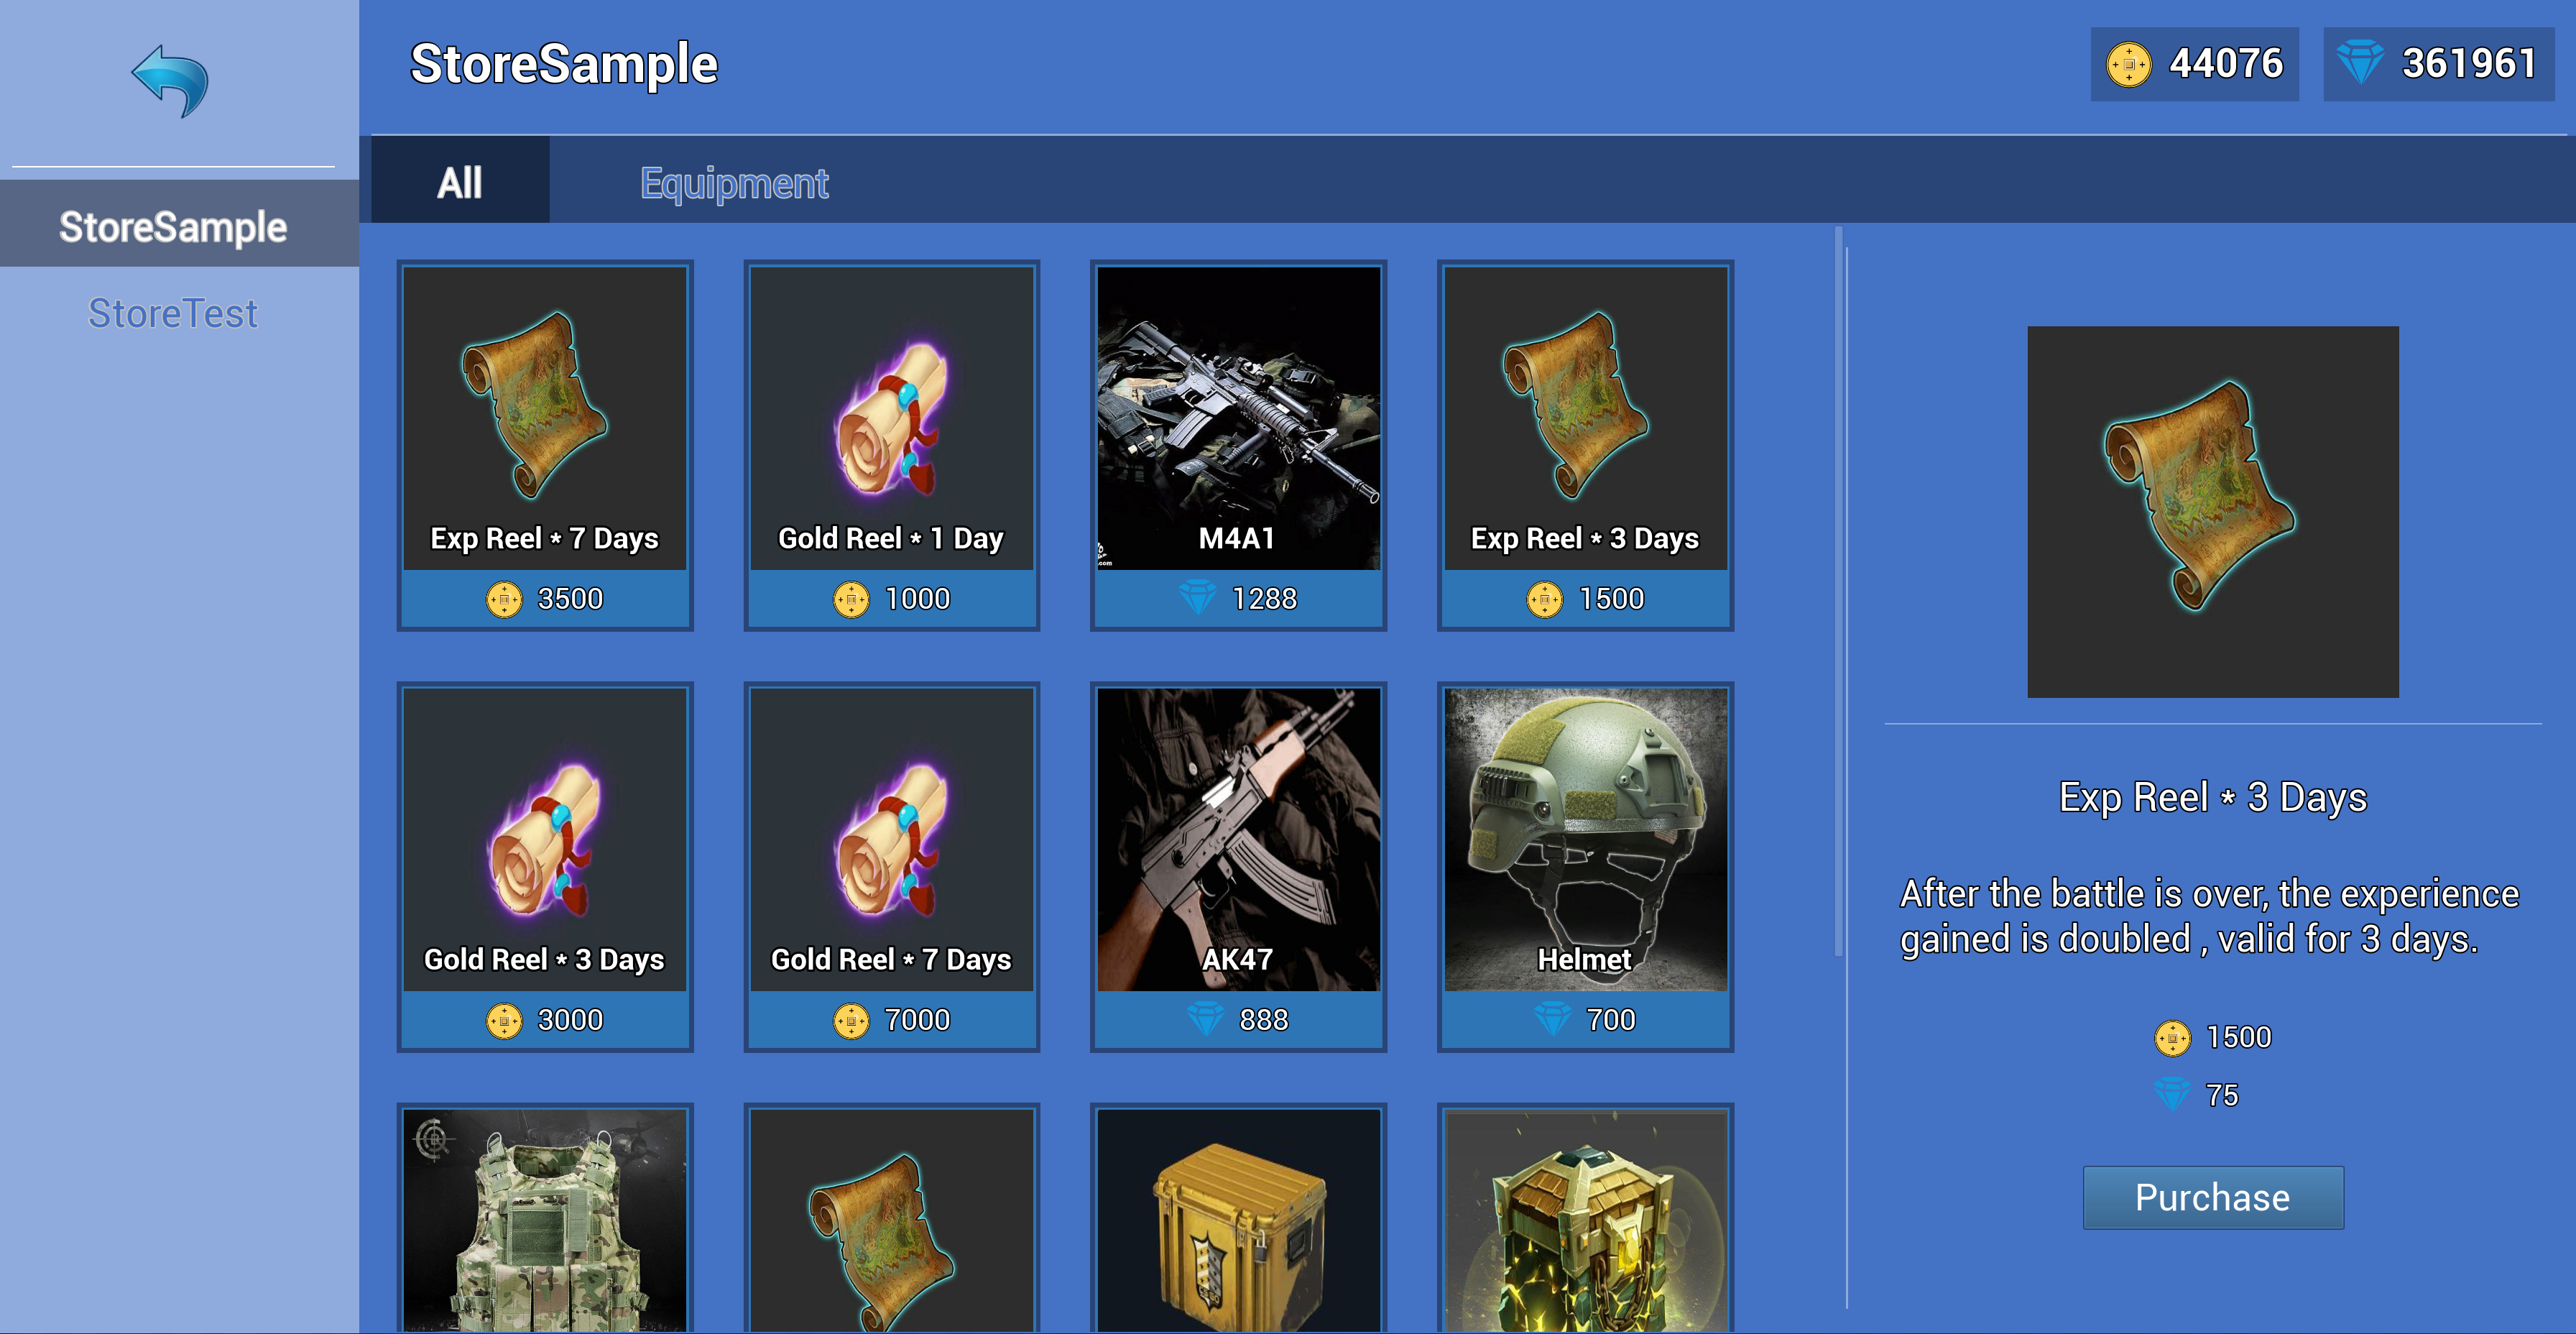
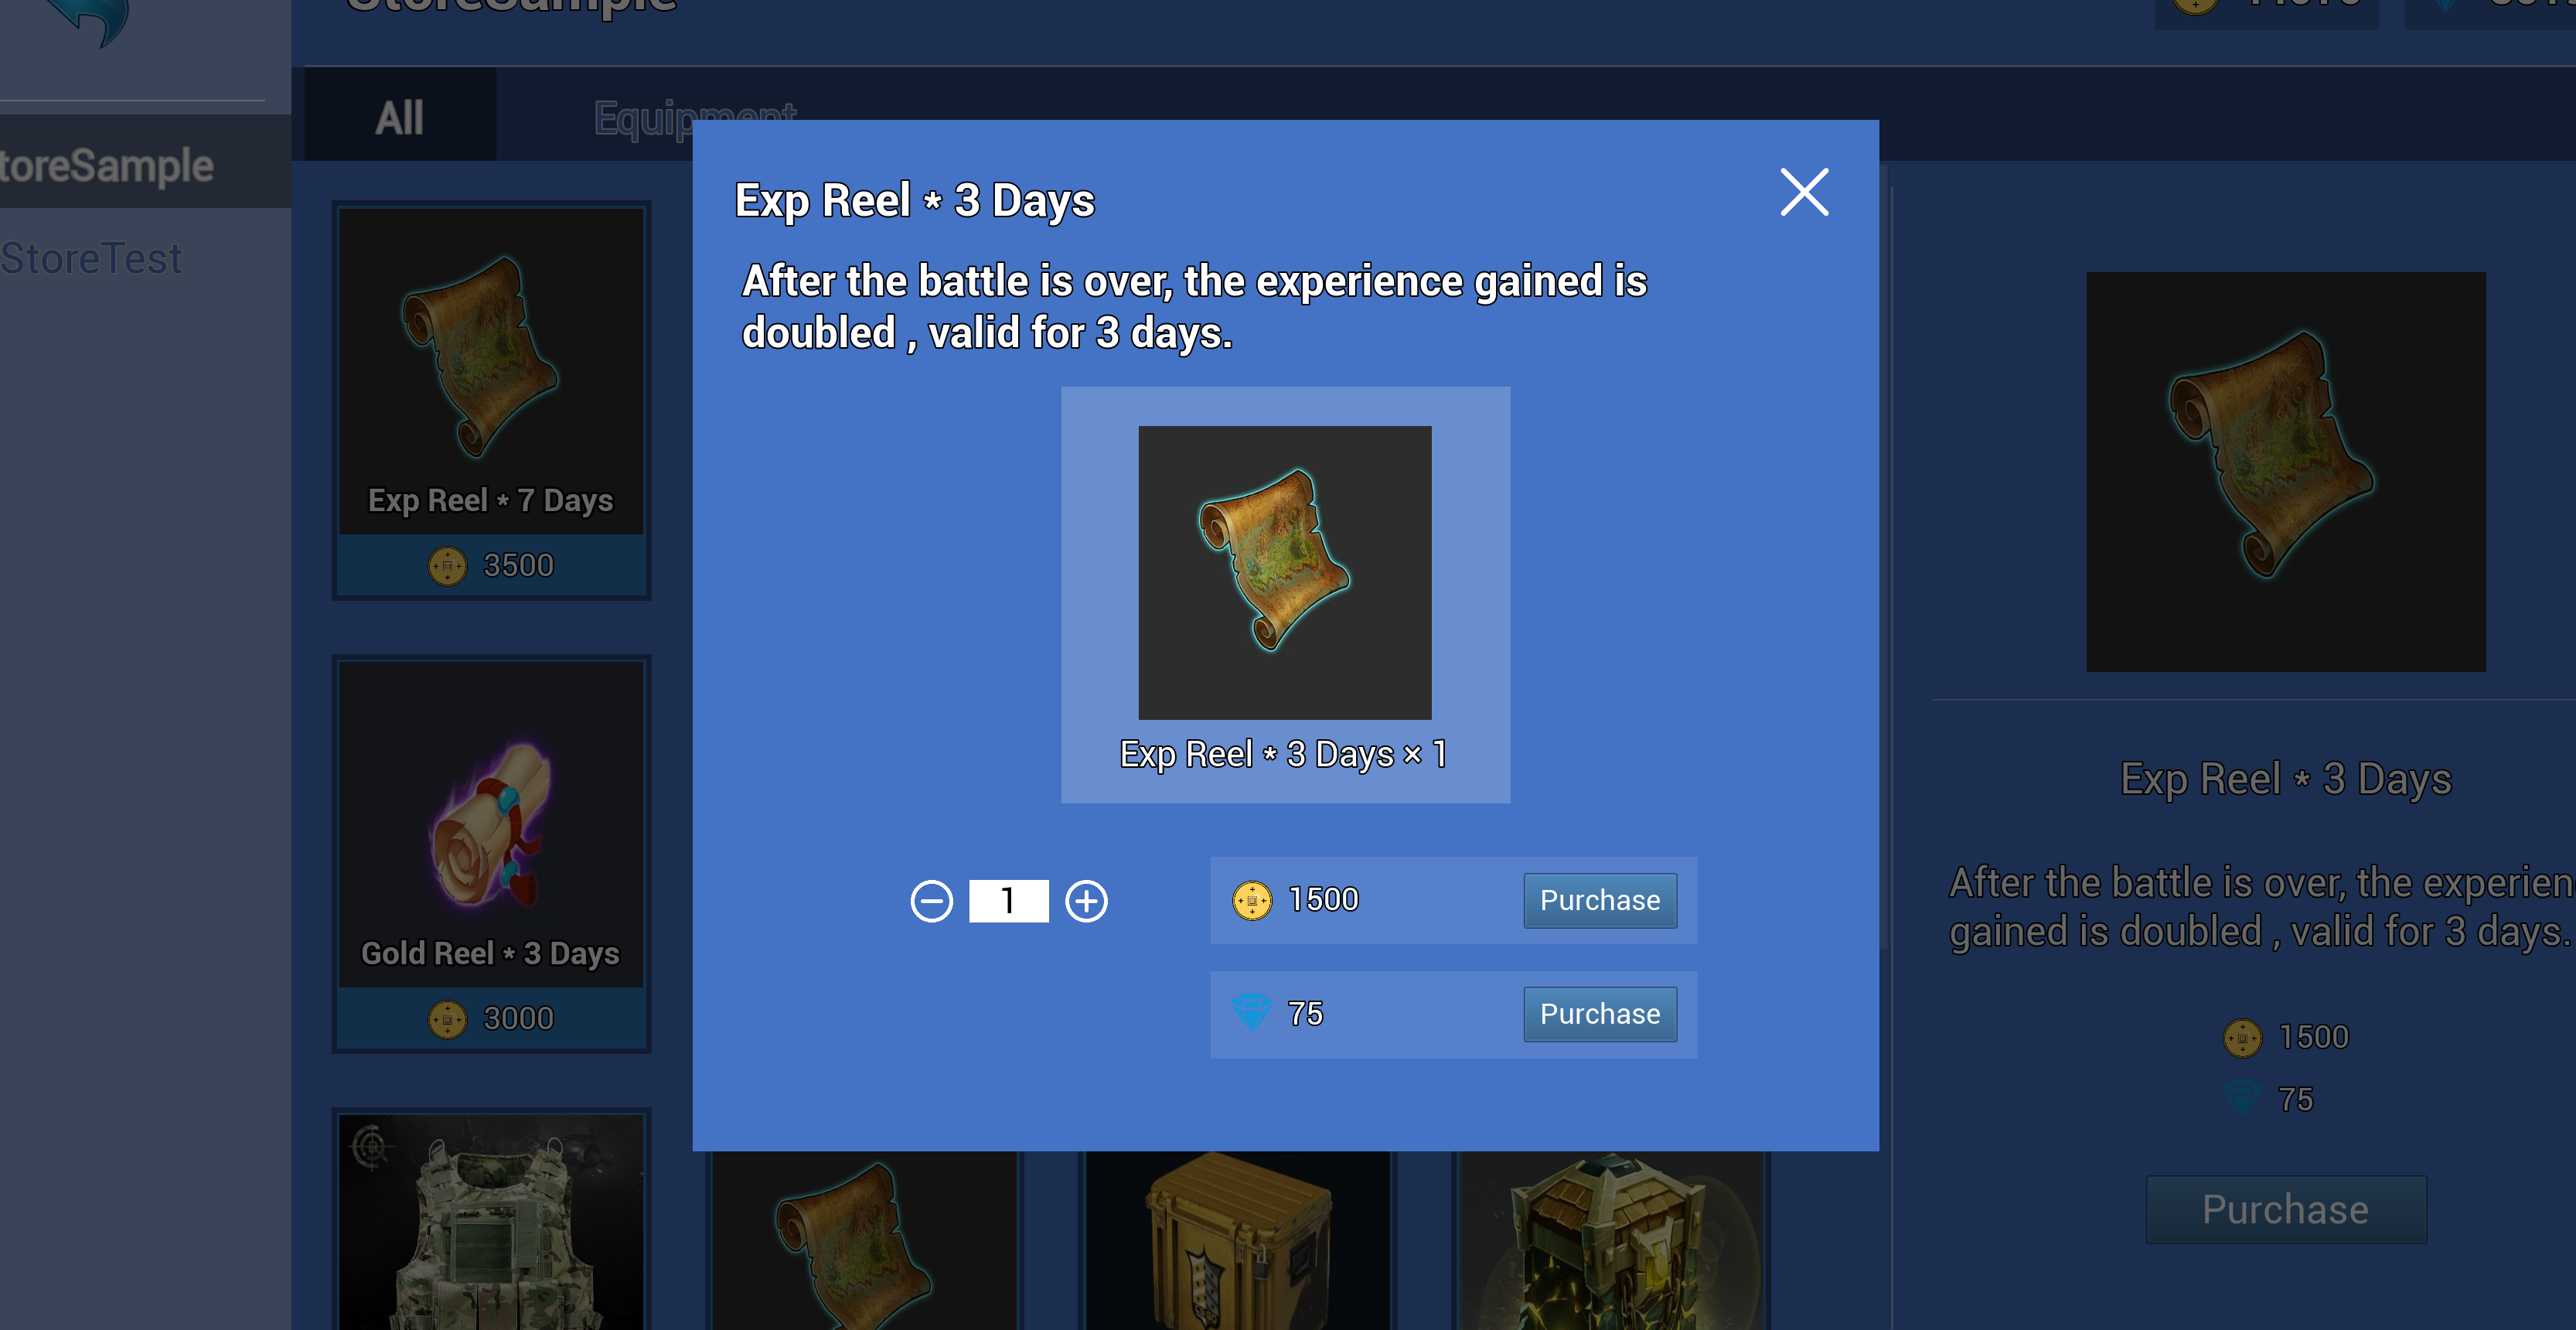
Displays the items that players can purchase and their prices.
All types:
- Gold scroll: A time-sensitive item instance. When a player purchases and then consumes this scroll, the player will earn x2 gold from battles.
- Experience scroll: A time-sensitive item instance. When a player purchases and then consumes this scroll, the player will earn x2 experience from battles.
- Gear: A unique permanent item instance, each player can only have one. After purchase, the player obtains the gear. Gear cannot be consumed, but increases the player's attack or defense during battles once equipped.
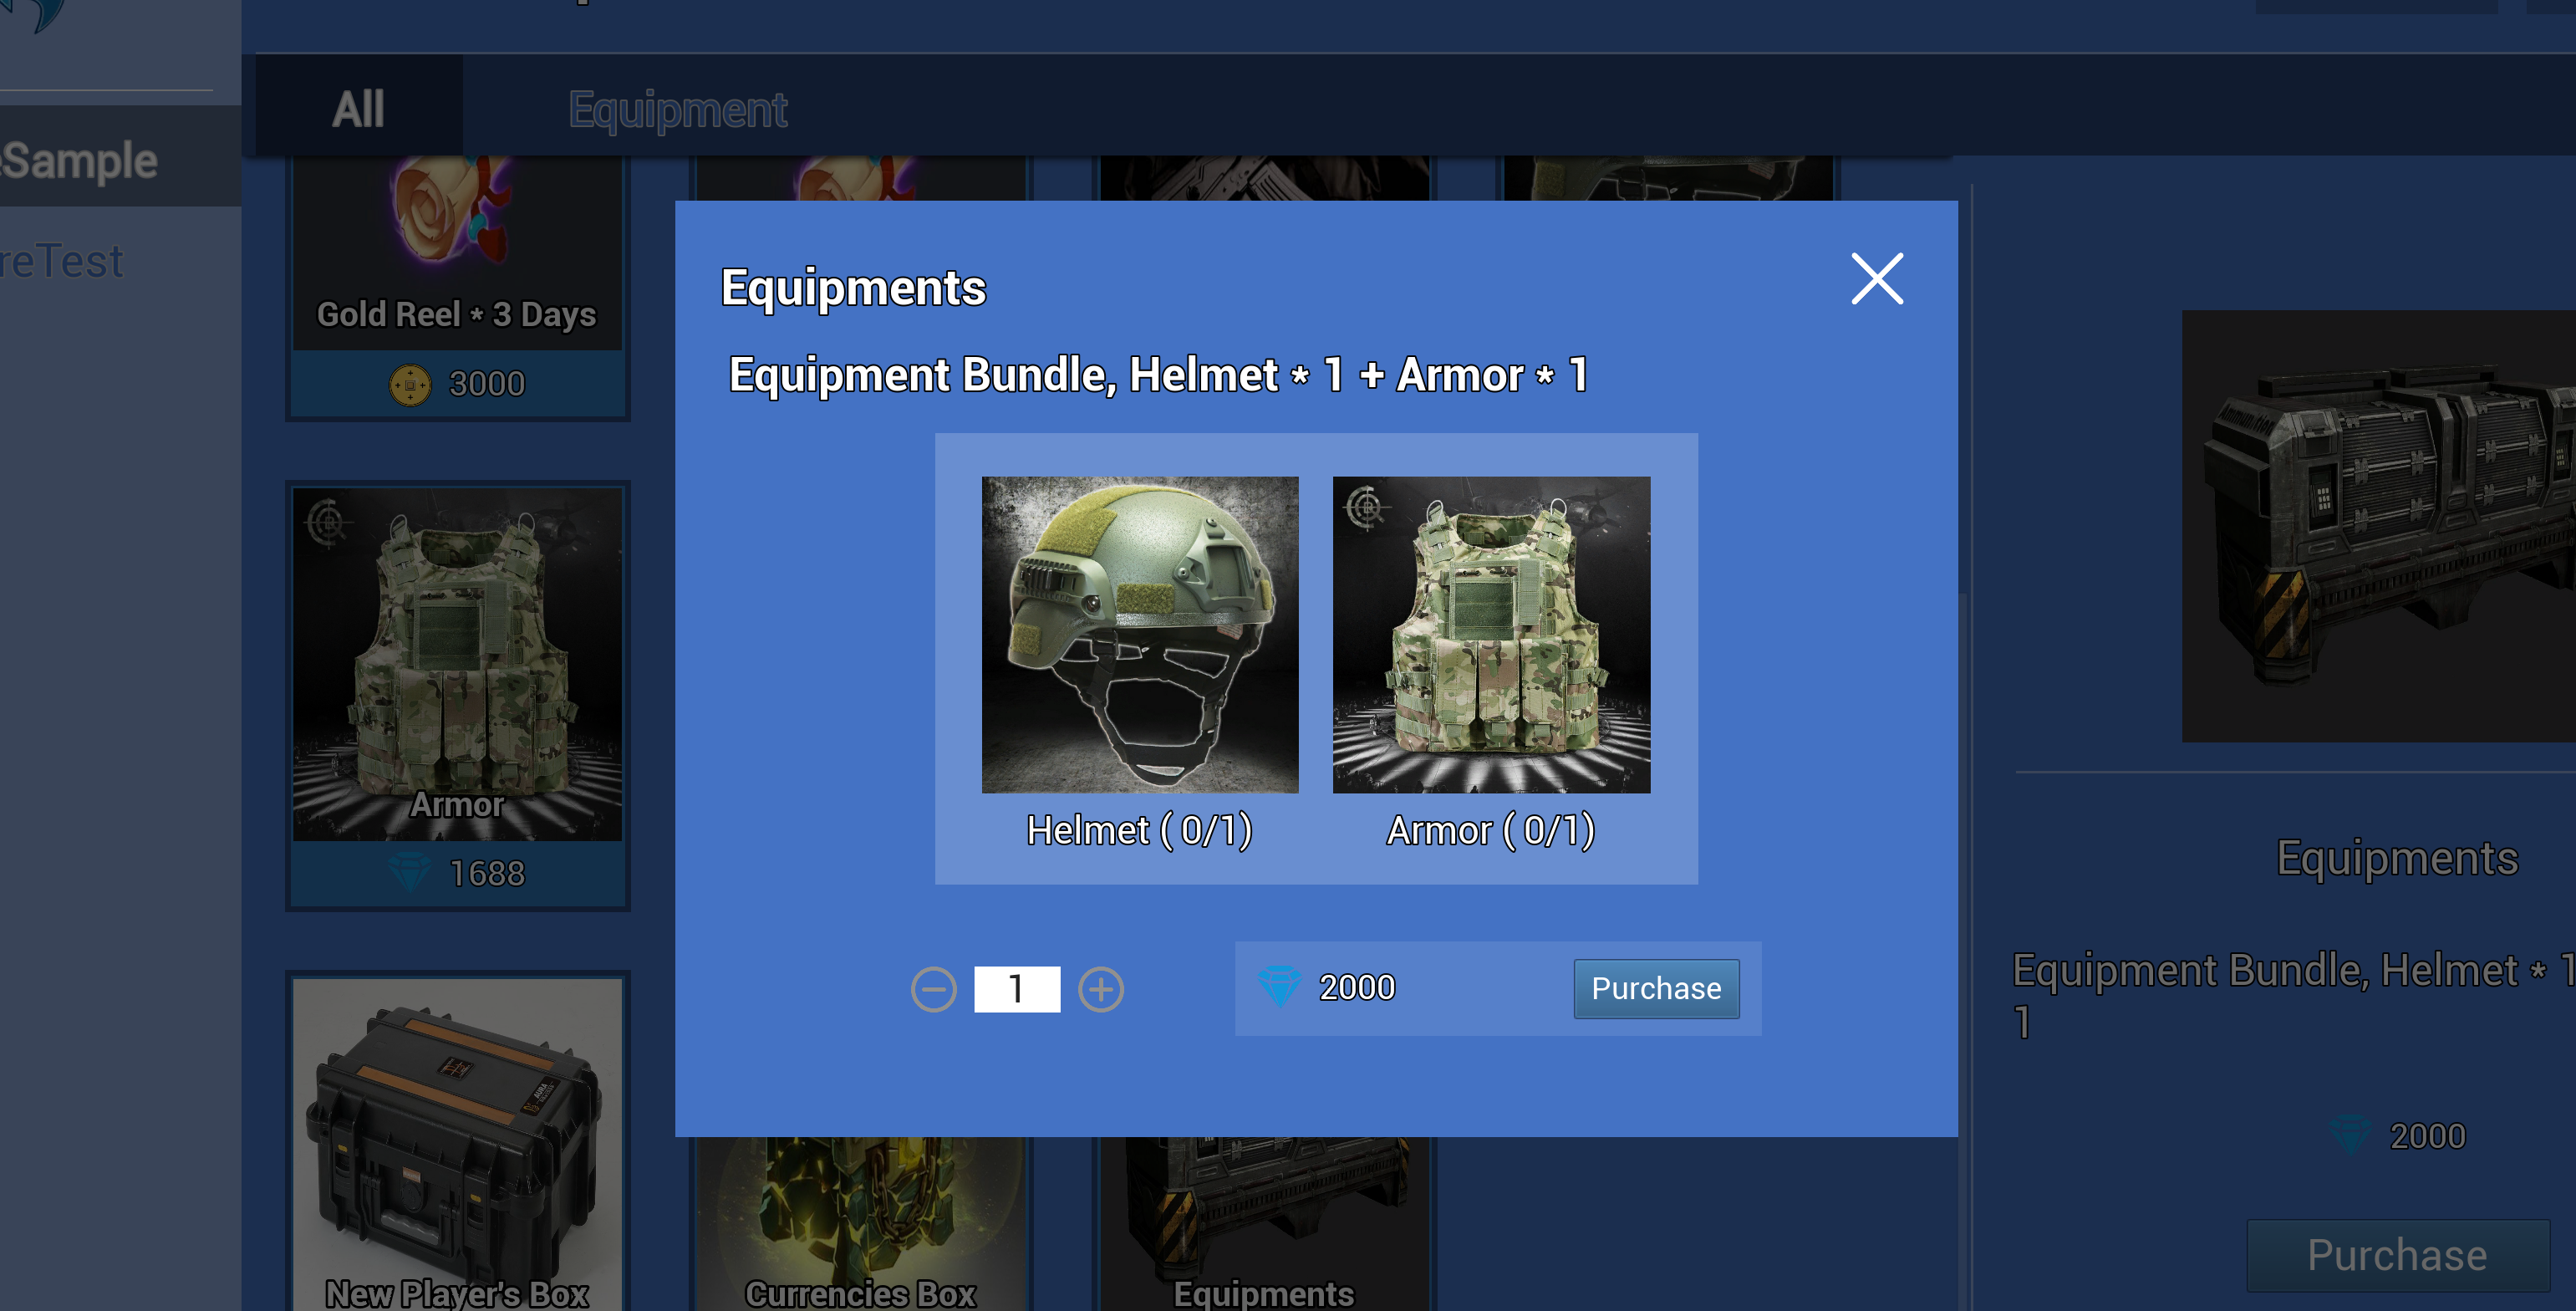
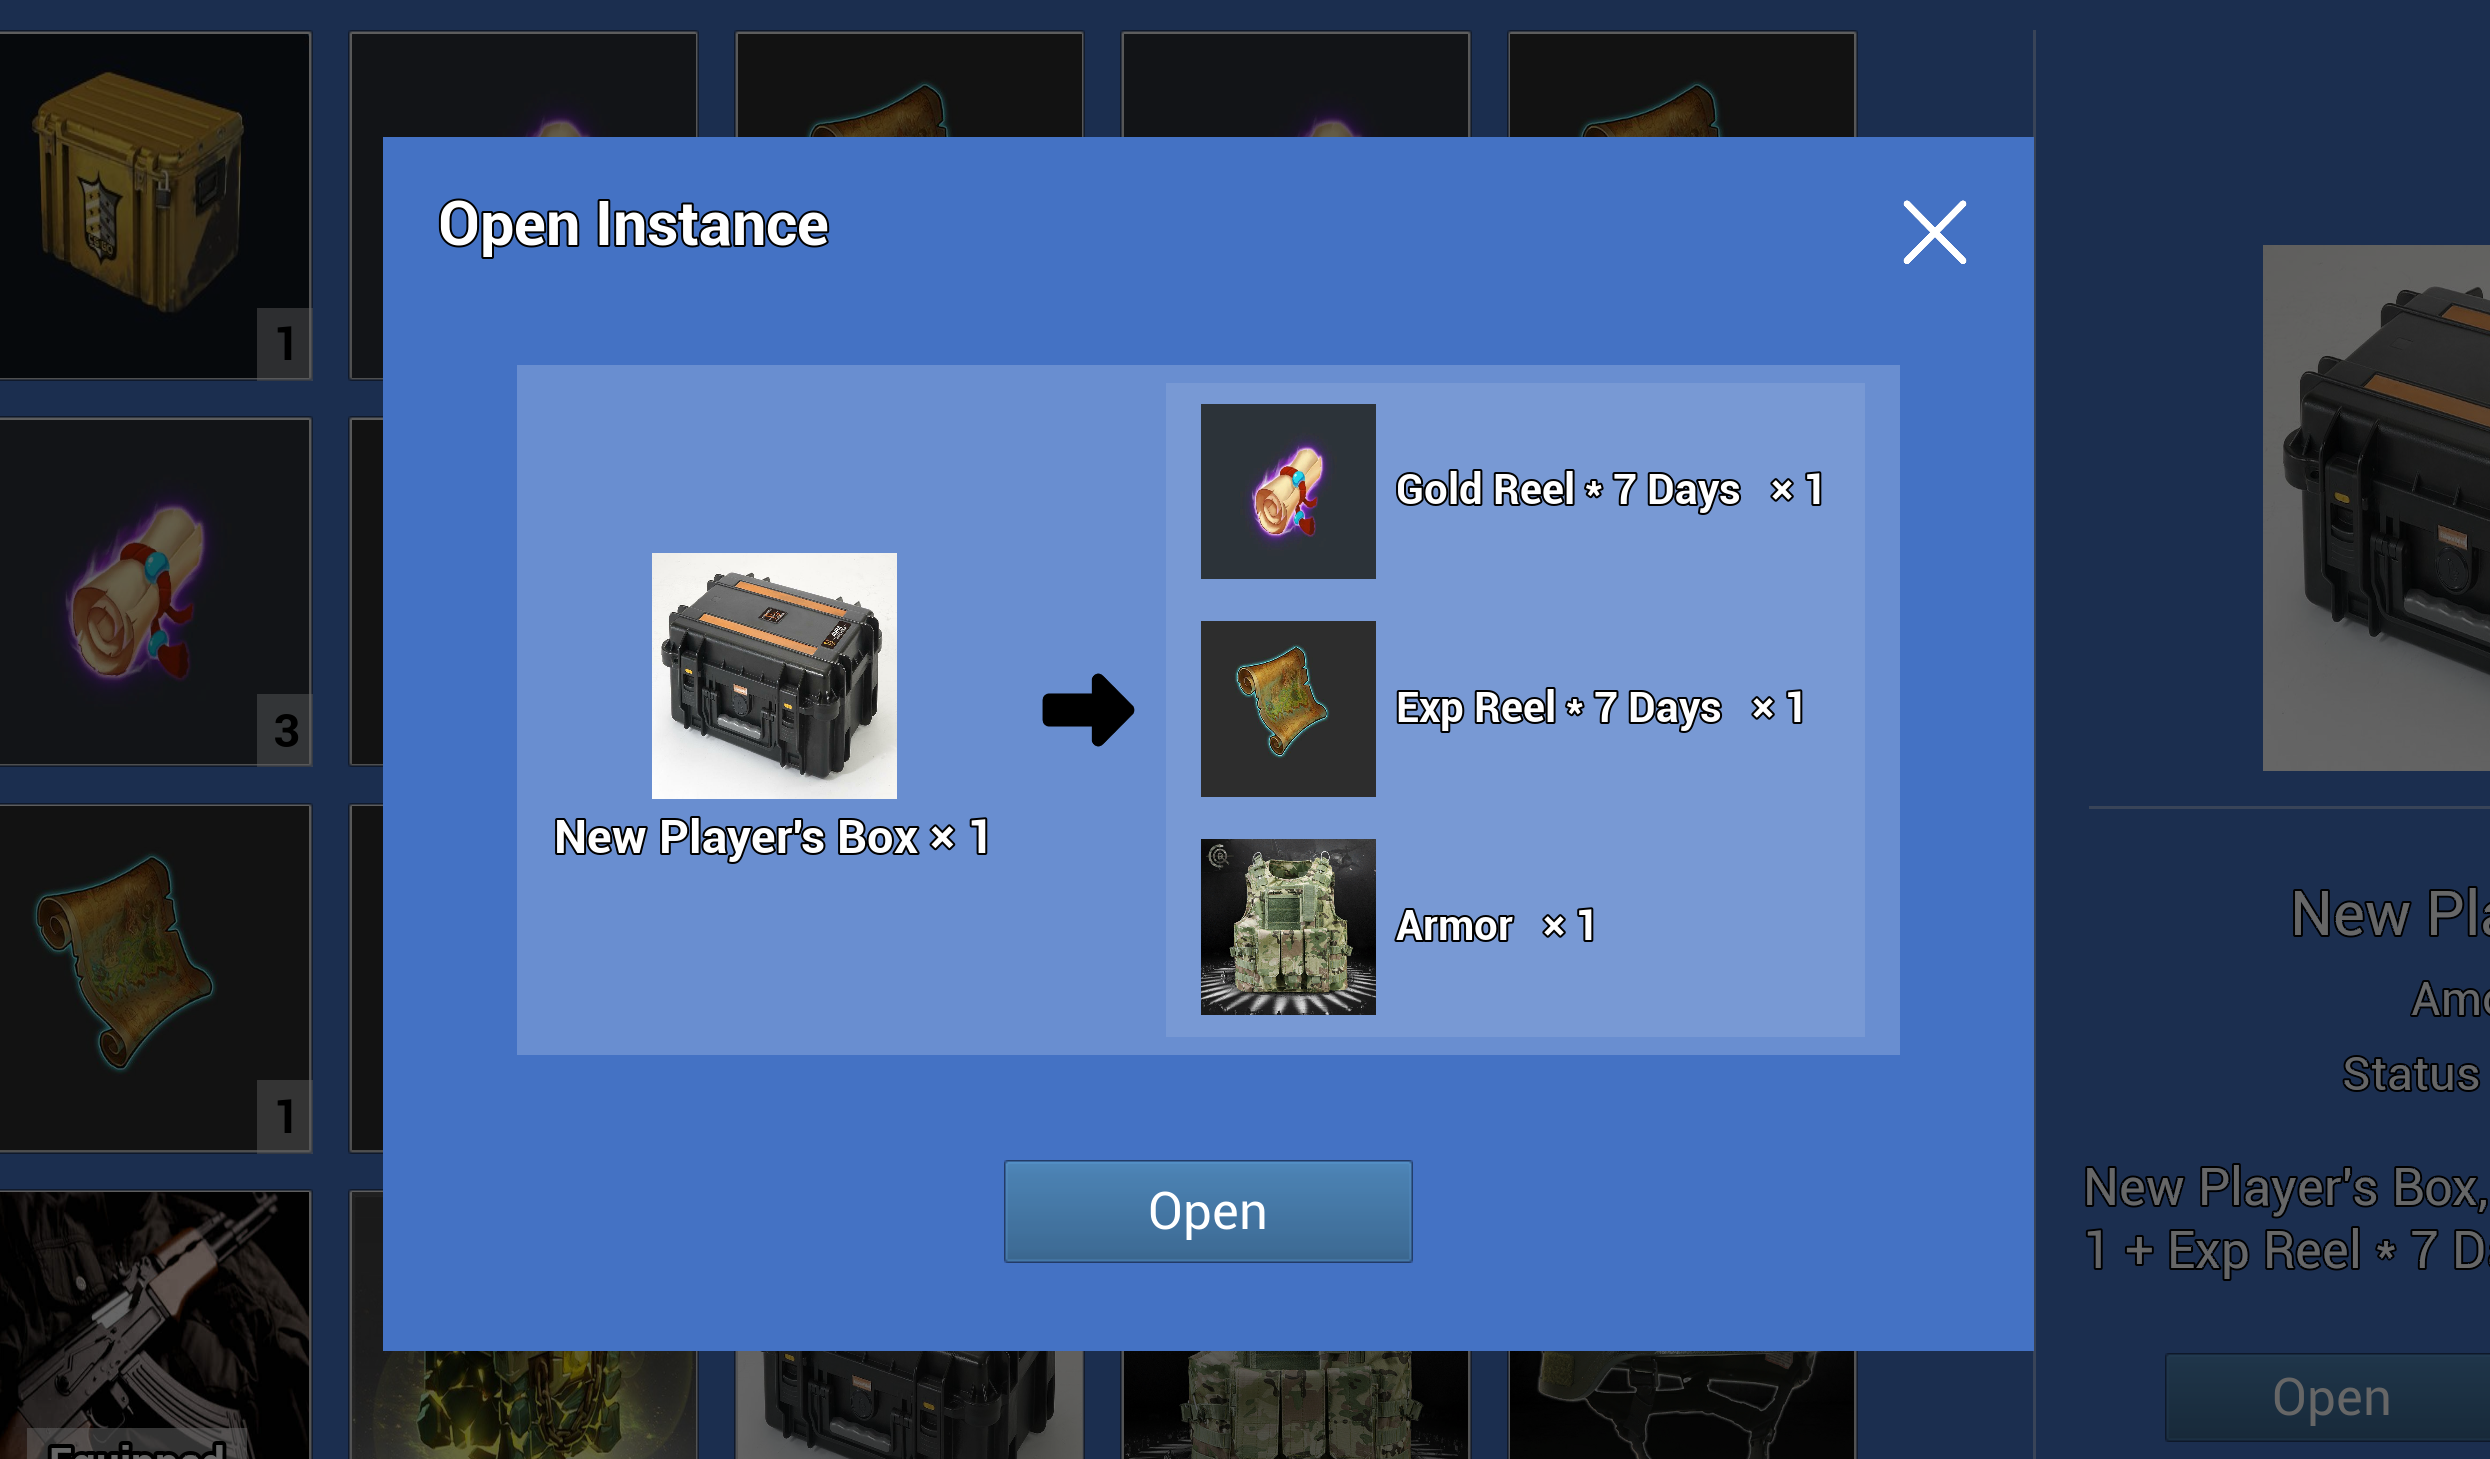
- Container: Contains scrolls, gold, gear, and other item instances. After purchasing a container, the player opens it to obtain all its contents. If the container contains gear, its price is reduced if the player has already owned any of the unique item instances it contains.
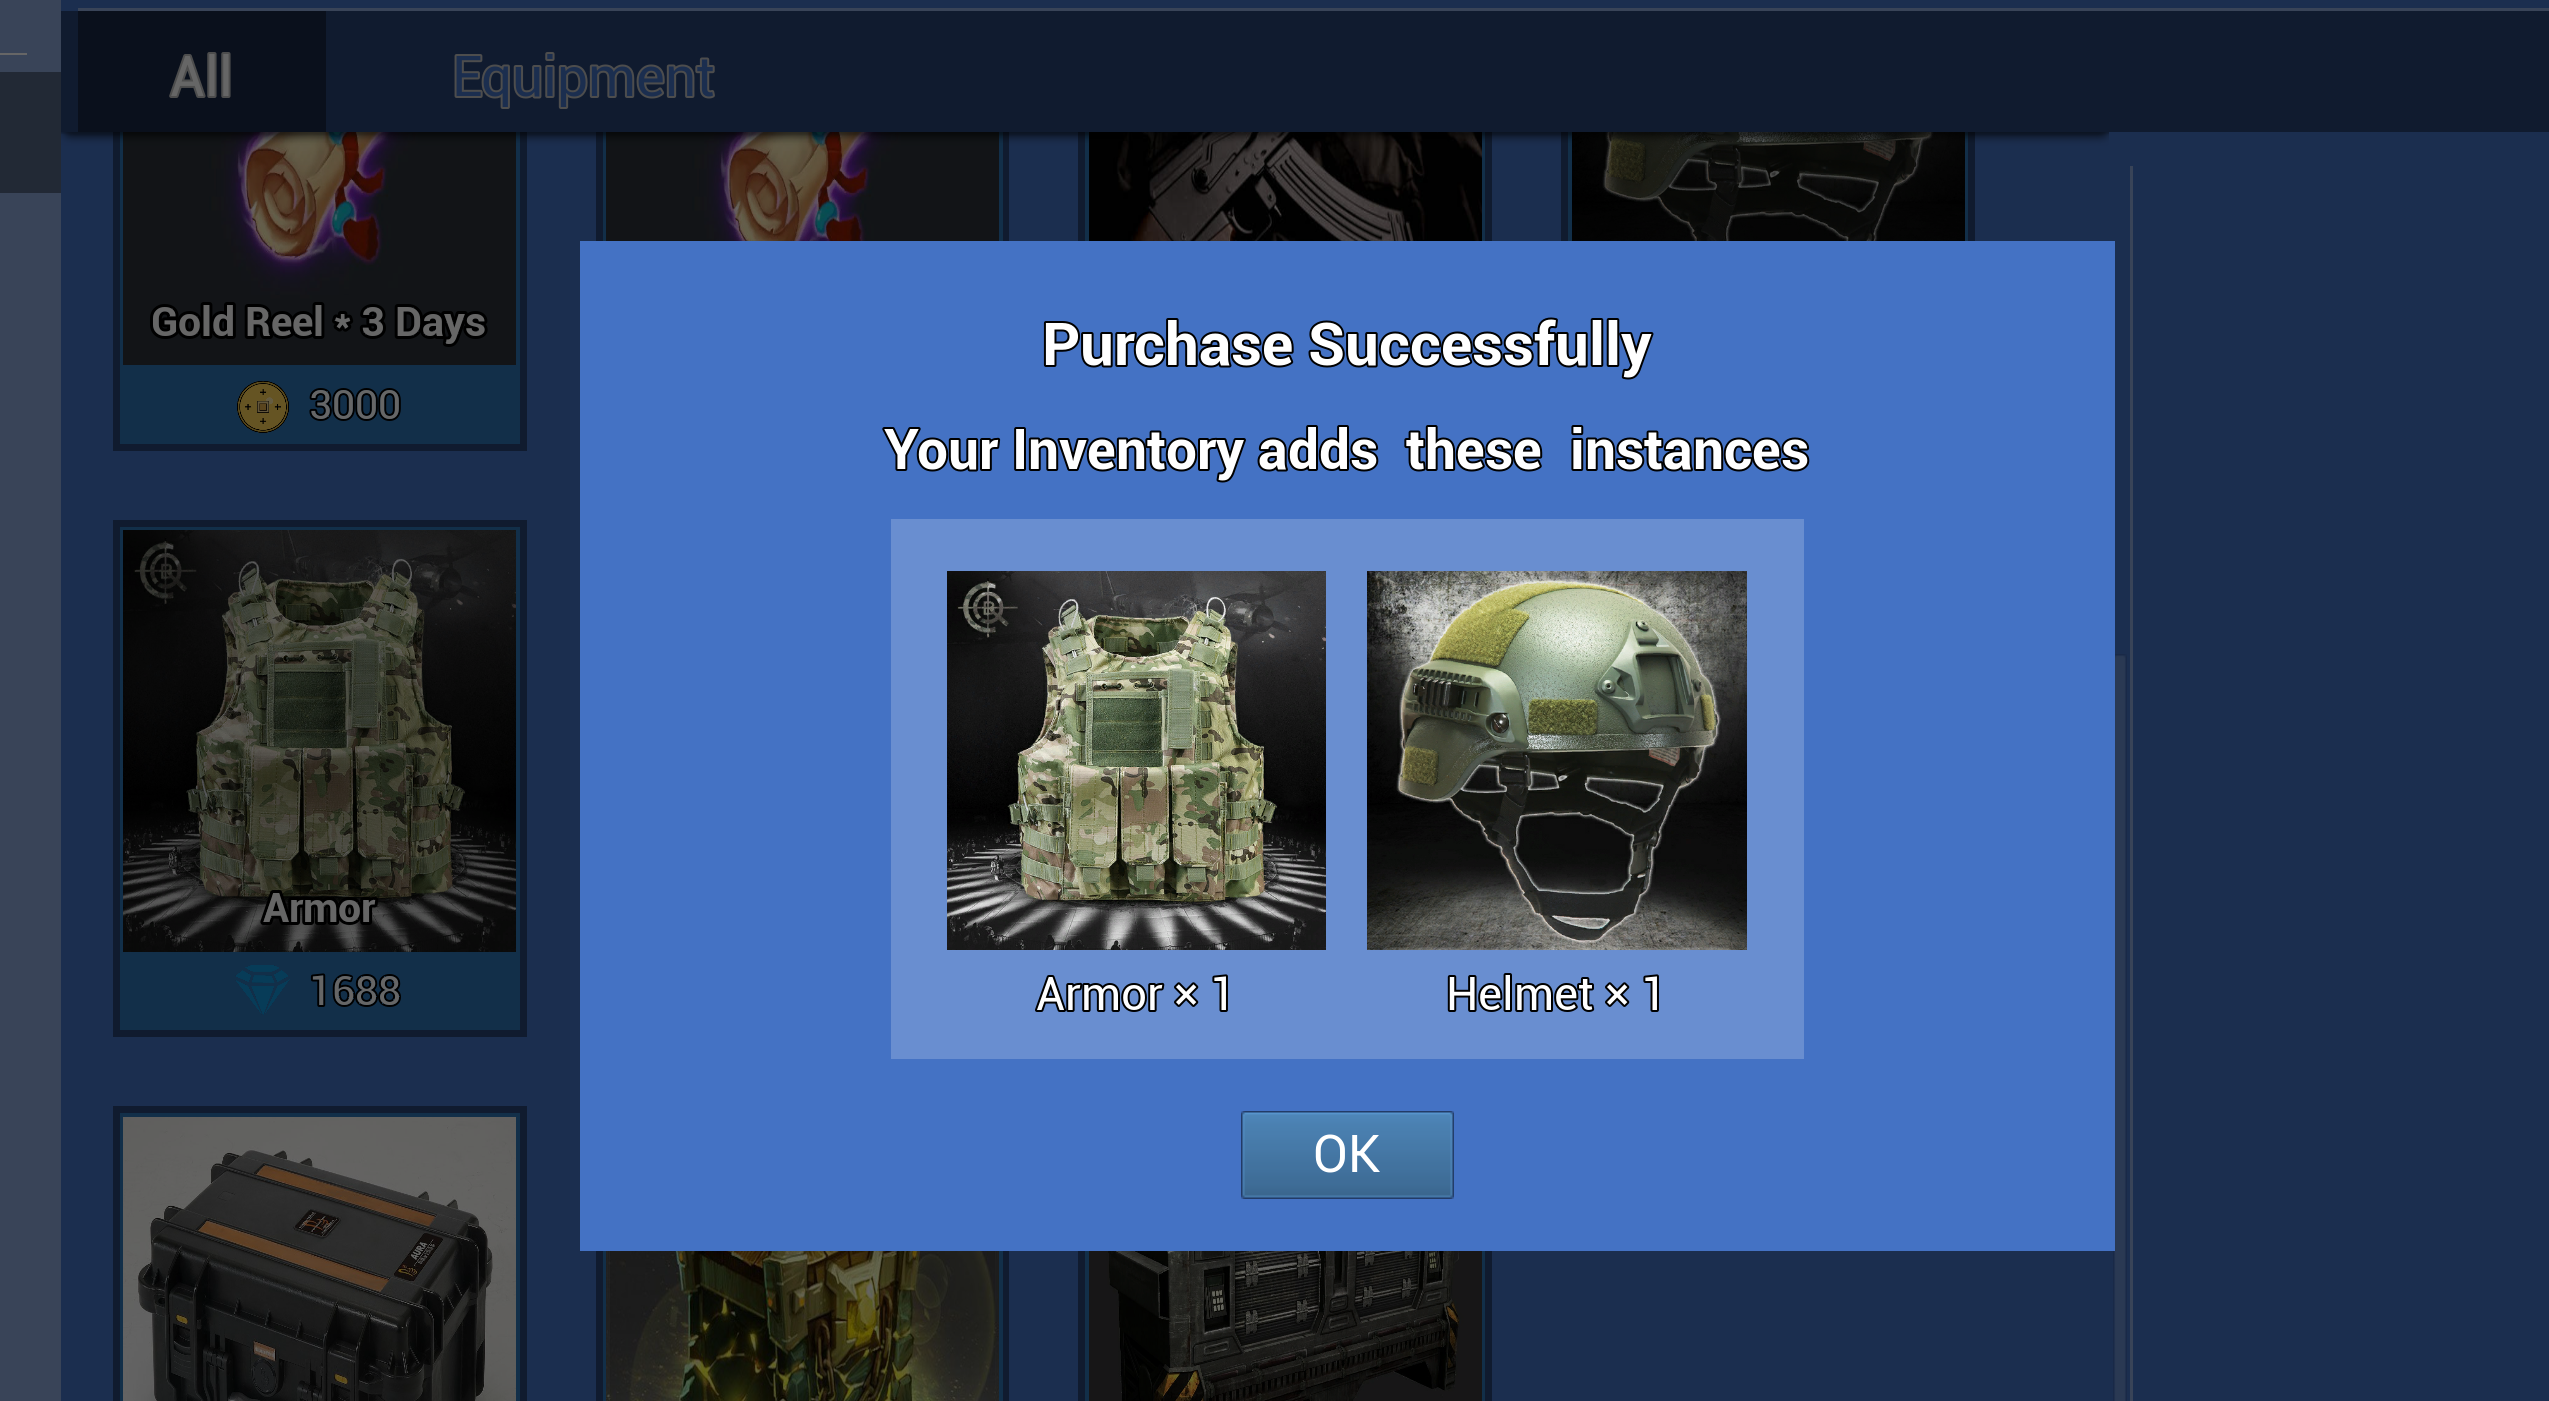
- Bundle: Contains gear. After a player purchases a bundle, the player obtains all its contents. Its prices change just like how that of containers with gear reduces.
Inventory
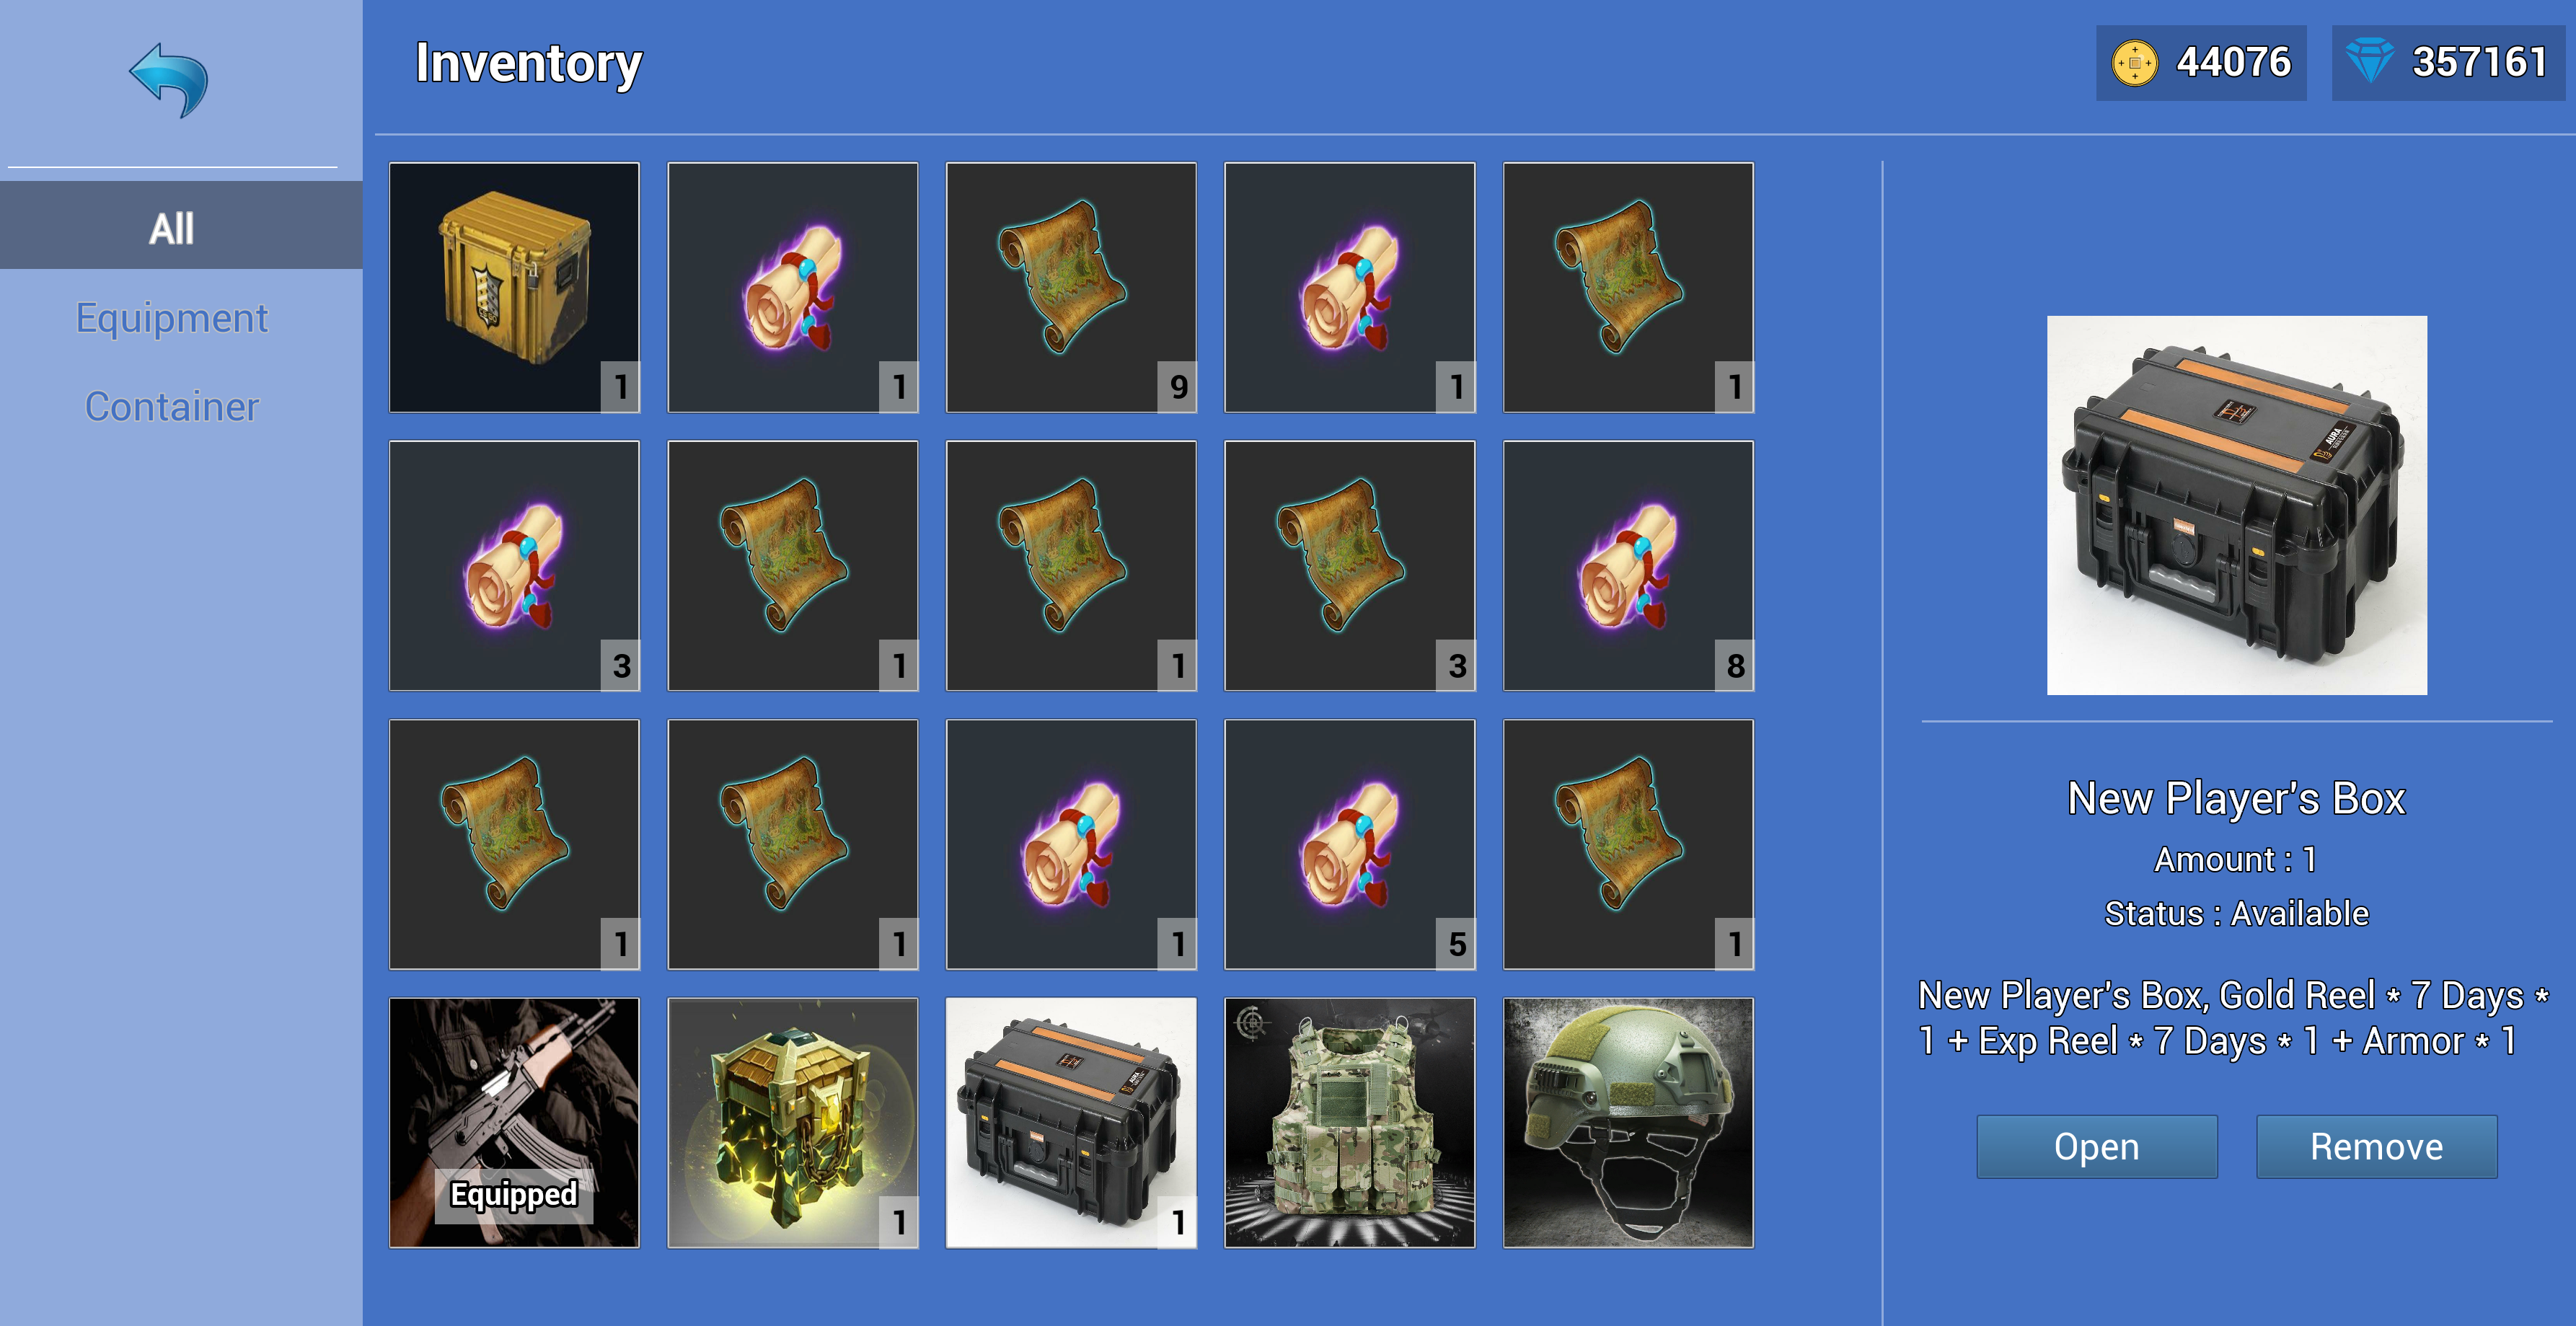
Holds the item instances of a player. Players can consume, open, equip, or revoke these instances.
All types:
- Gold scroll: A time-sensitive item instance. When a player consumes this scroll, the player will earn x2 gold from battles.
- Experience scroll: An time-sensitive item instance. When a player consumes this scroll, the player will earn x2 experience from battles.
- Gear: A unique permanent item instance. By equipping gears, players increase their attack and defense during battles.
- Container: Players open containers to obtain all their contents.
3.2.7.1 Balances
The player balance is displayed on the upper-right of the Store and Inventory pages.

3.2.7.2 Store
3.2.7.2.1 Store Page
3.2.7.2.2 Item Purchase Page
3.2.7.2.3 Purchase Successful Page
3.2.7.3 Inventory
3.2.7.3.1 Inventory Homepage
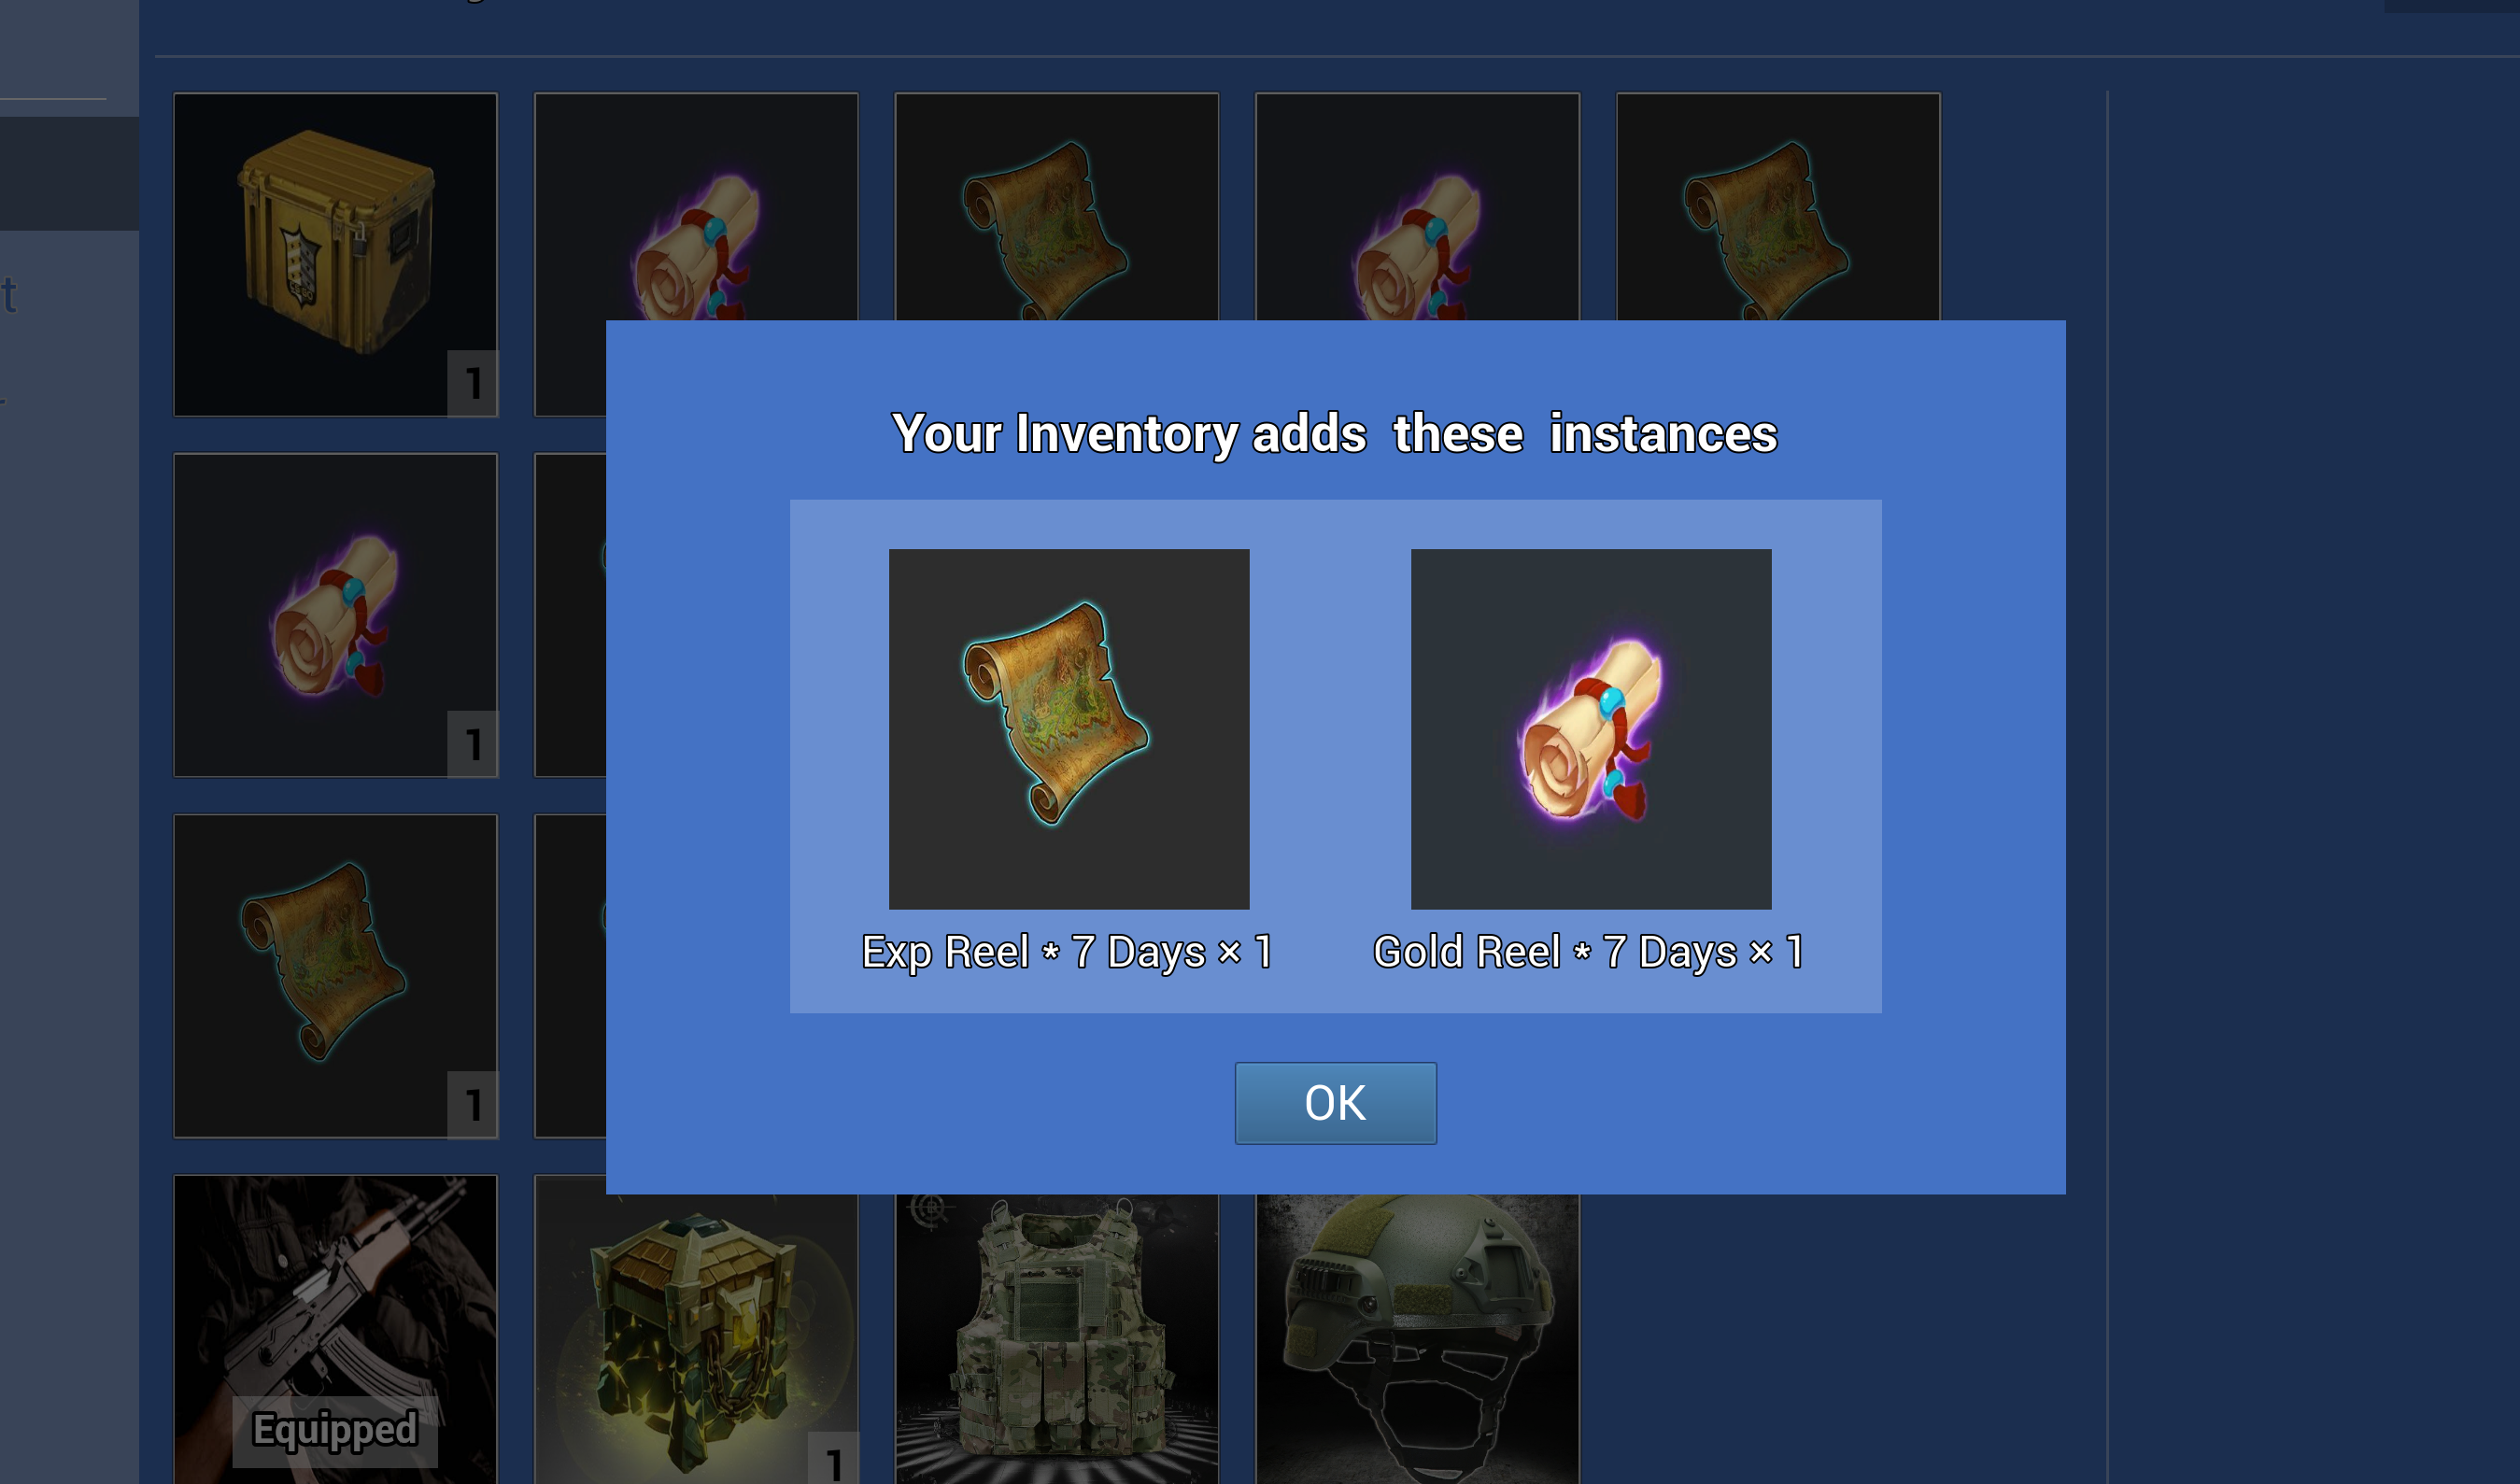
3.2.7.3.2 Open Container Page
3.2.7.3.3 New Item Instances Page
3.2.7.4 Battle
After the battle starts, equipped item instances are shown in the lower-right corner.
